flower arranging

Peony Hack!

It’s finally time!
The peonies are blooming!

Okay…We admit to being just a little peony crazy around here.
Maybe 20 plants is a bit of overkill, but each one is special. 

I love using peonies in arrangements.

BUT….

I hate how quickly the blooms fade or fall apart.

I tried this little hack this year and am quite pleased with it.

The trick is to let the glass container support the blooms.
That way the flowers stay together for a lot longer.

I love the way these colors are enhanced by the glass.

You may remember this vase from the arrangements of tulips using the same technique.

This rose bowl is the perfect way to use the trick.  The Coral Charm and Yellow Garden Treasure blossoms are particularly prone to dropping petals and fading.
These lasted for 4 days in the rose bowl.

Other People….parade pictures of grandchildren or vacations…..
Me….
just a few of my favorite flowers!

It is too bad that they don’t last longer.

I wrote a post a while ago about a way to keep some peonies in the refrigerator to extend the season.
Read about that here:  How to Extend the Peony Season

I didn’t feel that ambitious this year.  Maybe it is because my plants are blooming later this year and when they are done, there will be lots of other garden blooms to enjoy.

Anyway…I leave you with this thought!

Pinterest
Have A Blooming Great Day!

Tiptoe Through the Tulips!

The weather outside is frightful…..yes….3 days of snow in APRIL!

Tulips to the rescue!
I can’t think of a better antidote to the white landscape than a bunch of colorful tulips!

I want to show you how I have been using tulips to bring Spring into the decor around here.
Then….read on to learn some fun facts about how to care for your cut tulips.

Tulips are readily available in just about every grocery store flower department!

Tulips are reasonably priced!

 Right now, you can buy a bunch of 10 tulips at Trader Joe’s for 4.99!

Look at how I used that one FIVE BUCK CHUCK bunch of flowers here at Sweetwater.

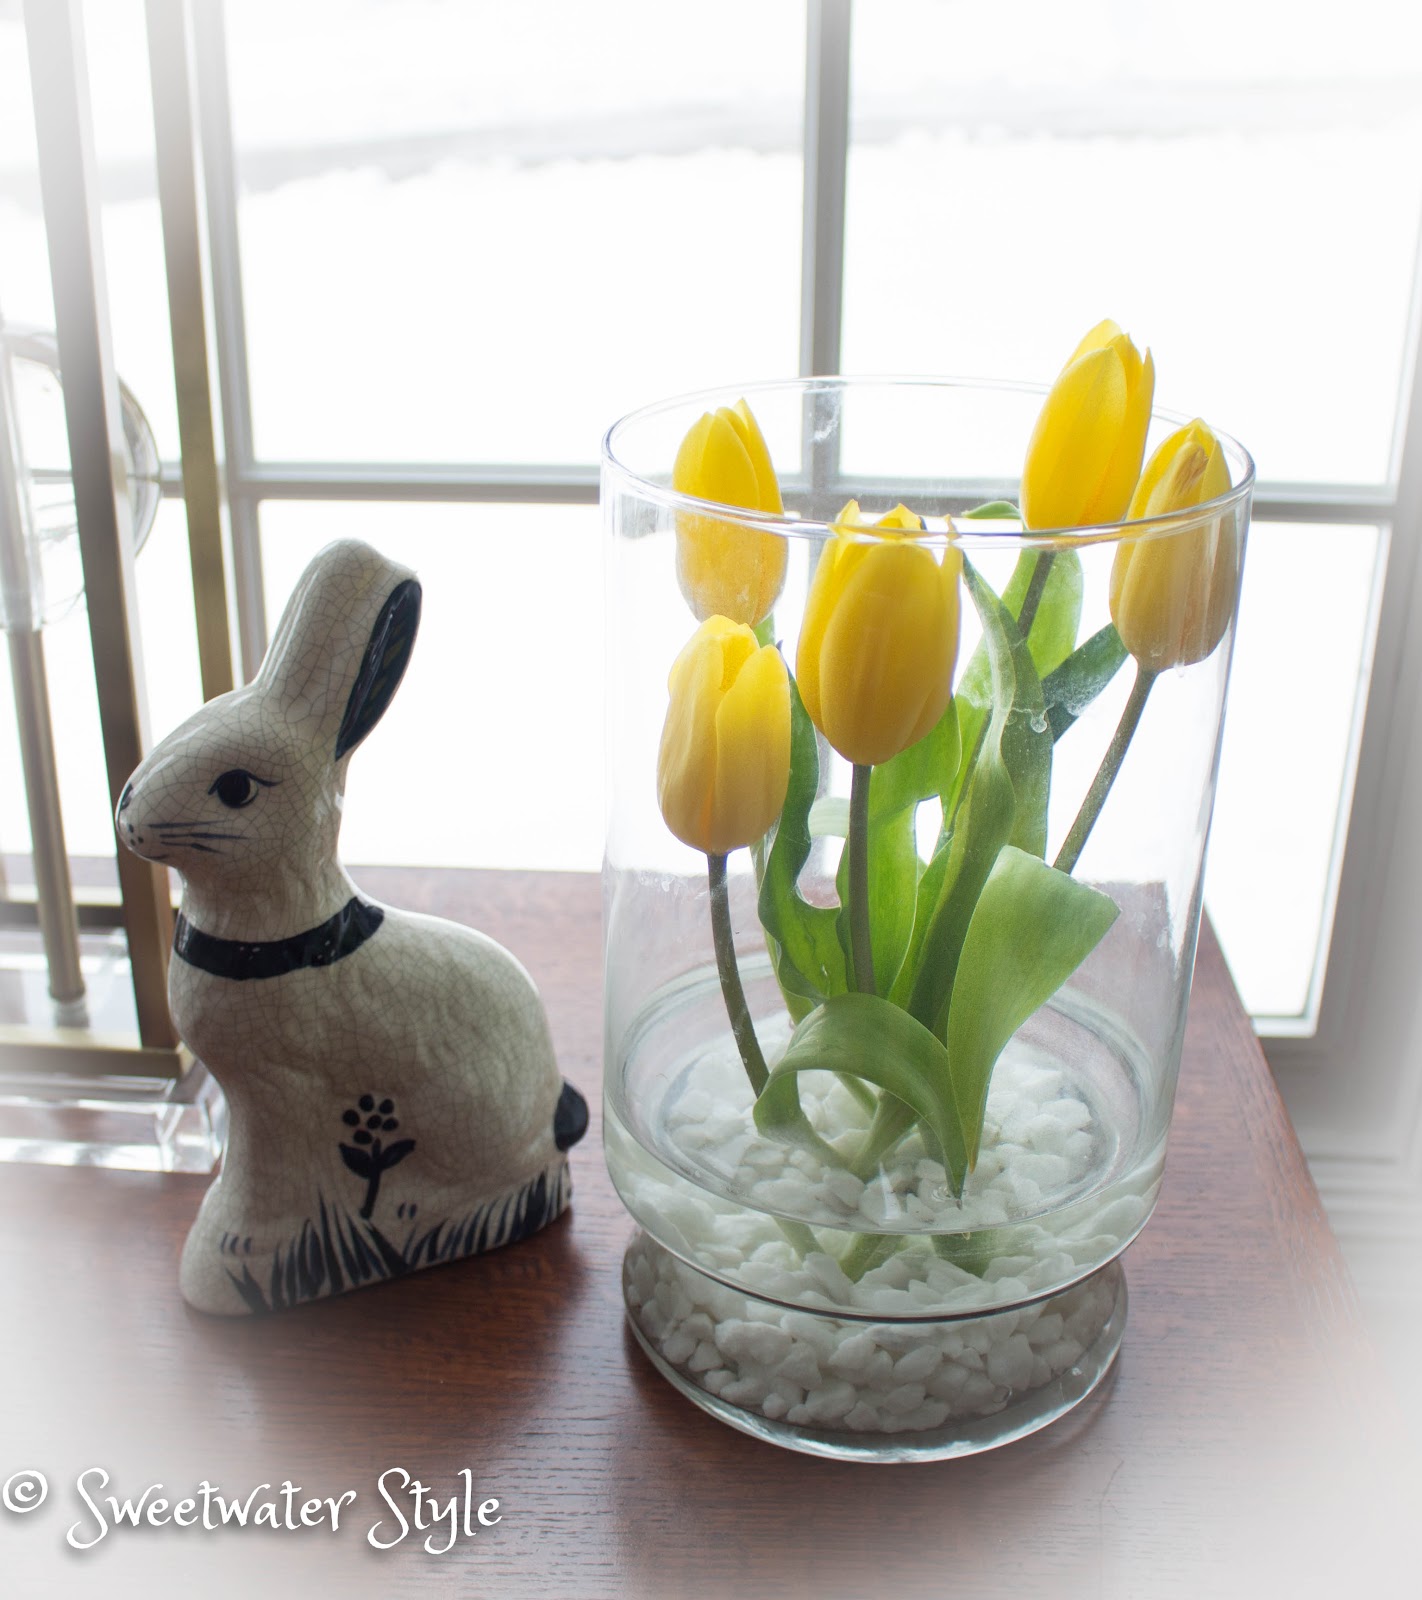
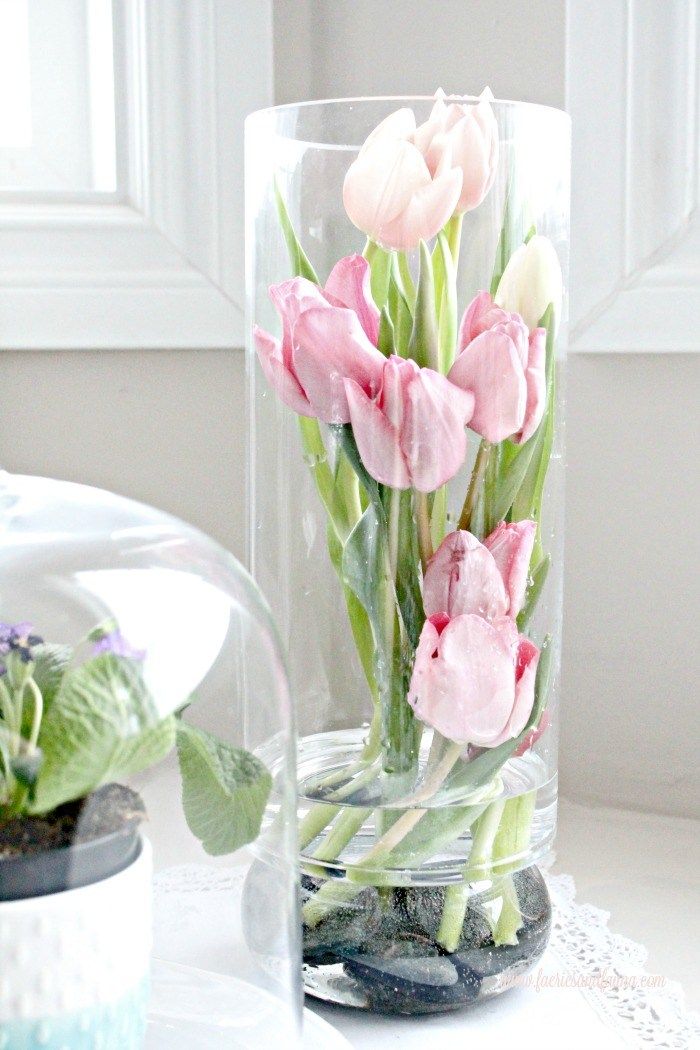
I put some white stones from the dollar store in the bottom of a clear vase with tall straight sides.

I added a couple of inches of water mixed with floral preservative.

The tulips are cut at various heights and arranged so they are supported by the glass.

 This arrangement used five tulips….so there were five others to use.

The green vase has floral foam in the bottom.

The hydrangeas are “faux”….no worries about them drooping!

The floral foam allows the tulips to be arranged in a radiating form.

Add a few bunnies….
and there you have two Spring vignettes for little or no money.

Sweetwater Floral was asked to create 50 centerpieces for an education conference this week.

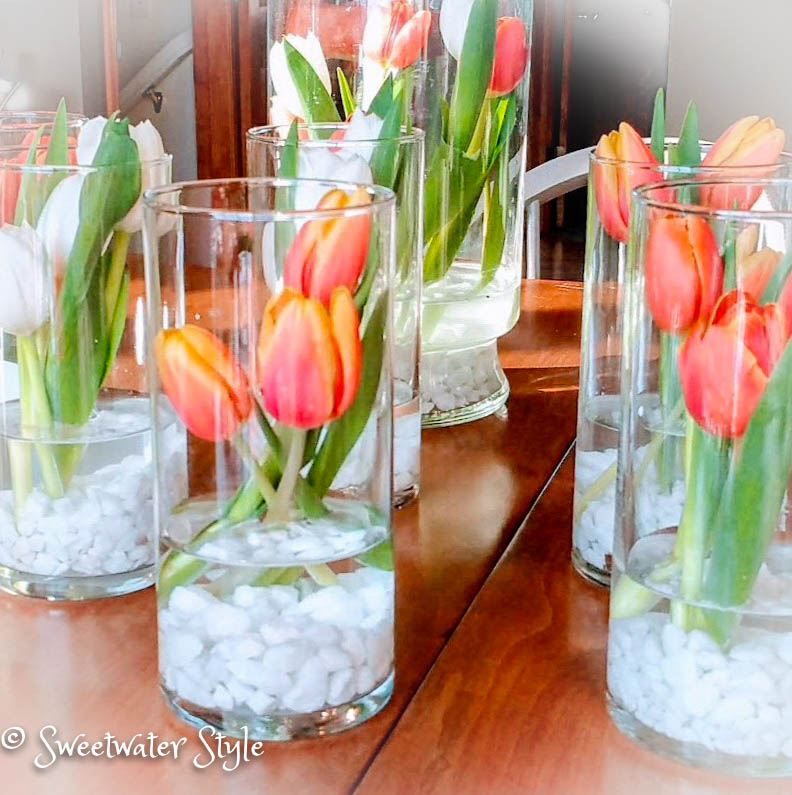
We wanted to keep the cost down and still provide something with visual impact.

The recipe:

dollar store vases
bags of stones from the dollar store 
3 tulips
repeat 50 times!!!

Look at these variations of the same theme!  I love the way the vases support the stems to keep them from falling over.

source

I know this has inspired you to head to the store and buy yourself some tulips.
Here are some things you should know so they last as long as possible!

 Things I know for SURE:

  • Did you know that tulips continue to grow after they are cut? Crazy….but true.  Don’t be surprised if those tulips keep stretching as much as 2 inches.  
  • Buy tulips that are tightly closed and keep them in the dark and in cold water until you are ready to arrange them.
  • As with any cut flower, you need to recut the stem at an angle when you are ready to arrange them.
  • Avoid placing tulips in direct sunlight or near heat. Tulips will grow toward sunlight and may bend a little when doing so.  They are okay in indirect sunlight
  • Don’t mix tulips with cut daffodils.  Daffodils have a sap that clogs the water uptake of other flowers.

Thinks that sound interesting and might be worth trying:

  • I read that when your tulips get droopy you can stick a pin through the throat (top of the stem) to make a hole that will release any air trapped in the stem.
  • I guess you can recut the stems of your tulips after a few days.  Take them out of the water and recut on the diagonal.  Wrap the whole bunch in a cone shaped paper and put them in water for an hour or so.

Oh….and about tiptoeing through the tulips….

Here I am almost 20 years ago doing just that!
We visited the famous Keukenhof Gardens in the Netherlands. 

 Now that is a way to get your tulip fix that I highly recommend!

Have A Wonderful Day


.

Flower Arranging: How To Keep Them In Place

This is the time of year to sit back and enjoy the fruits of gardening labors!
A stroll through the garden will reap lots of flowers to make arrangements with.
If you don’t have a garden spot, the local Farmer’s Markets can supply you with flowers for very little money.

So many people tell me how intimidated they are about arranging flowers.
Knowing how to support and keep the stems in place will take the mystery out of flower arranging.
Once you know these different tricks, your creations will have that professional look you want.

Floral Foam (the wet kind!!!)

This is by far the easiest way to create a formal arrangement. Floral foam lets you have the stems come out at angles.  Your ability to control the arrangement is limited only by your artistic eye. Once you create the arrangement, keep the foam hydrated and it will last a pretty long time.  Floral foam CAN NOT be reused successfully.  This makes it sort of an expensive option. Amazon has the foam for a couple dollars a block.  But the more you buy the cheaper it is….I just ordered 36 blocks for 20 bucks…but then….I do a lot of flower arranging!!!

Flower Frogs

A flower frog is a glass or metal object with holes in it to hold and support flower stems. There are glass, metal and ceramic frogs.  It is a good idea to watch for them at the thrift store or yard sales.
Sometimes I use these as pencil holders.

According to hearthandvine.com “It seems that no one knows the origin of the term “frog,” though most agree it must have become a slang term for the fact that they sit in water, like a frog. … In the mid 1950s, however, a water-absorbent foam, called “Oasis,” was invented, driving the flower frogs to near extinction. ”  

Tape Cross Hatch Grid

 You can create a cross hatch of floral tape on the top of a vase if you have a lot of patience and dexterity.

Me….not so much!  I never have seen the point of this.

But……if you are one of the many Mason jar lovers…..you can buy this insert to create a grid for your flowers.  Not a bad idea.


Chicken Wire or Rabbit Fencing

Using chicken wire is a cost effective alternative to floral foam.  It is not as easy to work with, but it makes a strong support grid for stems. 

 
Chicken wire is kind of “pokey” and you need a tin snips to cut your piece to size.
Using plastic “rabbit fencing” solves those problems.  The plastic can be used over and over again.

You can buy the plastic mesh fencing at most garden stores.  25 feet is a lot…maybe you could split it with a friend or two.

Since we have rabbits eating our plants…we had this lying around here!

The piece of the plastic is cut to size and pushed down into the container.

The flowers are easy to arrange using this grid support.

Foliage as Support

Sometimes you are working with a clear glass container.  You don’t want to see the floral foam or wire.  Using sturdy leaves from your perennial plants is a way to provide support.  This works especially well with shallow arrangements.

Pachysandra, Hosta, a Peony leaves are especially good choices.

Curly Willow or Grape Vine

A twist of curly willow or grapevine inside a clear vase makes an interesting and organic support.
I didn’t have any example photos of my own…..so I went out and found these pretty ones.  You do have to change the water often if you use this method because the willow or grape vine does “muddy” the water.

Flirty Fluers
source

I hope these ideas are some you can use when you arranging your flowers.

Have A Wonderful Day!
 

Instant Spring in Ten Minutes for Ten Dollars!

This is the time to start looking for signs of Spring!

One of the sure signs of Spring is the arrival of the Primose plants at the Home Depot!

 Mr. S and I were there yesterday!

Ah Hah!  There they were.  2/$5

I figured it was worth spending $10 on a little bit of Spring that would last longer than the usual bunch of tulips.

The copper bowl (from Goodwill) was the perfect holder for the four little plants.
It was a simple matter of plopping them in there and adding a bit of Spanish Moss.
Spanish Moss is one of those “little things” that is great to have around to add a nice touch to planters.
Primrose plants need to have the spent flowers picked off to keep them blooming. If I am lucky, I will keep these around until it is warm enough to plant them outdoors….wish me luck!

There you have it…..Ten Minutes…..Ten Dollars…..Instant Spring!

Have you ever wondered about the old saying about being led down the “Primrose Path”?
  
The primrose path refers to someone living a life of ease and pleasure. Not to be confused with “led up the ‘garden path'”, which is an idiom suggesting that one is being deceived or led astray.

It would be nice to think that at Sweetwater we live that life of ease….and frolic down the Primrose Path…..but sometimes I think it is more likely that the garden path is our destination!

www.barbclarke.com

 Think Happy Spring thoughts today….it is only about 2 weeks away!

Link Parties
Happiness is Homemade
Create With Joy 
Life On Lakeshore Drive 
Nifty Thrifty Things 
The Fabulous Party

Cornucopia 2016

Source

What could be more iconic than a cornucopia at Thanksgiving?

The cornucopia (from Latin cornu copiae) or horn of plenty is a symbol of abundance and nourishment, commonly a large horn-shaped container overflowing with produce, flowers or nuts. The horn originates from classical antiquity, it has continued as a symbol in Western art, and it is particularly associated with the Thanksgiving holiday in North America. (Wikipedia)

This is the 2016 version here at Sweetwater.
I used a collection of artificial fruits and vegetables
with bittersweet, magnolia leaves and pheasant feather accents.
It is finished off with a burlap bow.

I have blogged about arranging a cornucopia in past years….so if you are interested in a tutorial of sorts, click here: Tips for Arranging a Cornucopia.

Probably the most important tip is to look for the horn shaped baskets at the thrift store.

Setting the Cornucopia on a tray or basket is a simple way to give your arrangement some substance.

Using a tray makes it look like the stuff is tumbling out “on purpose”.

I used raffia as the fill this year.

There were enough items to fill the opening and the basket.

If you don’t have as many items, you can use a block of dry floral foam and insert picks into your fruits etc.

A piece of burlap or other fabric can cover the foam block.

You know….I really believe that making something pretty is very therapuetic!

I just had to share this tutorial for a cornucopia favor made from a waffle cone!
Too Cute! 
On the to do list for sure!
Creativesavingsblog.com
Have A Wonderful Day

Link Parties
Happiness is Homemade
Create With Joy