
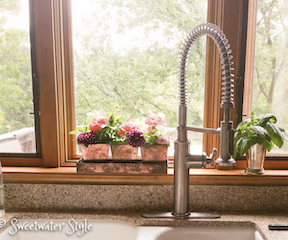
I bet like me, you spend a lot of time at your kitchen sink.
If you are lucky, you have a window over that sink to look out of.
AND
If you are really lucky, that window has a sill.
I guess that I am really lucky!!!!
A kitchen windowsill just cries out for plants and/or flowers.
It is sort of an indoor "windowbox".
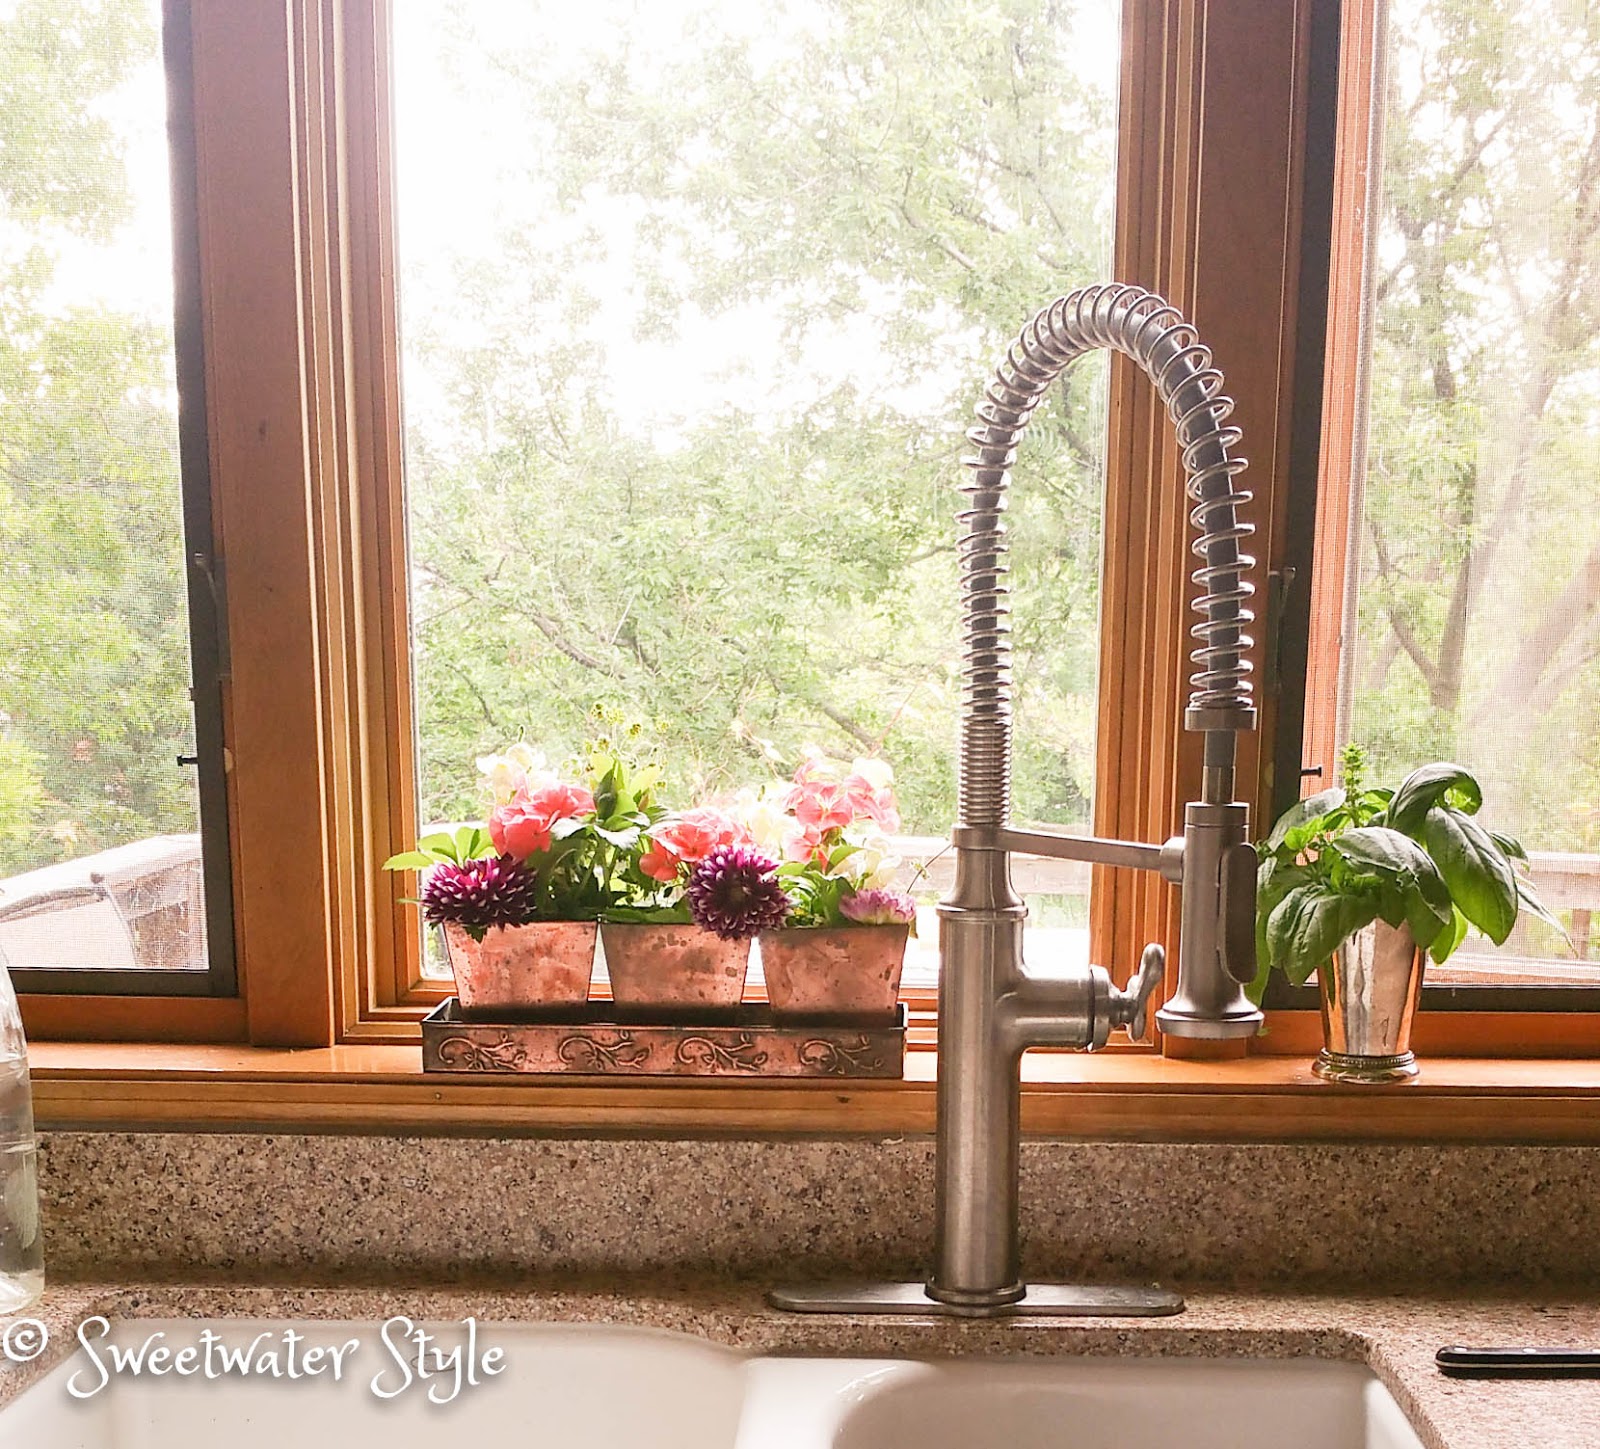
These three copper planters on a tray are a long ago thrift store find. I love how it fits perfectly on the window sill.
I know you are supposed to actually put dirt in the planters and grow something.
I decided to avoid the dirt and have a way to create ever changing displays of pretty blooms.
So.....

It is simple to just use a plastic tumbler filled with water as an insert.Then....any greenery or flower snippets can be tucked in to create the illusion of a planter.
Regular readers know how I preach about dead-heading flowers in the garden to keep your plants thriving. I like to "proactively" deadhead. The little flower garden here is filled with some almost spent Dahlias and some geranium heads. The greenery is Pachysandra. That seems to last forever and sometimes even sends out roots.

Keep your eye out for this type of 3 pot planter tray. I see them often at the thrift store.
If you can't wait......
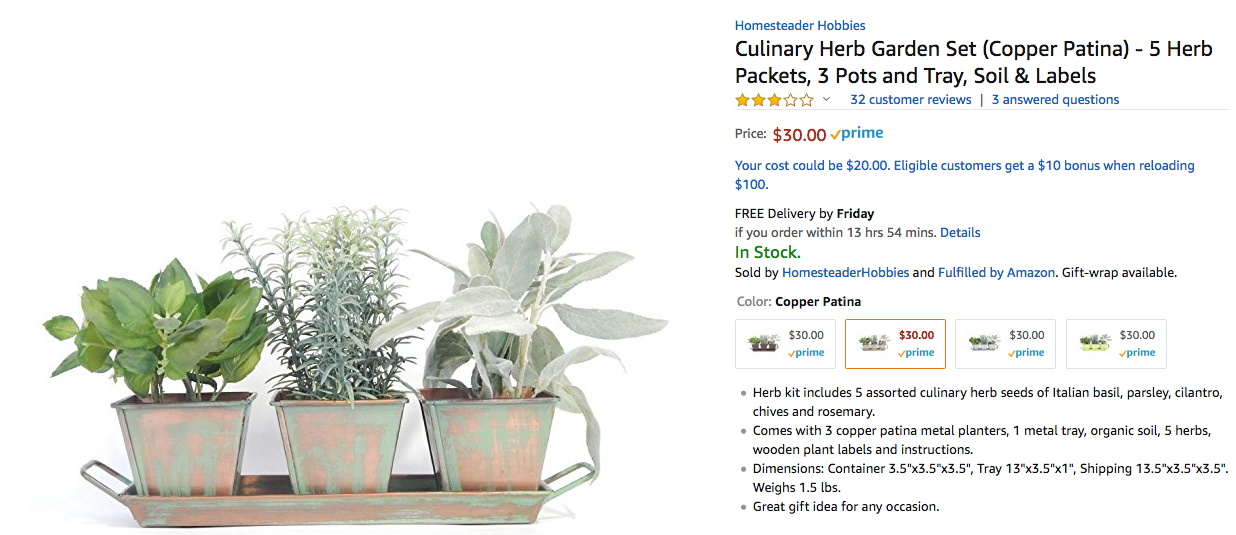

You can get them at Amazon....
What a chuckle to see that my thrift store find is worth thirty dollars!
Now....here is some "kitchen window humor" to brighten your day!

Have A Wonderful Day!
