tricks

Foiling the Felines!

Marvin the cat has developed the most annoying habit/craving!

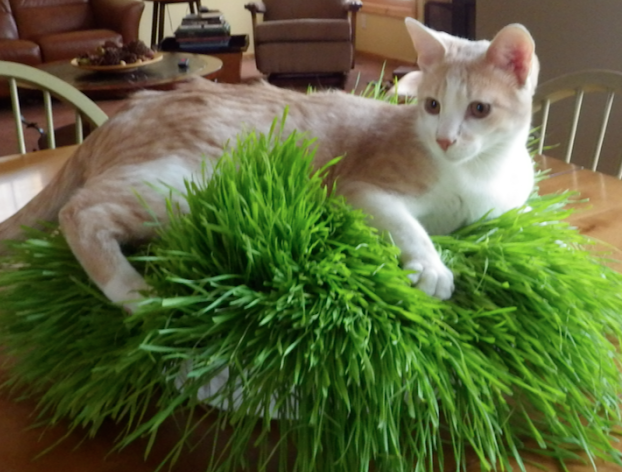
Back in the day….”cute little Marvin” just slept in the green grass and DID NOT eat it!

 He seems to NEED to eat almost any foliage that is in any floral arrangement in the house.
He doesn’t bother the house plants….just the greenery in flowers.
And of course…..after munching….there is the puking that follows!

In fact….he even tries to eat the husks on the sweetcorn if it is sitting on counter….go figure!!!!

Now…you know I am NOT going to give up having flowers in the house!!!
And….you know that a flower arrangement needs green filler to look pretty!!

What to do?
Wanna see?

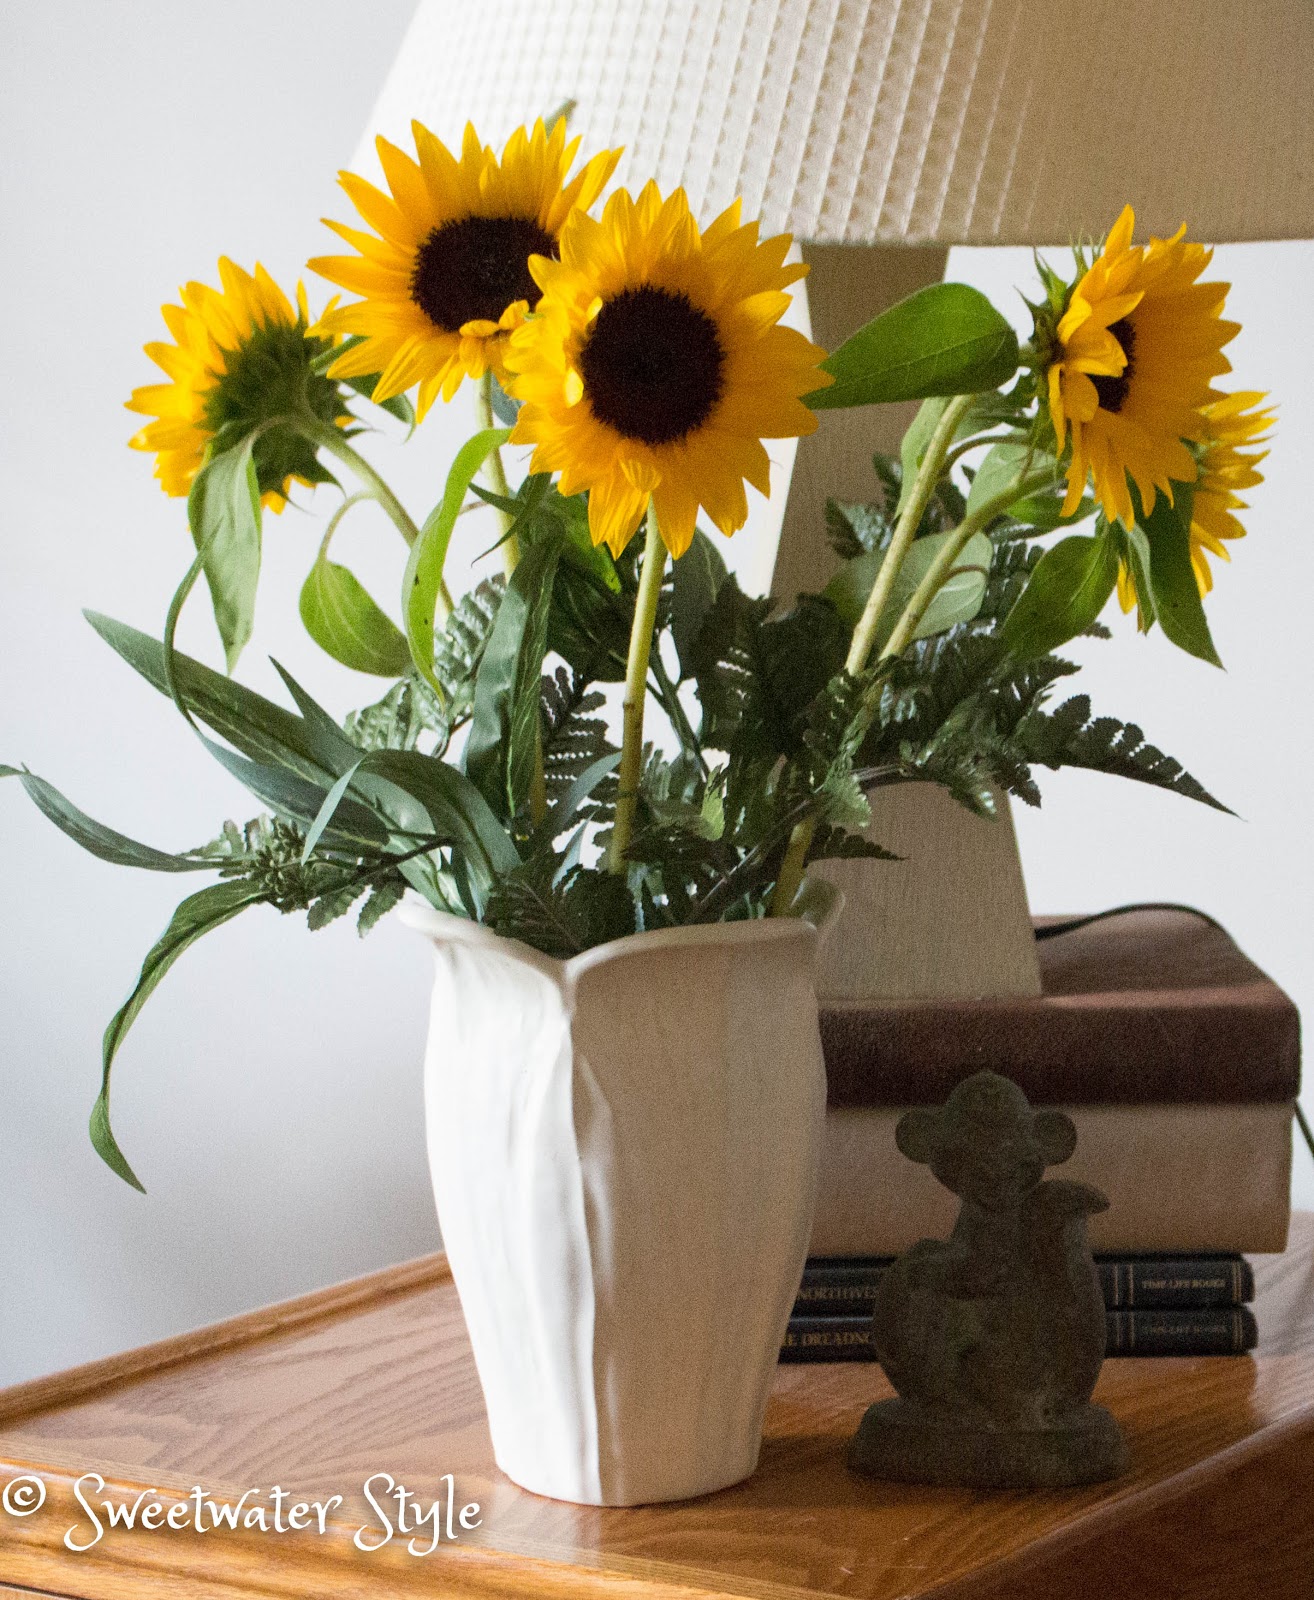
 These lovely Sunflowers just cried out for Hosta leaves…..Marvin’s absolute FAVORITE greens to munch on….
Since that wasn’t an option…..

 I headed to the craft store and bought the best looking “permanent botanicals” that I could find.

I looked for things that are often used as fill at the florist shop.

Total investment: $18.00

But….the proof is in the photos.

Look again at the sunflowers.
You have to look really hard to see that they are not real.

In fact….Marvin keeps sniffing them…and then turning to give me his best “stink-eye”!

Here are some more examples.

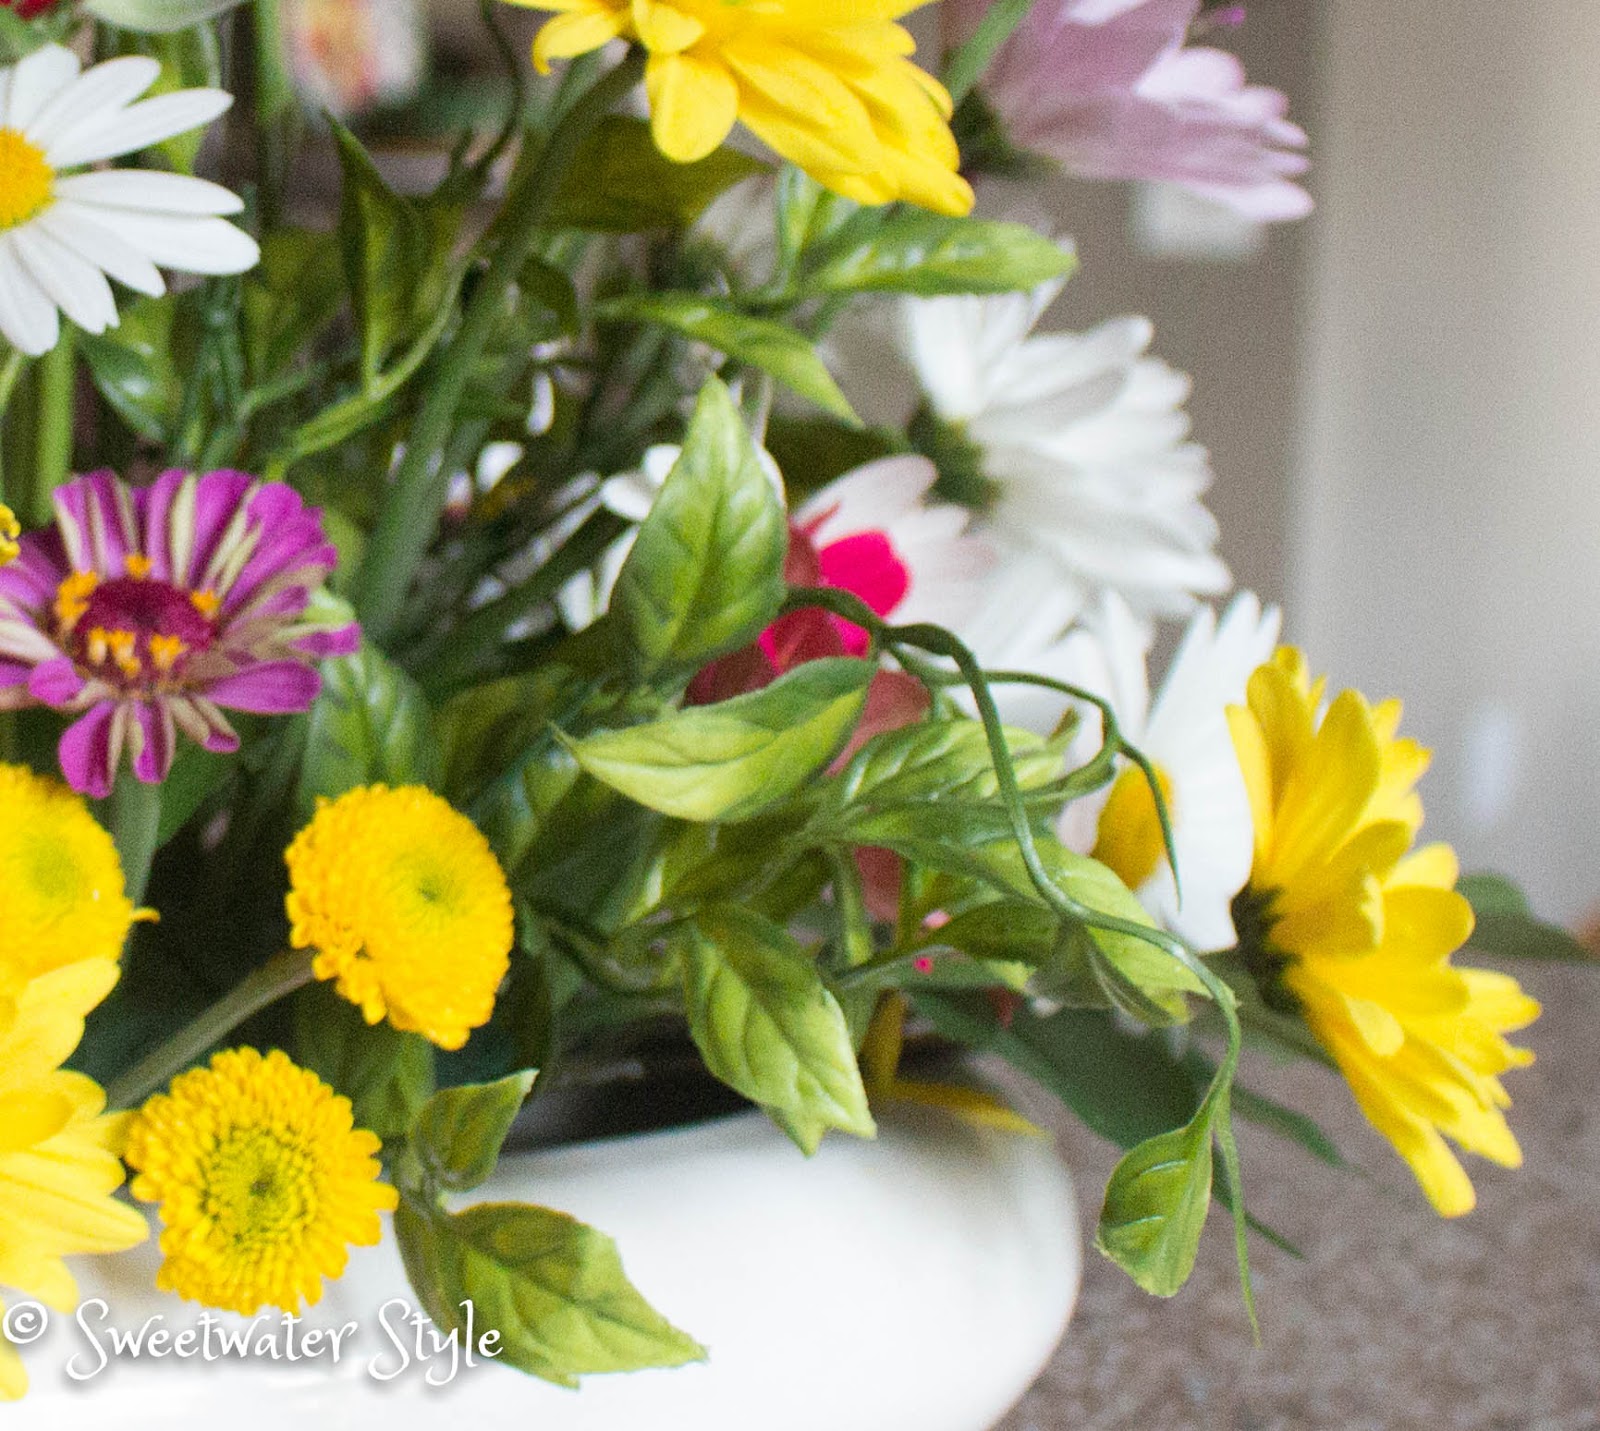
These Zinnias are tucked into some Dollar Store ferns and spiked grass.  There is a little real pachysandra too….that is one that Marvin doesn’t eat.

Now obviously, I would rather use real greenery.
But given the choice of using artificial greens with real flowers or cleaning up cat vomit….I bet you can guess which one I pick.

Have A Blooming Great Day!

Flower Arranging: How To Keep Them In Place

This is the time of year to sit back and enjoy the fruits of gardening labors!
A stroll through the garden will reap lots of flowers to make arrangements with.
If you don’t have a garden spot, the local Farmer’s Markets can supply you with flowers for very little money.

So many people tell me how intimidated they are about arranging flowers.
Knowing how to support and keep the stems in place will take the mystery out of flower arranging.
Once you know these different tricks, your creations will have that professional look you want.

Floral Foam (the wet kind!!!)

This is by far the easiest way to create a formal arrangement. Floral foam lets you have the stems come out at angles.  Your ability to control the arrangement is limited only by your artistic eye. Once you create the arrangement, keep the foam hydrated and it will last a pretty long time.  Floral foam CAN NOT be reused successfully.  This makes it sort of an expensive option. Amazon has the foam for a couple dollars a block.  But the more you buy the cheaper it is….I just ordered 36 blocks for 20 bucks…but then….I do a lot of flower arranging!!!

Flower Frogs

A flower frog is a glass or metal object with holes in it to hold and support flower stems. There are glass, metal and ceramic frogs.  It is a good idea to watch for them at the thrift store or yard sales.
Sometimes I use these as pencil holders.

According to hearthandvine.com “It seems that no one knows the origin of the term “frog,” though most agree it must have become a slang term for the fact that they sit in water, like a frog. … In the mid 1950s, however, a water-absorbent foam, called “Oasis,” was invented, driving the flower frogs to near extinction. ”  

Tape Cross Hatch Grid

 You can create a cross hatch of floral tape on the top of a vase if you have a lot of patience and dexterity.

Me….not so much!  I never have seen the point of this.

But……if you are one of the many Mason jar lovers…..you can buy this insert to create a grid for your flowers.  Not a bad idea.


Chicken Wire or Rabbit Fencing

Using chicken wire is a cost effective alternative to floral foam.  It is not as easy to work with, but it makes a strong support grid for stems. 

 
Chicken wire is kind of “pokey” and you need a tin snips to cut your piece to size.
Using plastic “rabbit fencing” solves those problems.  The plastic can be used over and over again.

You can buy the plastic mesh fencing at most garden stores.  25 feet is a lot…maybe you could split it with a friend or two.

Since we have rabbits eating our plants…we had this lying around here!

The piece of the plastic is cut to size and pushed down into the container.

The flowers are easy to arrange using this grid support.

Foliage as Support

Sometimes you are working with a clear glass container.  You don’t want to see the floral foam or wire.  Using sturdy leaves from your perennial plants is a way to provide support.  This works especially well with shallow arrangements.

Pachysandra, Hosta, a Peony leaves are especially good choices.

Curly Willow or Grape Vine

A twist of curly willow or grapevine inside a clear vase makes an interesting and organic support.
I didn’t have any example photos of my own…..so I went out and found these pretty ones.  You do have to change the water often if you use this method because the willow or grape vine does “muddy” the water.

Flirty Fluers
source

I hope these ideas are some you can use when you arranging your flowers.

Have A Wonderful Day!
 

Hydrangea Tricks and Tips

Everybody loves Hydrangeas!
They put on a wonderful show in almost any floral arrangement.
These pretties also have a reputation for being almost impossible to keep for any length of time.
It used to be that I dreaded getting a request for Hydrangeas in our floral work.
Not anymore……I know “Hydrangea Stuff” now!
AND I am going to share that stuff with you!

On Thursday the wonderful folks at Koehler and Dramm delivered 125 Hydrangeas Sweetwater.  Yikes….that is a lot of flowers.
What ever would I need 125 Hydrangeas for?
Why….to make popcorn centerpieces for the Chaska Rotary Circus Themed Gala of course!

Popcorn boxes from the dollar store were stuffed with white Hydrangea to mmic popcorn.
The gala decor is the genius work of the Sweetwater Daughter…..and I got to help!

I think she nailed it…..
Enough bragging on my kid…

I am here to share some tips that will ALMOST guarantee success and a long vase life for Hydrangeas.

TIP #1
HMMMM…..did you know that Hydrangeas take in water from their petals?
So…when I unpacked the 125 flowers….I immediately plopped them all upside down in bucket (or in this case the bathtub) of cold water.

Each flower comes with it’s own little baggie of water. This keeps the flower stem hydrated while the flowers soak.

If your flowers don’t have this, you can concoct one with by bunching the stems and wrapping a water filled baggie around them with a rubber band.

OR…..you really can submerge the whole flower stem and all in the water.

I didn’t take photos of my process…so here is an image from the Flower Muse

I soaked these overnight.  You really only need to do this for a couple of hours.
Give them a fresh diagonal cut when you take them out of the water.  Immediately get them in buckets of water.
The flowers will be really wet when you take them out…DUH!….so they will need to dry off before you arrange them.

TIP #2

Alum Dip

When you cut hydrangeas they can form a sticky substance over the cut that prevents the flower from sucking water up through the stem.  There are a couple of ways to prevent that “sticky stuff” from forming: dipping the stem in boiling water….putting the end of the stem in an open flame….OR this! Dip the freshly cut stem in ALUM(A common ingredient used for pickling, find it in the spice aisle.) 

French Country Cottage

When you are arranging your hydrangeas re-cut the stem  about an inch above the previous cut and immediately stick the bottom 1/2″ of the stem in the alum to coat it, then arrange as usual.

 I learned this trick at a workshop given by a wedding designer who does those really spendy weddings that budget upwards of $15,000 for FLOWERS.
I figure that if he relies on this method, it must be pretty fool proof!

TIP #3

Finishing Spray !
This is my new favorite “secret sauce”.  Once this is sprayed on your Hydrangeas or other flowers, it keeps them looking fresh for a really long time.

It might seem like a lot to spend…..but if it keeps your expensive flowers looking good for more than a week….it is worth it.  A little goes a long way too.

Tip #4

You can revive a droopy Hydrangea!  Sometimes all the tricks don’t seem to work and a flower will wilt anyway.  It is worth trying to revive your Hydrangea….you have nothing to lose!  Just cut the stem again and fully immerse the flower head and stem in cold water for a few hours.  In many cases, the flower will perk right up!

So the proof is in the photo….right!?

Here are the Hydrangeas from the Gala last weekend.
They were arranged on Friday….
Now it is Tuesday…..
They look pretty good and probably will for at least another 4 or 5 days!

 Now….go buy yourself some Hydrangeas and enjoy them with no worries!!

Link Parties
Happiness is Homemade


Get Your Holiday Tool Kit Ready

Don’t you admire/hate those people who have all of their holiday shopping done before Halloween is past?
I know I should be doing this….
BUT
Somehow…I really don’t get in the spirit of shopping until at least Thanksgiving.

I do start to put together an essential Holiday Tool Kit to have ready for the hectic holiday decorating, wrapping and shopping!
I thought I would share my “gotta have” list with you.  I would love to hear what your essentials are.

Source        
 
Paddle Wire
You won’t believe how many times you will use this.
It costs about $3.
I keep a paddle in the craft room and the junk drawer.
It is great for hanging decorations….without damaging surfaces.
It is the way to secure the center of a fancy bow!
Paddle wire is available at craft stores and on Amazon.
Wired Ribbon
Costco has 50 Yard spools of wired ribbon for $6.99.  I don’t think there is a better deal out there.
This ribbon works for everything.
I always buy a pure red and a burlap look.  
You won’t believe the ways this will work in your holiday wrapping and decorating. 
Here is a link to a tutorial all about tying fancy bows.
Pine Cones 
 

Pine cones are accents that work in November as well as December…and even up until Valentine’s Day.

If you have pine trees or access to them…..start collecting all sizes of pine cones.  We have trees with those tiny “mini” cones.  I gather tons of these to use as filler. 

Start watching at the grocery or craft store.  You can find deals on those wonderful cinnamon scented cones.  Instant Holiday atmostphere is just $5 away!

If you feel like splurging….invest in some giant Sugar Pine Cones.  I have been able to order them in bulk for around $3 a cone….but even at twice that….they have a dramatic impact. I think this arrangement could work from November to January.

 Cellophane Wrap
I love to use this simple clear cello wrap to dress up a hostess gift.  If you buy food grade…it can make that home baked treat look pretty upscale.  If you have some on hand you can add some instant glamour without much expense or fuss.

source
All Kinds of Tape/Adhesives
This is the time to buy those 3 packs of clear tape both single and double stick.  The ones at the dollar store work great for most things.
Zots…are great for sticking paper to paper.  You can also use them to put paper on glass….easy to remove.
Command Strips…great to have on hand to temporarily put up holdiday themed art.
Spray Mount Adhesive….make sure to have a full can.
Modge Podge…even a small bottle from the dollar store may come in handy.
 Picture Frames
Start gathering small sized frames from the thrift store.  You can frame cute family photos with a holiday theme or a beautiful holiday card from the past!  Print out a favorite quote captured from the internet and present it in a frame.  (wrap it in cellophane for a classy touch)
Those are just a few of the things that are in my arsenal. 
I know I won’t have the ambition to get the big shopping items purchased before mid-December….but I can be ready to do some small things.
The whole idea is to have things on hand so that you don’t have to take time out to go to the store when inspiration hits you.
What are the things you deem essential for your holiday preparations?  I would love to hear from you!
Have a Great Day!

Get Your Flowers in Condition to Last!

If you don’t know the term flower conditioning, then this is the post for you!

 You don’t need exercise equipment to condition your flowers…..

Conditioning means preparing cut plants/flowers before arranging them.

The right conditioning for the right flowers makes all the difference.

Taking the extra time to condition your blooms pays off with the extra time you will be able to enjoy your gorgeous flowers.

Here are a couple of examples of how conditioning makes a difference:

These yellow Loosestrife plants come up all over our garden.  I don’t usually cut them because they never seem to last without dropping flowers right away.  But look at these after 4 days!   I cut them and they ended up sitting in cold water for a day…..I decided to stick them in a vase….and like magic…the conditioning worked!  They lasted almost a week.

Look at these…..they came from the florist a full week ago.  With some good conditioning they have lasted and lasted.
Conditioning flowers is all about making sure there are no air pockets in the stems.
Every flower is a little different.
I did some good librarian research….and found you all some great links to teach you the ins and outs of conditioning YOUR flowers:

Conditioning Flowers to Boost Vase Life:  This is a nice overview article that gives the basics of flower conditioning.


The Garden Club of Brookfield Connecticut  has put this amazing alphabetical list of lots and lots of flowers and the “rules” for conditioning each one.
Somehow a group that has been in existence since the 1930’s give me confidence in their advice!

Now that I am including it in this post….I will be able to stop back and refer to it often!!!
(maybe I will memorize some…so the next time strangers ask me for advice….I won’t just be guessing!

Here are just a few of the tips from this site:

  • Artemisia: Split stems and place in boiling water for a few seconds. Condition overnight in warm water.
  • Black-Eyed-Susan (rudbeckia): Dip stems in a small amount of boiling water for a few seconds. Condition overnight in deep, cool water.
  • Gerbera: Dip stems in boiling water. Condition overnight in cold water.
  • Phlox: Cut when clusters are one-half open. Split stems. Condition overnight in deep, warm water.
  • Zinnia: Place stems in boiling water for a few seconds. Condition overnight in tepid water. Zinnias last better if plants are watered before they are cut.   

http://www.flowerarranging.me.uk/conditioning.html 

This site is a great overview worth taking a look at. 

Whether you are investing in flowers from the grocery store, florist or just cutting blooms from your garden, it is well worth the effort to spend some time conditioning them.

Face it….if you aren’t going to work out and get yourself in condition…your flowers can be in good shape for at least a week!  And “no sweat” involved!

Have a wonderful day!

  
Link Parties
A Morning Cup of Joe 
The Answer is Chocolate 
Make It Pretty Monday 
Coastal CHarm