computer tricks

 
I was recently asked to review FotoJet which is an online application that lets you create custom collages, graphic designs, and even enhance photos right on the website.  There are many amazing templates for photo cards, social media graphics, posters, etc. There is a built in photo editor that makes it easy to adapt your pictures to the project you are working on.  Best of all….it’s FREE!

I want to share some of the things I have learned about 
FotoJet and sprinkle in some of the designs I “whipped” up in a pretty short time.


Today’s world is increasingly dependent on visual images.  We want those visual images to catch the attention of the audience.  I remember the “good”? old days of creating a graphic from scratch.  It would take me hours….mainly because I could never settle on what I wanted.
Now…I consider myself pretty creative….but to have the option to start with professionally designed templates is so much easier. 
 

Some of the options are:  Social Media Cover Photos, Headers, and Posts for popular social media platforms like Facebook, Twitter, YouTube, Google+, Tumblr as well as Email Headers. 

I often have a need to make posters, flyers, invitations, and greeting cards.  I have played around with Fotojet and I know this tool will be one I will use often.

With the Fotojet Collage Maker, you can create cool-looking collages from scratch or use pre-made templates. You can even create collage greeting cards for any occasion like birthdays, anniversaries, and special holidays.
 I use a lot of collages on this blog.

I love to make collages because you can use multiple photos from one event and highlight the best parts of them. The Fotojet collage maker has the typical collages…..but also some great looking 3D templates.  No matter how creative I might be….I certainly couldn’t pull this off.


There are so many options….so little time…..

BUT…

I like and would highly recommend FotoJet.  The interface was intuitive, quick and easy to learn.  I could create my projects without having any prior knowledge of FotoJet very quickly. In fact, I was thinking that this would be a great tool for teachers to use with students.

While I haven’t started to do as much as I need to with social media, the headers, banners, ads, and posts sizes available for Facebook, Instagram, and Google Plus look intriguing.  I would not have to find the sizes of these objects because they already there in template gallery.  

The fact that you save projects to your own computer is another great feature.

Bottom Line:  Fotojet is well worth trying out.  Remember….it is FREE!
FotoJet

Have A Most Creative Day!


Free Graphic Design Tool

I have always been fascinated by graphic design.
I admire people who can DIY their own beautiful graphic designs.
I am NOT one of those people!

That is why I am so in love with CANVA!
This on-line graphic design tool is free with sign up.

What Is Canva?
Canva is a free tool that is available over at Canva.com which you can use to create graphic designs.

The tool is designed to make designing simple and provides templates that are very professional looking.

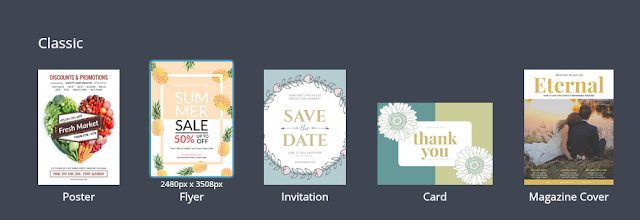
There are posters, flyers, cards, facebook headers, instagram, and so many more.

I am obsessed with the photo collage and the posters.

You can also make a custom sized graphic for almost any purpose.

Canva is a simple drag-and-drop type of software and that’s all there is to it.
There are a variety of options that are so fun to pick from.
In fact…..knowing when to stop “picking” and get on with it is probably the biggest down side.

As you can see from the images, you can select from a lot of features to help you create your design such as: text, layout grids, backgrounds and objects.

The best thing about having a CANVA account is that you can upload your own photos and images.  CANVA saves them so you can use them any time.

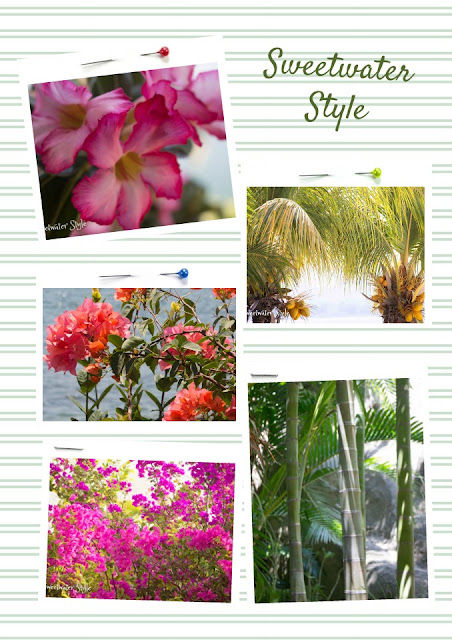
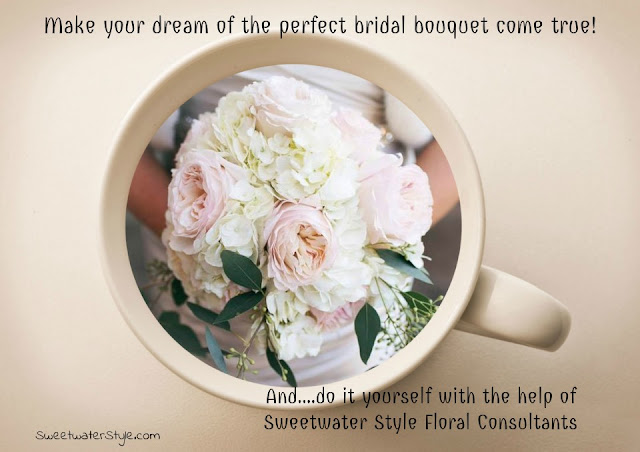
Here are some of my Canva designs.

Somethings just don’t have to be complicated.   Creating simple blog graphic or a social media post should be simple and enjoyable.
I really recommend that you check it out.
I bet you get hooked too!

Have A Wonderful Creative Day!

Pillow Knock-Offs Summer Edition

One of my favorite ways to give a quick fresh look to a room is with new decorator pillows.

I must not be the only one….just take a look at HomeGoods or Target and you will see bunches and bunches of pillows that have fun seasonal motifs.

Now….I guess giving a fresh look to a room for around $30 seems like a deal.
But if you follow this blog….you know I think that is WAY too MUCH $$$ to spend.

Come along and I will show you my inspirations from the stores….
and then….
My KNOCK OFF versions of the same pillows.

source

 This nautical inspiration is really fun.  But it made me “Crabby” to think about hand painting something like this.

Source

I love this simple burlap pillow and it is definitely on my to do list….

Target.com

But this charmer from Target is the one that really caught my eye!

Who doesn’t like lobster?

The red color is perfect for the blue and white decor in the lower level.

I used my Cri-Cut and Sure-Cuts-A-lot program to create a lobster stencil!

The stencil is done on canvas with red acrylic paint.

I went all fancy and did red cording around the edge.

The navy and white stripe fabric is left from my DIY Ironing Board Cover.
And….oh my….I actually put a zipper in the back….wasn’t I ambitious?

Since everything I used was already in my “stash”…this cost me nothing.   If you started from scratch, you could probably do this for under $10.

Zazzle.com

I have always loved those vintage postcards that say “GREETINGS FROM….”

Zazzle has done a pillow with this theme.

HMMMMM

I decided to commemorate our fun trip to Savannah, Georgia this past winter.
Some simple Google Image Browsing and I found this great vintage poster.
My apologies….I didn’t save the source….!!!

I used the “Print on Fabric Using Your Printer” technique to create this fun pillow.
Using an machine applique stitch around the print is a clean way to attach the printed fabric.

This next Knock-Off isn’t exactly a Summer theme….
I am continuing to work on the Kate Spade Inspired Guest Bedroom.

source

I came across this pillow when I was looking for ideas.

I had the green and white striped fabric.

It was pretty darn simple to create this knock off.

It has a bed pillow for a form so that it is bigger and fluffier than the inspiration.

The better for cuddling a Grandboy!!!

So the next time you are in a store with a big display of accent pillows…..
Pause….say HMMMMM….and go home and create something!

Have a Wonderful Day!

Link Parties
Coastal Charm 

Things To Do With Travel Photos!

Are you old enough to remember….?
Back in the day….
We actually used FILM in cameras!

 It cost bunches of money…..and even more to get developed!
AND….you usually took very few pictures….and were stuck with them whether they turned out or not!

I remember rationing how many rolls of film we would use on a vacation.  Four or five rolls of 36 pictures was a pretty big extravagance for us!

 Then….along came the Polaroid!

Instant gratification…..but kind of lousy quality!

And Still…..super expensive….especially if your photography skills (or your subjects) were not up to par!

Too funny that all of the Instagram photos are a take off on the old look of polaroid prints!

Enter the 21st Century and Digital Photography!

There are no limits to how many photos you can take!

HMMMMMM…….

Now taking a bazillion photos of anything…..no film….no developing costs….is an every day habit!

HMMMMMM….that opens a whole new can of worms!
Organizing….deleting….storing those photos!
I have to admit….I am HORRIBLE at discarding photos and honing down the ones that are worth saving!
But THAT is a post for another day!

THIS post is a collection of cool things to do with your favorite vacation photos that steps outside the traditional “make a photo book” box!
Some I have done…..and others are ideas I found on other blogs and have on my to do list.
Enjoy!


PHOTO COASTER TILES

Crop some of the scenes from your trip into a square format.

Print them on card stock.

Use Mod Podge to adhere the images to plain white ceramic tiles.

Give the coasters a quick coat of spray on gloss laquer to water proof them.

Use adhesive backed felt on the back to protect the table you will use the coasters on.

 Fun and thrifty take on this project.

Look for coasters at the thrift store.  I found these for $1.99 and will be able to glue MY images right over the top….and they already have a backing!

PHOTO TURNED WATERCOLOR 

This is the view from the rooftop bar in the hotel we stayed at in Hong Kong.

Using the Waterlogue APP it became an impressionist painting for the family room wall.

Here is a post with another image that was done in a similar way.

Over at Lovely Etc. you can find lots of other ways to use your photos.

This custom photo map from cutcraftcreate.blogspot.com is so fun!

SOUVENIR PHOTO PLACEMAT

There are places like Zazzle that can turn your photos into double sided placemats.

The cost is “sort of” reasonable….but the quality is really amazing!

CUSTOM SOUVENIR CANDLE

This tutorial from Inspired Ideas Mag gives all the directions for transfering photo images to glass.

That is definitely on my list TO DO!

CUSTOM IMAGE SOUVENIR PILLOW
 You can print images on fabric using your inkjet printer (Learn how here).

 Look at the cute pillows that were for sale at some shop in Yellowstone…..

I don’t remember exactly how much they cost…..but I bet it was plenty!

Look at the photo we took in Montana at the National Bison Range…

HMMMMM….that seems doable!

So many fun ideas…..I hope one of them provides you with some inspiration.

Do any of you have examples of fun things YOU have done with your photos?
I would love for you to take a minute and share!

Now…..I think what I REALLY should be doing with ALL my photos is editing them and only keeping the best ones….Yeah….and that is gonna’ happen!

Have A Wonderful Day!

Link Parties
Creative Muster  My Girlish Whims 
Katherine’s Corner    Share It One More Time   

Spring Herb Basket!

Home Depot is selling 5 little pots of herbs for $10 this week!

That is a great deal…..but it is way too early here in Minnesota to put plants outside!

In fact….yesterday, I drove to a meeting through snowflakes bigger than cottonballs…go figure!

Since the herbs were such a bargain…I couldn’t pass them up!

I put together this nice little basket for a centerpiece on the kitchen table.

Here are a couple of things I did to “style” this little basket!

Buying baskets at Goodwill makes a lot of sense (cents 🙂 ) Mr. S might disagree….in fact he does disagree….he thinks my “basket stash” is too full!
In this case…I had the perfect little basket for my herbs.  I like that it has a handle…it will be easy to put out on the deck on warmer days to get the full effect of the sun!

The first thing I did was line the basket with the plastic bags that I brought the herb pots home in.  This allows me to put the basket on a wood surface with no worry.

Then….the pots that the herbs came in were two different heights. They were also a little short for the basket.

I tucked some crushed newspaper and paper toweling in the bottom to create the right height for the pots.

I decided to use some squares of fabric around the base of the pots to disguise the edges and create a nice background.
I went really neutral, but wouldn’t checks or a bright print look nice too?

The finishing touch is a little chalkboard marker sign made from some little trays I spray painted with chalkboard paint.

HMMMM….I might just have to go back to Home Depot and get some more bargain herbs!
This would make a really nice hostess gift or even Mother’s Day gift!

I also bought these two Ranuncula plants when I was shopping. 

The basket styling technique is pretty similar…..plastic bags in the bottom with Spanish Moss to hide the pot edges.

This looks so springlike and cheerful on the counter next to the chalkboard easel!
And speaking of chalkboards…..

(getting a good photo of this chalkboard is almost impossible….it is in a narrow stairwell….but you get the idea)
 You can see that I am truly anxious for some dirt under my fingernails!
AND
the lack of warmth and sunshine is making me CONTRARY!

Have A Wonderful Day!  Go Plant Something!

Link Parties
It’s Overflowing  Nifty Thrifty Things