technology tools

 
I was recently asked to review FotoJet which is an online application that lets you create custom collages, graphic designs, and even enhance photos right on the website.  There are many amazing templates for photo cards, social media graphics, posters, etc. There is a built in photo editor that makes it easy to adapt your pictures to the project you are working on.  Best of all….it’s FREE!

I want to share some of the things I have learned about 
FotoJet and sprinkle in some of the designs I “whipped” up in a pretty short time.


Today’s world is increasingly dependent on visual images.  We want those visual images to catch the attention of the audience.  I remember the “good”? old days of creating a graphic from scratch.  It would take me hours….mainly because I could never settle on what I wanted.
Now…I consider myself pretty creative….but to have the option to start with professionally designed templates is so much easier. 
 

Some of the options are:  Social Media Cover Photos, Headers, and Posts for popular social media platforms like Facebook, Twitter, YouTube, Google+, Tumblr as well as Email Headers. 

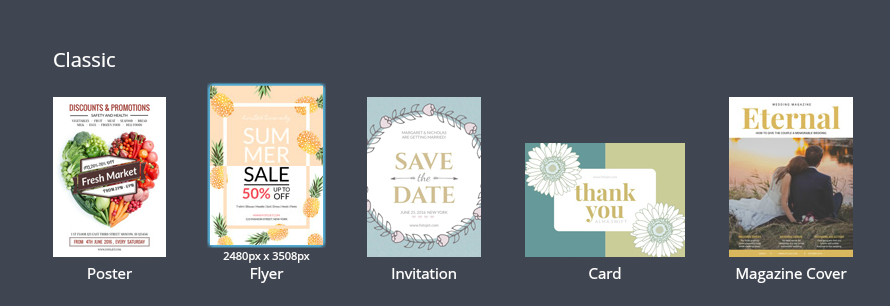
I often have a need to make posters, flyers, invitations, and greeting cards.  I have played around with Fotojet and I know this tool will be one I will use often.

With the Fotojet Collage Maker, you can create cool-looking collages from scratch or use pre-made templates. You can even create collage greeting cards for any occasion like birthdays, anniversaries, and special holidays.
 I use a lot of collages on this blog.

I love to make collages because you can use multiple photos from one event and highlight the best parts of them. The Fotojet collage maker has the typical collages…..but also some great looking 3D templates.  No matter how creative I might be….I certainly couldn’t pull this off.


There are so many options….so little time…..

BUT…

I like and would highly recommend FotoJet.  The interface was intuitive, quick and easy to learn.  I could create my projects without having any prior knowledge of FotoJet very quickly. In fact, I was thinking that this would be a great tool for teachers to use with students.

While I haven’t started to do as much as I need to with social media, the headers, banners, ads, and posts sizes available for Facebook, Instagram, and Google Plus look intriguing.  I would not have to find the sizes of these objects because they already there in template gallery.  

The fact that you save projects to your own computer is another great feature.

Bottom Line:  Fotojet is well worth trying out.  Remember….it is FREE!
FotoJet

Have A Most Creative Day!


Free Graphic Design Tool

I have always been fascinated by graphic design.
I admire people who can DIY their own beautiful graphic designs.
I am NOT one of those people!

That is why I am so in love with CANVA!
This on-line graphic design tool is free with sign up.

What Is Canva?
Canva is a free tool that is available over at Canva.com which you can use to create graphic designs.

The tool is designed to make designing simple and provides templates that are very professional looking.

There are posters, flyers, cards, facebook headers, instagram, and so many more.

I am obsessed with the photo collage and the posters.

You can also make a custom sized graphic for almost any purpose.

Canva is a simple drag-and-drop type of software and that’s all there is to it.
There are a variety of options that are so fun to pick from.
In fact…..knowing when to stop “picking” and get on with it is probably the biggest down side.

As you can see from the images, you can select from a lot of features to help you create your design such as: text, layout grids, backgrounds and objects.

The best thing about having a CANVA account is that you can upload your own photos and images.  CANVA saves them so you can use them any time.

Here are some of my Canva designs.

Somethings just don’t have to be complicated.   Creating simple blog graphic or a social media post should be simple and enjoyable.
I really recommend that you check it out.
I bet you get hooked too!

Have A Wonderful Creative Day!

Vacation Memories Art Project

We just got back from a trip to Voyageur’s National Park.
What fun….and yes…I actually caught a fish or two!
In fact…I was voted “most improved” fisherman in our group.
That wasn’t hard considering that on the first day I couldn’t even make my reel work!

I never did get over the gag reflex about the whole sticking the worm on the hook deal!

Of course we took bunches and bunches of photos.
It is so easy to take too many pictures….and then it is so hard to figure out what to do with them.

This article from the Washington Post has some great suggestions for organizing and “doing something” with those photos.  These tips are definitely on my to do list!

I am not much for scrapbooking….so I also enjoyed this article about NON-scrapbooking ways to remember your vacation.

This quick craft is a way to turn a scenic photo into canvas art at home.

What you need:
a scenic vacation photo
photo editing software or APP
canvas “paper” for your printer purchased or DIY (directions here)
frame (no glass)
fabric covered mat (tutorial follows)

One of our favorite places in Manzanillo, Mexico is Playa la Audencia.
The Waterlogue App for iPad is free.
This app makes it easy to create a watercolor effect with any photo.

This photo turned watercolor is a wonderful memory of our favorite spot.
Somehow…the original went “missing” in all of the zillions of Mexican vacation photos…..

This is one from the same day to give you an idea of the scene.
If you look closely in the watercolor version, you will see Mr. S in his classic “kicked back” position!  
Don’t you think it adds an even more personal touch to the image?

Then it is a simple matter of printing the water color image on canvas.
Here are the directions for DIY printing on fabric.

I removed the glass from a frame I had.
I decided that a fabric covered mat would look nicer than plain mat board.

The finished project is a nice addition to the beach themed table in the entry way.
Adding the “caption” makes this a wonderful vacation memory.
I am in the process of doing one from our fishing trip.
I have the frame with the mat done  
Here is the tutorial for covering a mat with fabric.

Start with a plain mat cut to size.

 Use an adhesive spray to attach the fabric.

 Press the fabric smoothly on the mat.

 Cut an x from corner to corner.

Fold the sections back and press well.

I use mounting tissue to attach them to the back.
You can just use tape.

The burlap looks nice…but those frayed corners will need a little attention with some glue.

Insert the mat into the frame and you have a nice fabric mat that looks good without glass.

Now it is just a matter of figuring out which scenic photo to use for my water color technique.

HMMMM….

Now wasn’t that a sneaky way to make you look at our vacation pictures?

Have a Wonderful Day!

Use Your Printer to Create Custom Pillows

In this post I really will show you how to use your ink jet printer to make custom pillows. I will show you how to use muslin or canvas to make your own sheets of fabric to print on.  BUT….first I need to inject a public service announcement about the wonderfulness that can be found at your public library!
This is yet another reason to love your public library.

Did you know that you can check out digital versions of many popular magazines from your library?

FOR FREE.

Just hop on your library website and do a search for Zinio.  If your library supports Zinio then you can browse the collection of magazines just like magic…..a few seconds later you can read them on your phone, ipad or computer.  Follow this link to find out the specifics!

I used Zinio to check out the latest issue of Martha Stewart Living. (yes….you can read the newest issues of magazines)
I read an article, “Picture This”, about using digital photographs in interesting ways.

 Oh, that is another cool thing about reading an emagazine…..you can take screen shots of the stuff you want to save!

 The ideas in the article were an inspiration for a couple of pillows I wanted to make.

I knew there were some different specialty printer papers in the cupboard…..hmmm….actually I have a LOT of different papers…

some for t-shirts
some plastic decal sheets
some post-it paper

then….aha….some canvas print “paper”!

First I made a pillow from a fun vintage print I found on the internet!

It was a simple matter of printing it out and appliquing it to a square of canvas for the front of the pillow.

 Then I used this pillow sham technique to make a simple slip on pillow.

 I needed to find a personal graduation gift for a favorite young woman. 
A pillow with a quote from Dr. Seuss was the perfect solution.

I used the digital scrapbooking program called My Memories Suite to design the image I wanted to print.

I used pink thread for the applique stitch on the edge.

The whole process took about an hour! 
The result was kind of special….for a very special person!

I still had some ideas for making more pillows….but I had used up the “store bought”canvas.  I guess I could buy some more.  You can purchase ink jet canvas at a cost of about $1.70 a sheet!   But you know me….I am always looking for a thriftier way to “DO STUFF”.

 One of the staples in the “fabric stash” is plain canvas….which is about $5 a yard!
Here is how to make your own Inkjet Canvas!

Start by cutting an 8 1/2 x 11 piece of canvas.


Then cut an 8 1/2 x  12 piece of regular old freezer paper.

The freezer paper has a “plastic side” and a “paper side”,

Put the canvas on the “plastic side” and use your iron to melt the two sides together.

 The extra inch on the top gets folded down over the top edge of the canvas.

This smooth edge lets the printer “accept” the cloth and run smoothly during the printing process.

I used the My Memories Suite to design an image from our Asian trip.

Then into the printer went the freezer paper backed canvas.

It is important to tell the printer that the paper is thick.
For my printer that means using the “Glossy Photo” option.

 I always have a hard time waiting for the project to print….

Patience is NOT one of my strong suits!

Success!

The canvas texture give the photo a really nice look.

The freezer paper pulls easily off the canvas.

Now you have a piece of fabric with the printed image on it.

Now it is just a matter of getting down to business and creating the pillow.
It will be a lasting reminder of our trip….and it won’t be necessary to sit at the computer to look at the picture!

Hmmmm…..what else could I make?
Check out these ideas from the Martha Stewart Living Website. 

This pillow with a collage look would be fun to try!

The little thumb tacks and magnets are made with bottle caps….Mr. S will just have to drink a beer or two or three so that I have the necessary supplies!

I am off to look through more photos!
Have A Wonderful Day!

Link Parties

Waterlogue-A Fun New Photo APP!

I discovered this new APP for my iPad a couple of weeks ago!
If you love playing with photos the way I do….
you are gonna want to splurge and spend the $3!
In a nutshell…the app takes a regular photo and turns it into a watercolor!
Here are my BEFORE and AFTERS using the APP!


 Seriously….this is the easiest app to use!
Not bad for $2.99
I think these would look great enlarged to 11 x 14 and framed…..
They would also make great notecards….
 I can’t wait to pick out some more photos to play with!
Anybody have any better ideas for what to do with my new art?
Have a Great Day!
Add caption
Link Parties