gifts

Gift Idea: Tea Towel in a Frame

Two weeks until Christmas!
That means that there isn’t a lot of time around here for writing blog posts.
My goal is to do a few posts with a ideas that you might use to save time and/or money during the holidays this year.
Frame A Tea Towel for Statement Wall Art

Inevitably, you are going to be going shopping in one of those cute gift boutiques….
Inevitably, you are going to fall in love with lots of items that are way out of your price range….
Don’t despair!
Check out the tea towel section….you will probably find something very cute for a reasonable price.
AND…
Tea Towels make fabulous gifts….
BUT…
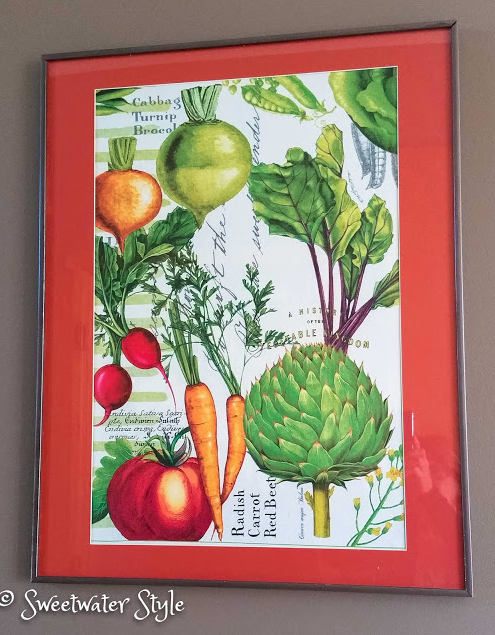
Why not take it up a notch and frame that tea towel to create a statement piece of wall art?

I found this towel at a gift boutique….yeah…I know I said this was about giving gifts…but I loved it so much I had to keep it for myself. (note to self: next time buy TWO of something thrifty that you love).
I already had the frame, but you can find deals on poster frames with the mat already in them.  Michaels and IKEA are good sources.

The HOW TO is simple:
1. Buy the tea towel.
2. Buy the frame.
3. Iron the towel.
4. Use spray adhesive to smooth the towel on the backing cardboard that comes with the frame.
5. Reassemble the frame.
6. Wrap it up!

Be sure to tell the person you are gifting how easy it is to change out the “art” for each season!

I have written about this before with more detailed instructions and some good sources for tea towels.

Tea Towel Wall Art: http://sweetwaterstyle.blogspot.com/2017/04/tea-towel-wall-art.html

Sources for Tea Towels http://sweetwaterstyle.blogspot.com/2015/01/wall-art-from-tea-towel-and-interesting.html

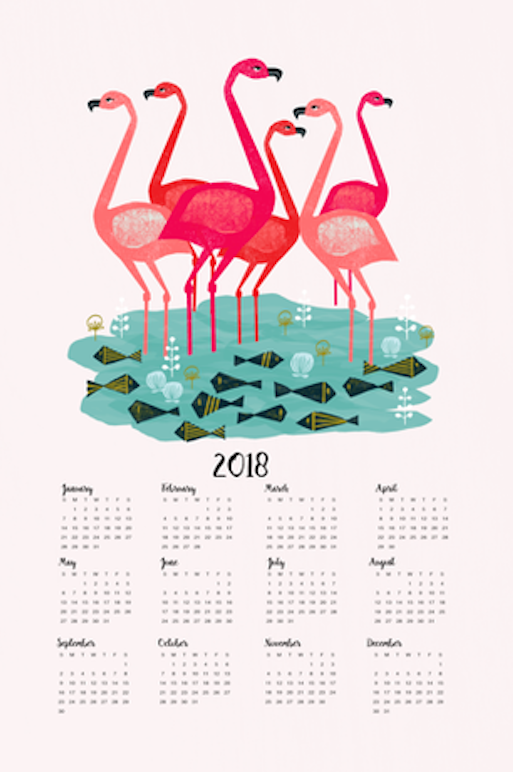
Remember when every 1960’s kitchen had a calendar tea towel? (well….some of you are too young to remember that….but trust me)
A framed calendar tea towel is an easy way to go beyond the ordinary…and way cuter than the one on your phone!

How cute are these towels from Spoonflower.com?

Hope this has given you an idea for a last minute gift if you needed one!

Have A Great Day!

Hostess Gift Tutorial Day 2: DIY Gnome!

Nothing says Scandinavian Christmas like a Tomtem, Gnome or Elf!
Why not make one of these charming little fellows for a hostess gift?

You probably have the supplies on hand.  If not, a trip to the thrift store will get you everything you need to make a bunch for only a few dollars.

Supplies:

Toilet paper tube or 3 inch birch log

Styrofoam ball

fiberfill

some kind of “beard material”….fiberfill, an old halloween wig, sheepskin

Old sweater sleeves

Wooden Bead

Hot Glue Gun

Sewing machine or needle and thread.

Directions:

  • Cut off a sleeve of the sweater you are using for a hat.  Use the bottom ribbing for the bottom of the hat and machine or hand stitch the side into a cone shap.
  • Cut a rectangular piece of the body sweater fabric to wrap around the toilet paper tube.  Tuck the ends into the tube opening and glue down. (Skip this step if you have access to birch logs)
  • Wrap fiberfill around the styrofoam ball and glue to the top of the tube or log piece.
  • Add a longer piece of the fiberfill to create a beard.  If you are going all out…you can purchase sheepskin remnants.  I got mine at Axe Man Surplus for $1.00.  You will want to glue the beard from the top of the head.  These Tomtens don’t have faces….just facial hair.
  • Stretch the hat on the head….position it so that your little guy has some charm.
  • Glue the wooden bead onto the center of the “face”.

In little or no time, you have a fun hostess gift.  If you want to go all out Scandanavian….you could head to IKEA for some Lingonberry Jam to add to it.  I am sure there are other Scandinavian treats that would make good additions….as long as it ISN’T Lutefisk.

Speaking of Lutefisk….I just finished a great book that will call to anyone with Minnesota roots…

A quirky and interesting read.

Have A Great Day!

Link Parties
Sunny Simple Life

A Week of DIY Hostess Gift Tutorials

Things are pretty much in full holiday mode around here….although since we are having a late Thanksgiving “gather and gobble” on Sunday….Mr. S has requested that I restrain myself a bit and leave a few remnants of fall decor….so the house feels a little like Thanksgiving.

Some of you may have noticed that I have been struggling to get posts written on a regular basis…
I have decided to change that!
I have a Goal: I plan to post EVERY DAY this week with quick tutorials for easy to replicate hostess gifts.  I hope this goal will motivate me to post more often….and inspire you to get your craft on!
So here goes!

DAY ONE
Coverless Book Bundles Holiday Style
Source
Coverless book bundles were all the rage a few years ago.
They are the epitome of “shabby chic”.
Shabby Chic is not for everyone….but…if you change it up to have a HOLIDAY theme….then these work for almost any decor style.
Do you know how hard it is for a retired “librarian” to rip the cover off of a book?
Well…I had to get over that for this project.
Since I promised you a tutorial….a tutorial you shall have…(even though I believe MY clever readers are all be smart enough to figure this out on their own!!!)

  •  Find some old books….the thrift store is a great source if you don’t have any lying around.  The older and dingier the better!  Look for groups of books that are similar in size. 
  •  Remove the soft casing of the book and make sure to remove any printed pages that precede the blank page. Most books have one blank page before the work of the book begins, so you want to leave that page as the top “page” of the book. When you remove the cover, don’t worry about peeling off the binding, the more weathered your binding looks, all the better for the look of your bundle. 
  • Play around with stacking your books.  It will all depend on the books you have.
  • Add your holiday sentiment.  I used the PRINT ON FABRIC technique to print the words on strips of canvas.  You can just use a fabric marker or sharpie to write your words.  Any kind of glue works to add the strips of canvas to the spines of the books. 
  • Wrap the books with a fun holiday ribbon just like you would wrap a  present. You can tie a bow or not tie a bow. It’s up to you.

You have just created a holiday themed vintage book bundle!
This is a perfect hostess gift. It takes little time and only costs a couple of dollars (or free if you use your own old books).
You will probably want to make a few so that you have one for your own!

Have  A Wonderful, Crafty Day!
Stay tuned for tomorrow’s Tutorial!

Gift Wrapping for a Neat and Tidy Christmas Morning!!

Every year….I promise myself to get all of the holiday shopping done early!
Every year….I totally fail at actually doing it!
I know I am not alone….
otherwise why would a google search for last minute gifts get 18,000,000 hits?
Source

Chances are….you will also be doing some last minute wrapping in the next couple of days!
Chances are….you will spend quite a bit of time doing that wrapping. 
Chances are….on Christmas Eve or Morning your living room will look like this in pretty short order.

I want to show you a clever trick to cut down on the mess of opening gifts.
It is really simple.
Wrap the top and bottom of the boxes with as many gifts as you can,
 Here is a step-by-step if you need it.

DISCLAIMER
The wrapping paper in this tutorial is really light weight!
I wanted to get this posted and don’t have time to run out and buy better stuff.
You will see all the flaws….but the process stays the same.
MORAL: Buy good paper!

 This is a nice sturdy box with a lid that only comes down part way.  Those boxes that reams of paper come in are great for bigger things.
BUT…you can do this with the fold up shirt boxes you get from the department store too!

Step 1: Lay the lid on the paper and cut the paper. It should cover the long sides with about an inch extra to fold over the top. Leave the short ends long enough to fold up and over the sides with a slightly longer overhang, about 1-1/2 to 2 inches.


 Step 2: Fold the long sides up and over the lid. Use a piece of tape to attach the paper to the inside edge of the lid as pictured and repeat on the other side (just one piece now to hold in place).

Step 3: Take the end sections and fold just like wrapping a regular box: Bring the edges in and fold as pictured. then make creases and fold the edges that stick up over and inside the box as shown.

 
Step 4: Tape the first folds to the inside lip of the lid. Where the side and end papers meet in the corners is the only tricky part, but just tuck and fold until flattened and then place a piece of tape to hold. Continue to fold and wrap the end just like a regular box, but take extra time folding and creasing so it will lay flat.

Step 5: When finished folding the end, wrap it over the lid edge and secure it with tape.
Step 6: Repeat with the other end.

Step 7: Repeat all the steps with the bottom of the box. OOPS on this example, I didn’t make it long enough to tuck inside….but the top will cover it.

I use that wonderful wired ribbon that comes in big 50 yd. spools.

Simply make a crossed wrap and tie a simple bow.

The packages look so nice under the tree….

And when it is time to open gifts……

A pull on the bow…..

A lift of the lid….

NO MUSS

NO FUSS

Then when everyone is ready to head home….the covers go back on the boxes and all the mess walks out the door instead of needing to go into the trash!

Simply Genius!

The thermometer is reading -23 degrees and we have a bunch of people coming for a Holiday Open House this afternoon…HMMMMMM!

Have A Wonderful Day!

Link Parties
Share It One More Time

Stuff to Buy at Goodwill: Make Your Own Fancy Cards!

 Here is another post in the “Stuff to buy at Good Will” Series!

Check out the aisle with the office supplies and cards!
You can often find whole wedding invitation kits for a down and dirty price.

 You don’t have to have a wedding in your future to use the lovely paper, notecards, stickers, and other great stuff in those boxes.

Now here in the days of
Email

Texts
Phone calls
Skype
Facebook
Instagram
Twitter

There isn’t a lot of need to have fancy personalized stationery!

And….certainly, there is NO need to spend a lot of money on such a little used luxury!

BUT….you will probably have need to send a greeting card once in awhile!

All it takes is some time spent with your word processing software….
Some creative use of monograms….
Or…a favorite quote!

Here,  the lovely invitation photo for a graduation was glued to the invitation card stock.

The quote is printed on the card and a very personal card was created!

Need a quick baby gift…what could be cuter than note cards personalized with the baby’s name?
Mom and Dad have stationery to send thank-you cards…

Aren’t  these yellow cards….
so cute?

No birthday gift on the shelf for a girlfriend…or no time to shop….?
Print out some cards with a monogram…..quick….fun….inexpensive and useful!

Oh….and here are a few fun quotes that you might use if you do decide to get creative!

Well Behaved Women Rarely Make History!

Some of us are becoming the men we wanted to marry.


She who leaves a trail of glitter is rarely forgotten!

Playing dress-up begins at age 5…and never truly ends!

Take My Advice…..I’m Not Using It!

A woman should be two things: Classy and Fabulous!

Style is the perfection of your point of view!

Fashion fades, only style remains the same.


If you don’t have anything nice to say, come, sit by me….

So…I challenge you to send some SNAIL Mail once in awhile!