
Gnomes or Tomte or Nisse…..Oh My!
Whatever name you give them, you have to admit they are awfully cute!
When you see how easy it is to make your own Tomten I am sure you will want to join in the fun!

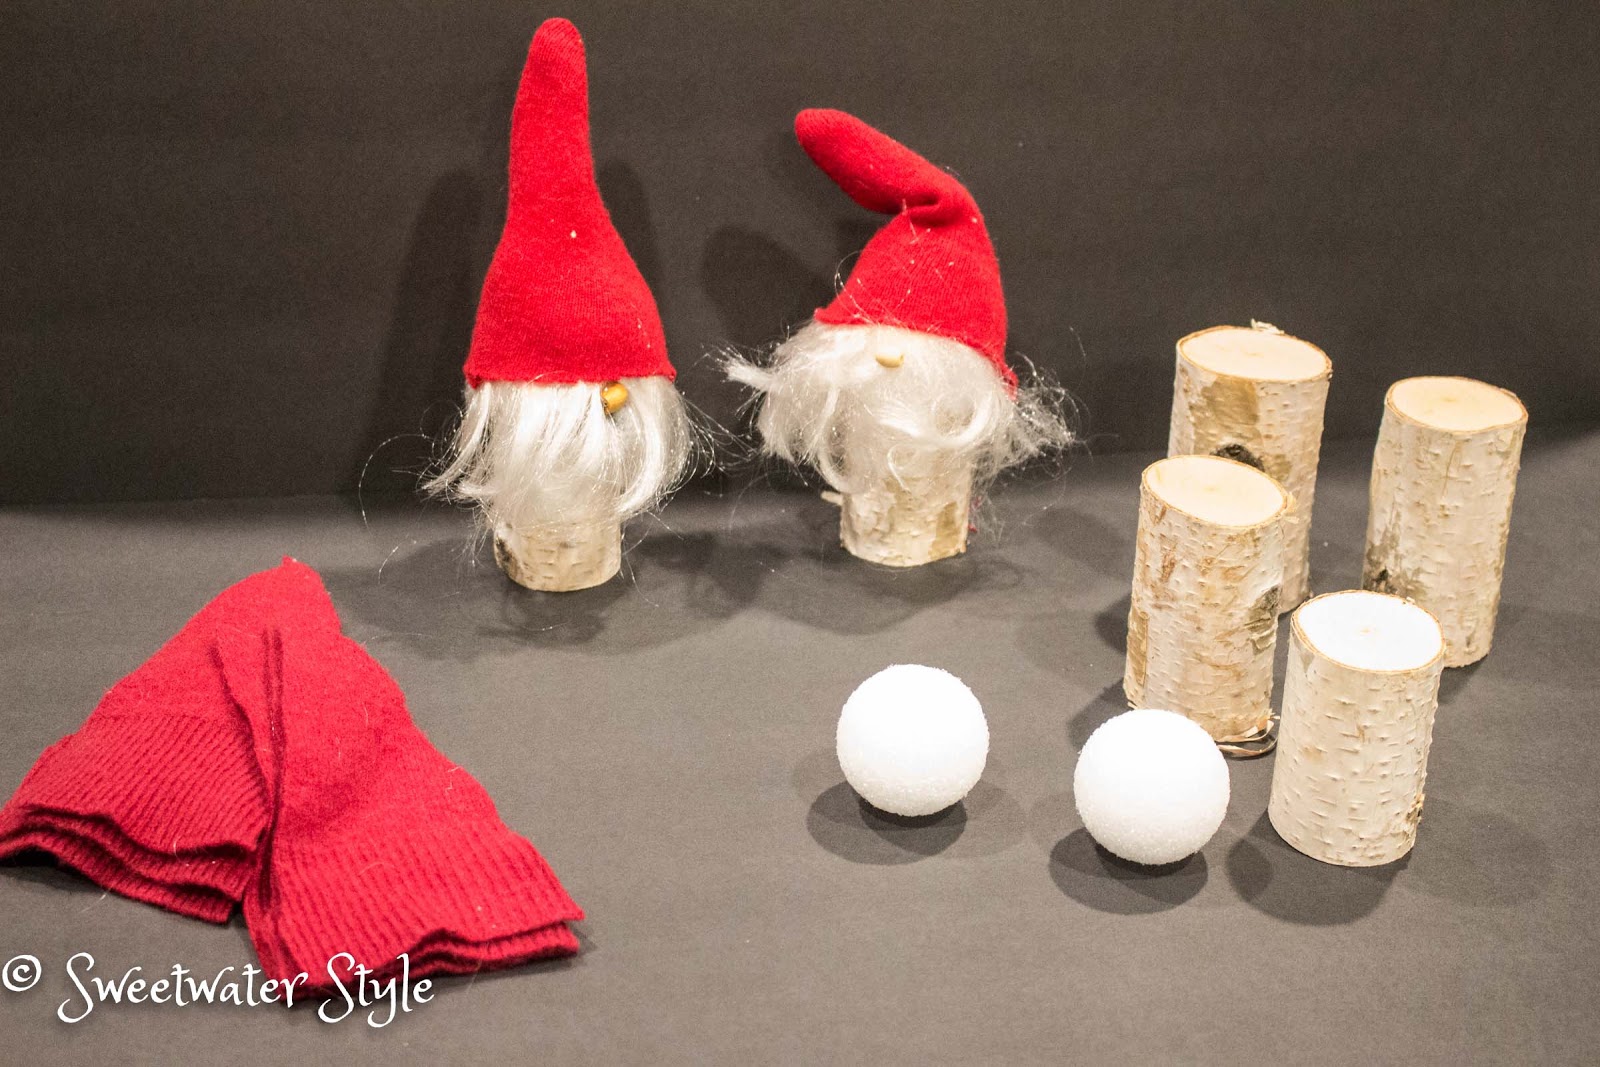
 Supplies:
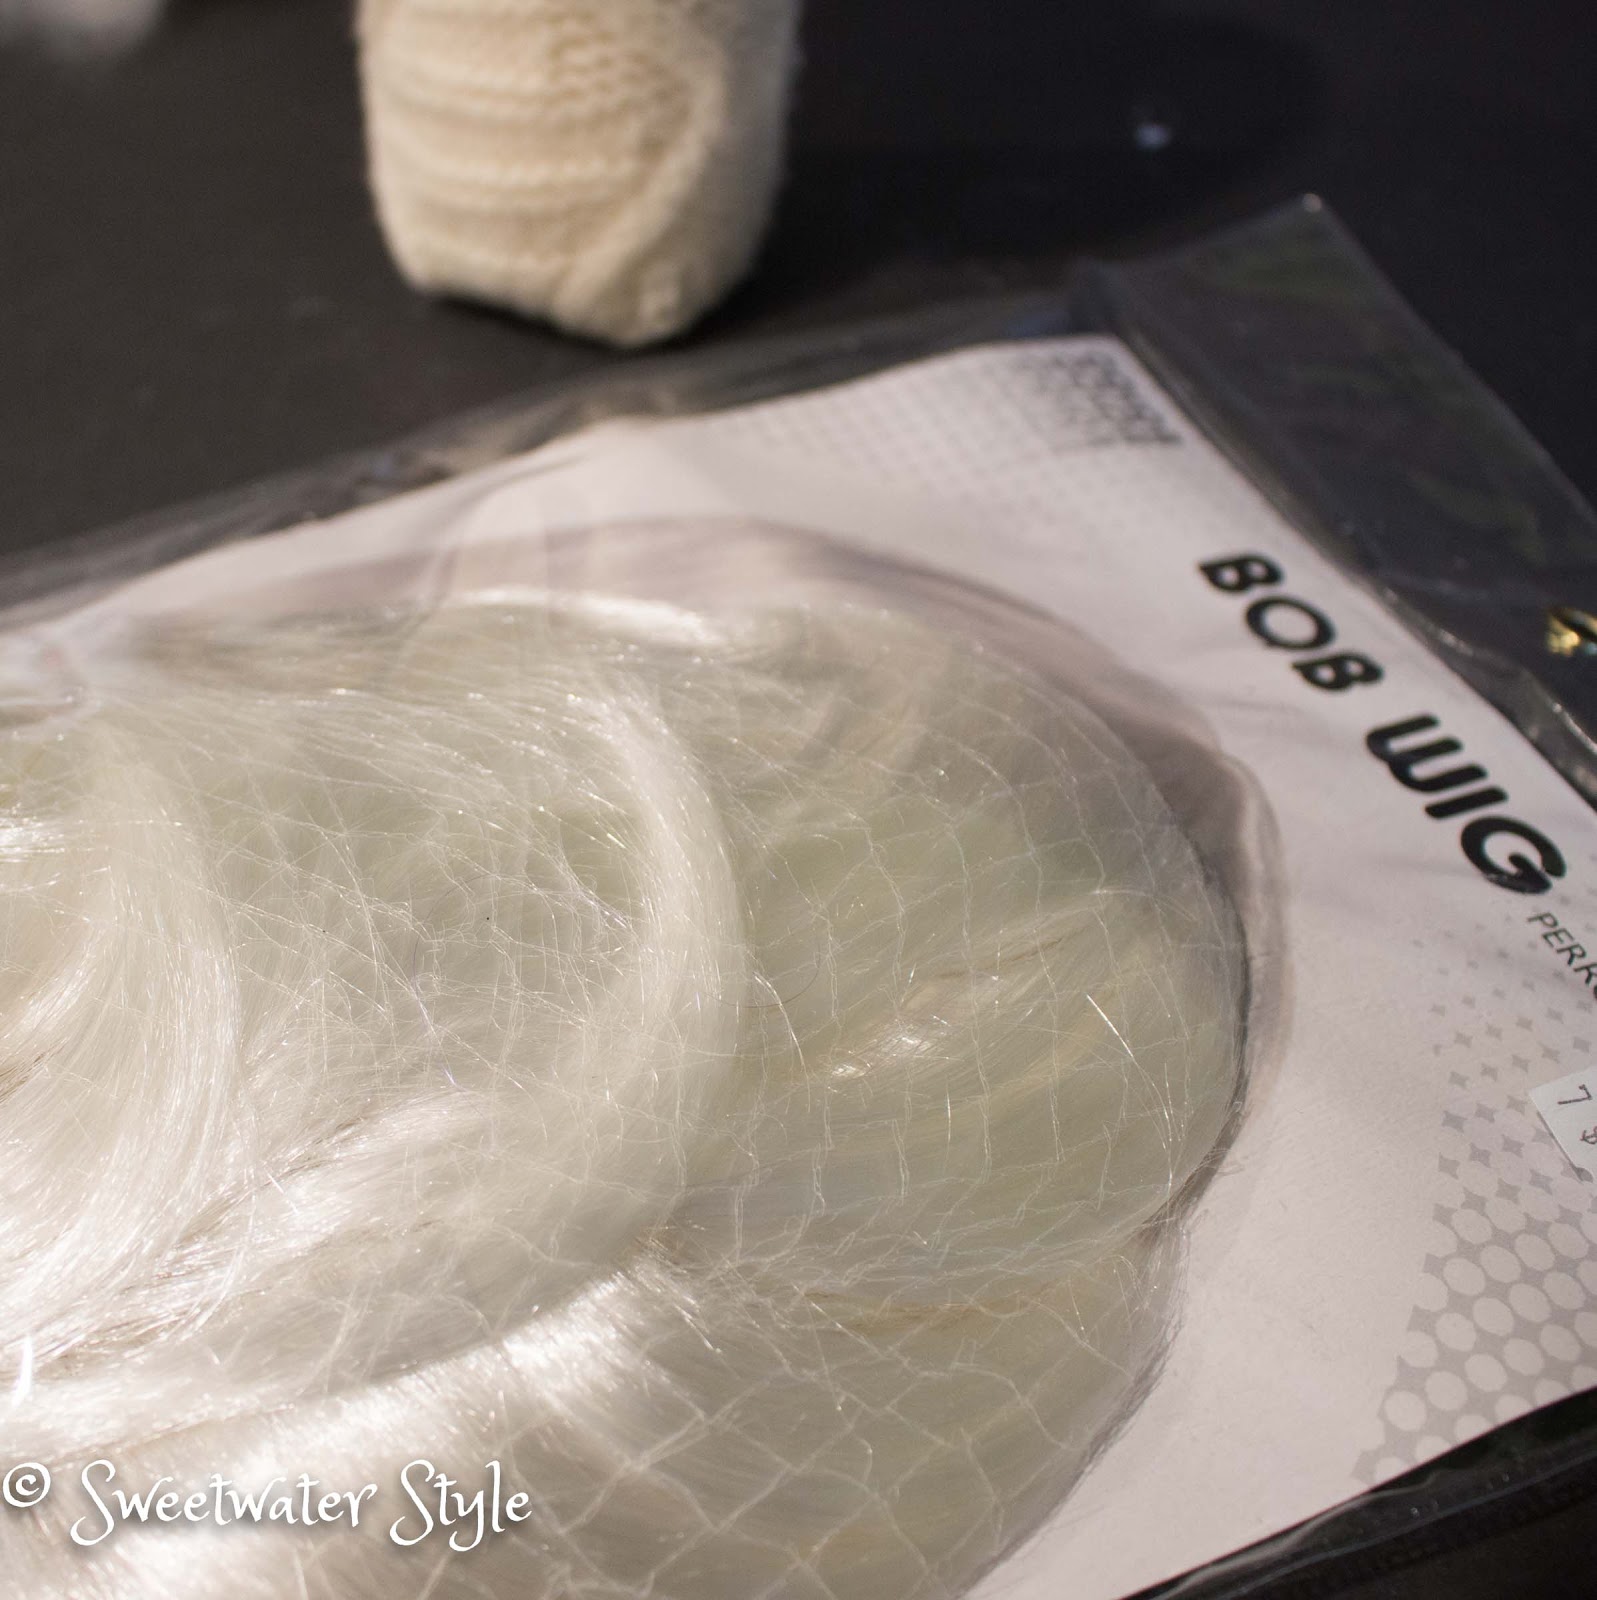
Steps:
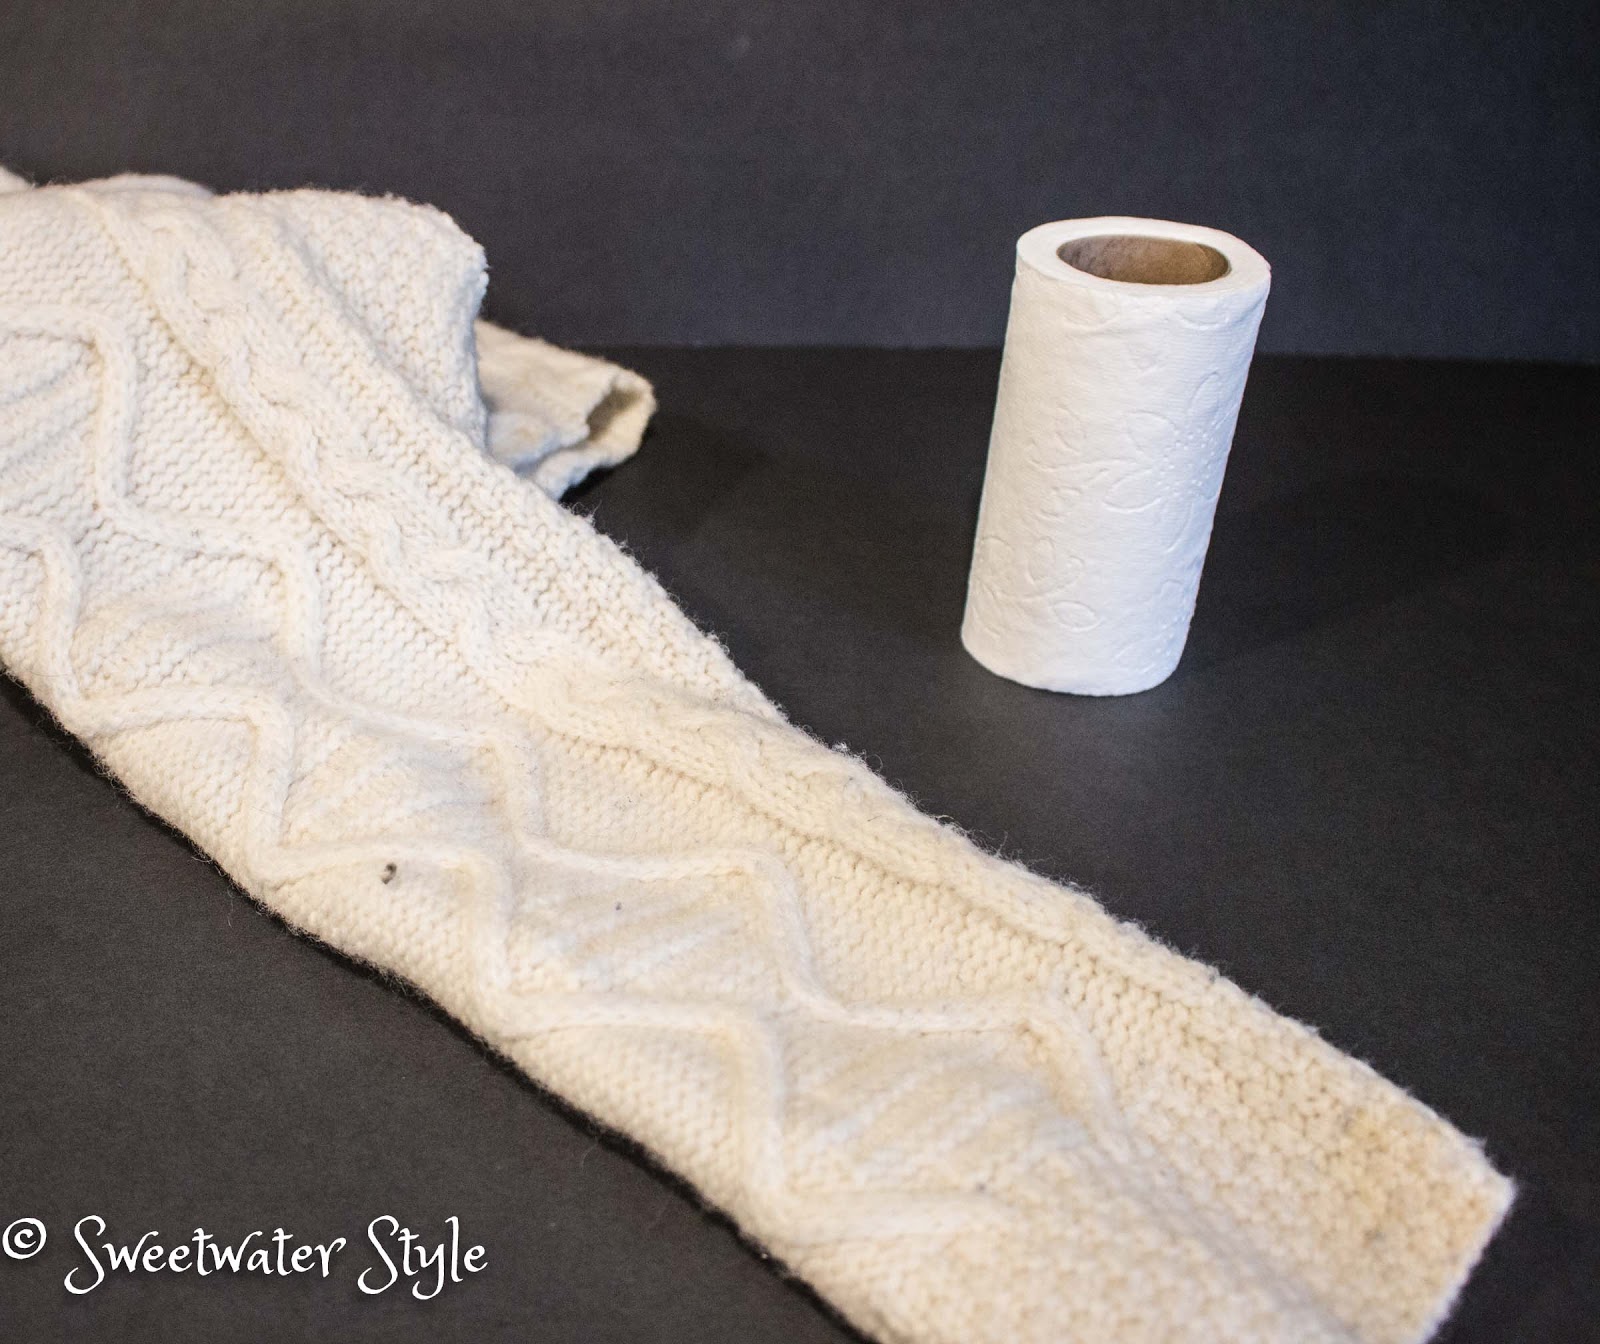
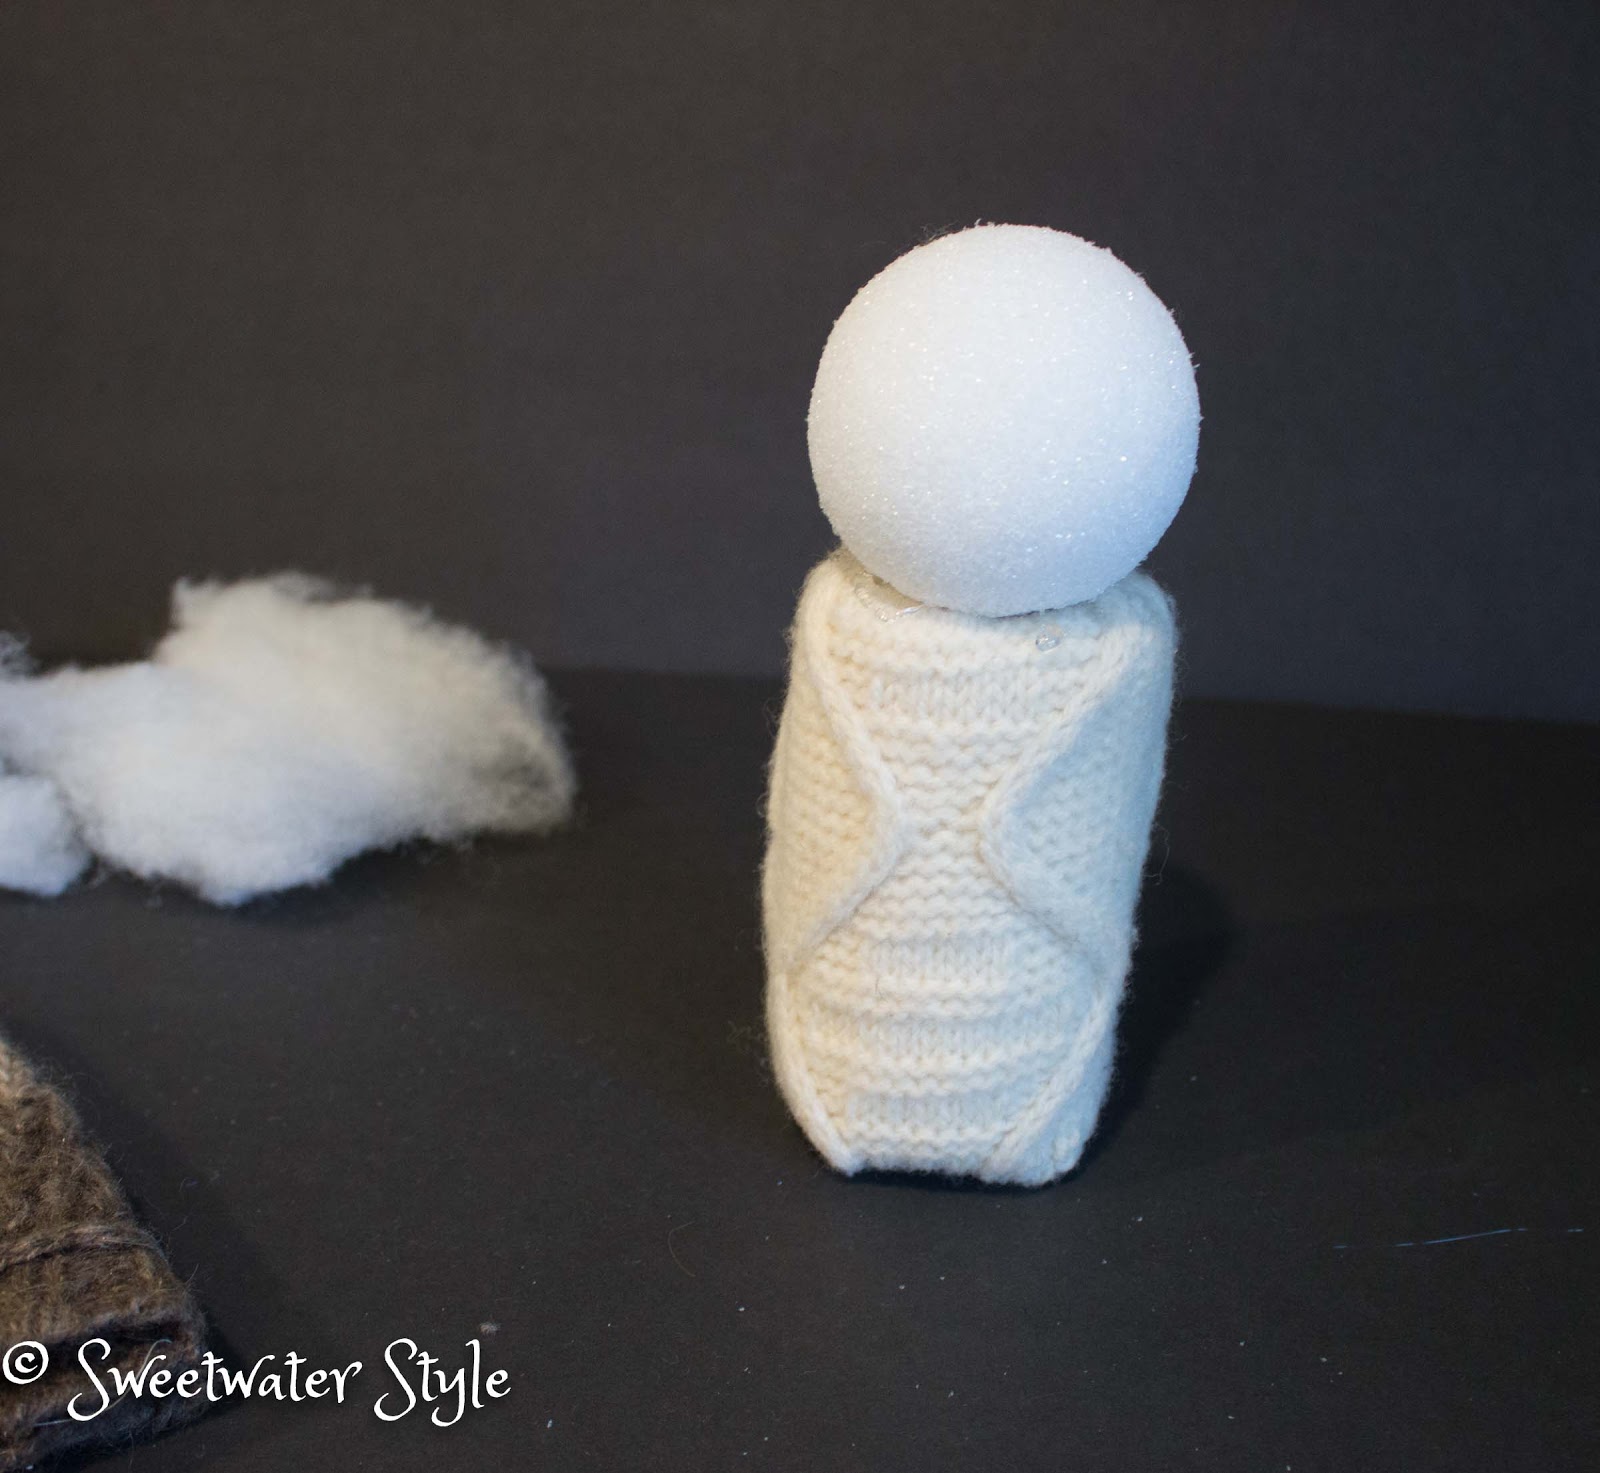
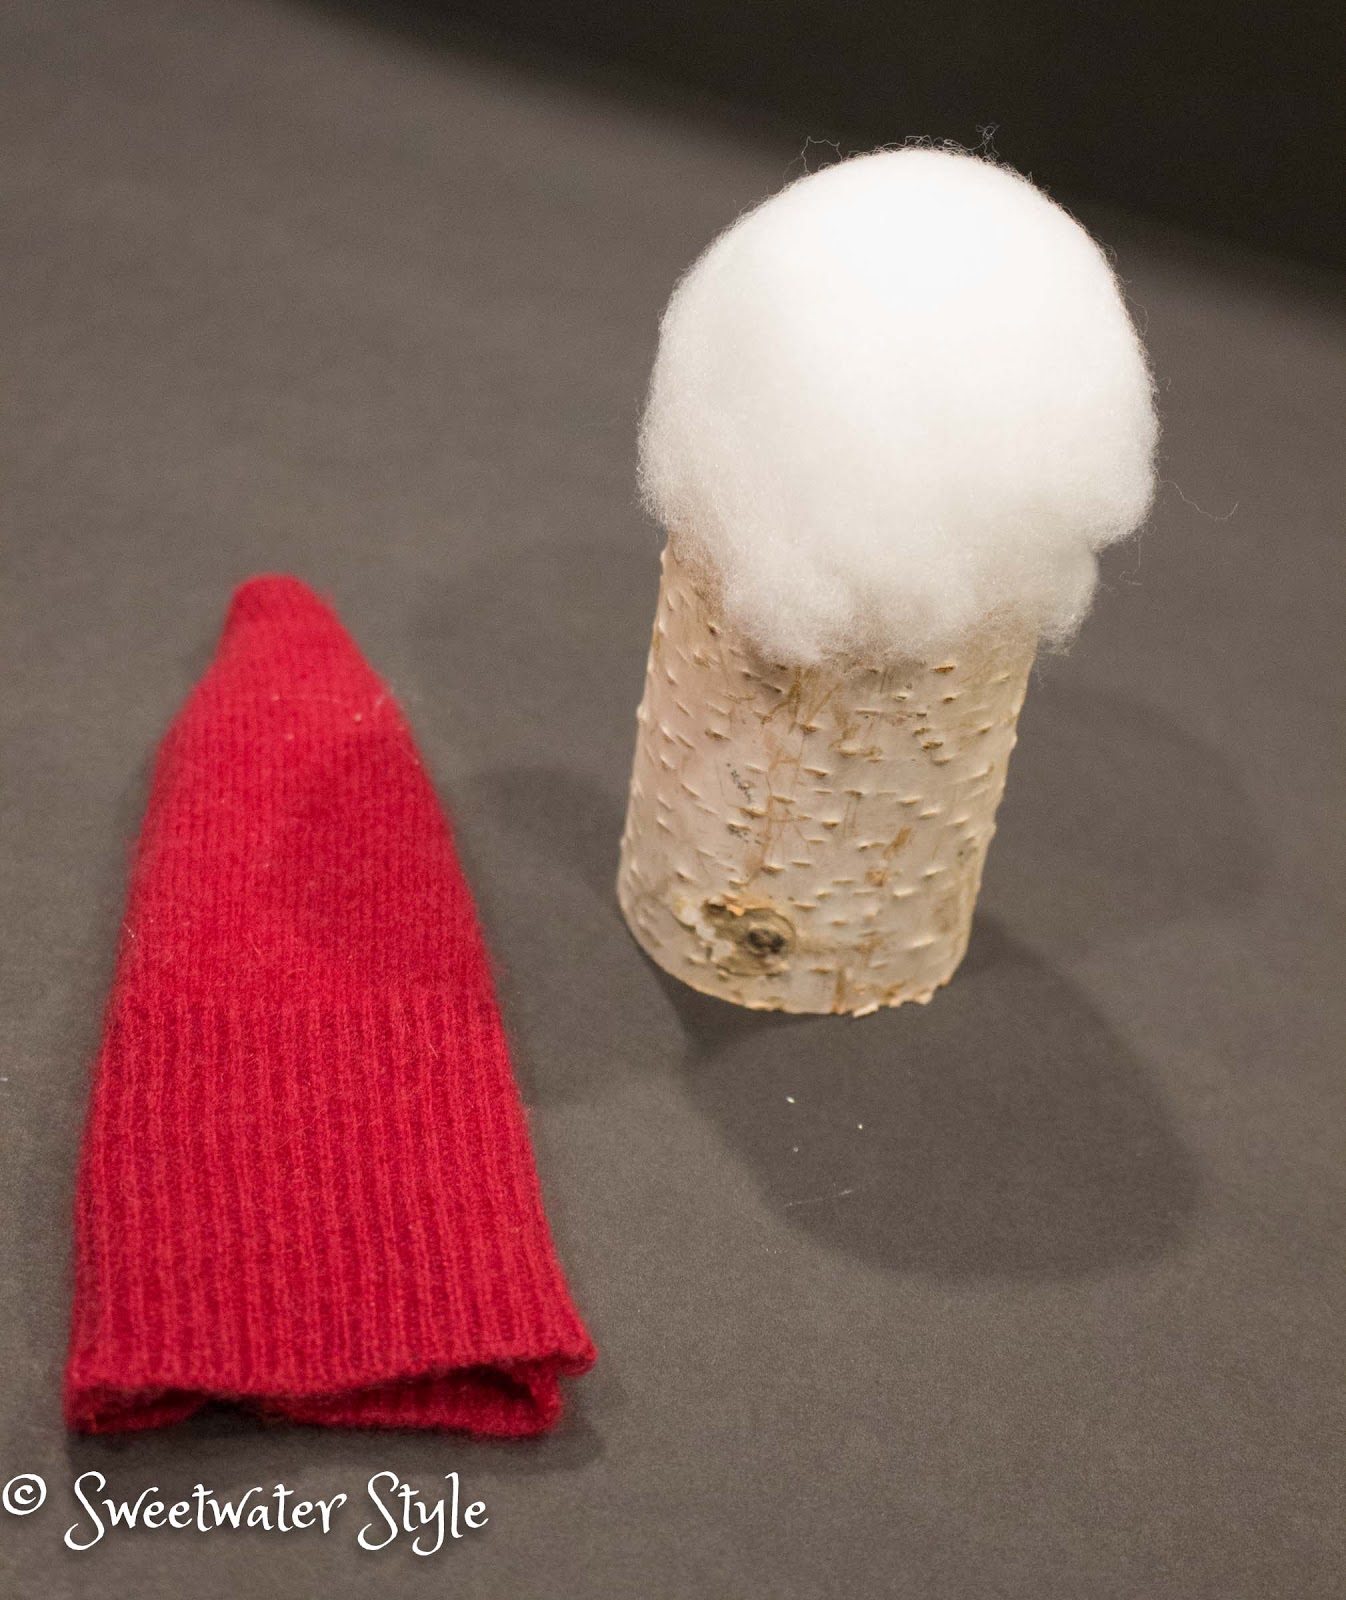
- Cut the sweater sleeve long enough to tuck into the top and bottom of the toilet paper roll.
- Glue the styrofoam ball on top of the sweater.
- Glue on some fiber fill and a fluffy piece of the wig.
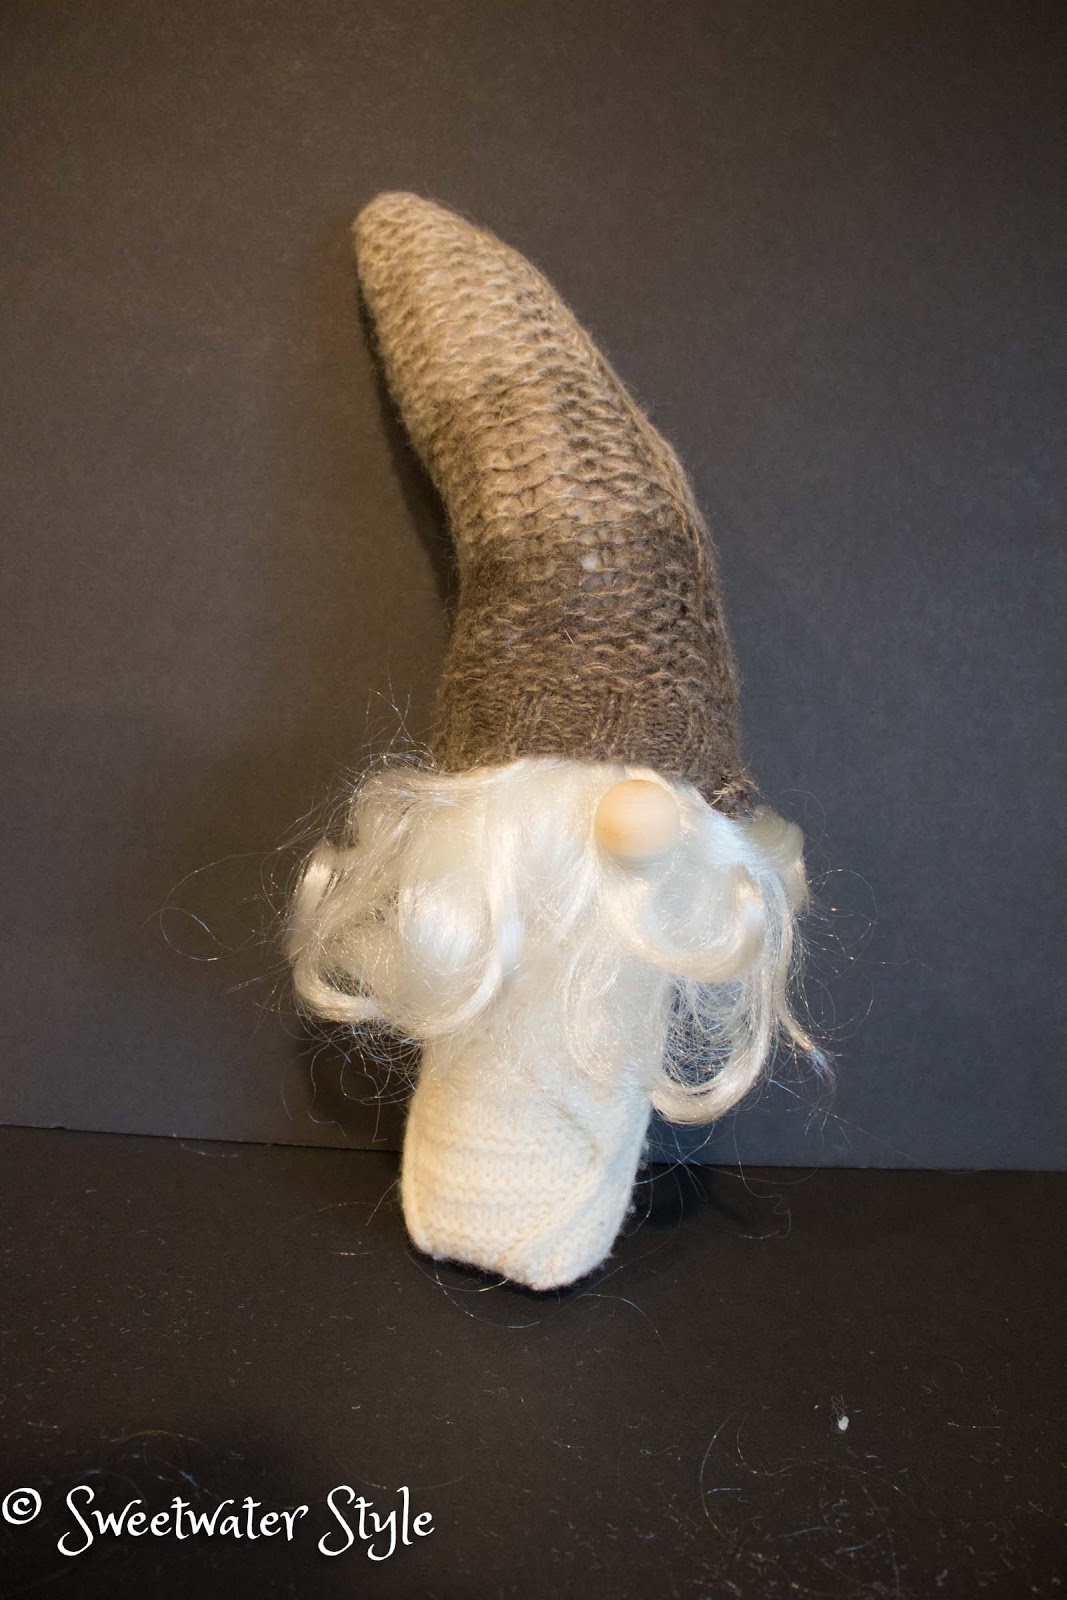
- Sew a triangular hat out of another sweater sleeve. Use an area that has ribbing for the bottom of the hat.
- Glue the hat over the ball. Fluff the beard and trim as needed.
- Glue the wooden bead nose very close to the edge of the hat.
After we made these Gnomes, I started to see the little creatures everywhere in all the fancy gift shops.
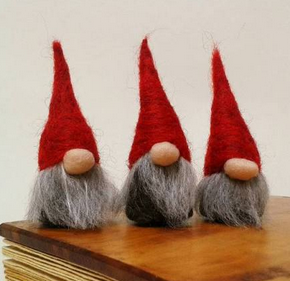
These are for sale on Etsy for $35.
 Look! You can buy 3 Gnomes for a mere $19.00 marked down from $24!
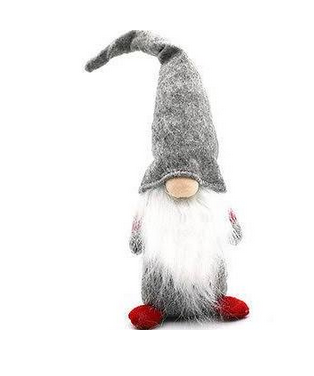
And this guy is super cute….but costs $19 too.
You know me….this was a challenge to see if I could DIY some little gnomes for our Christmas tree.
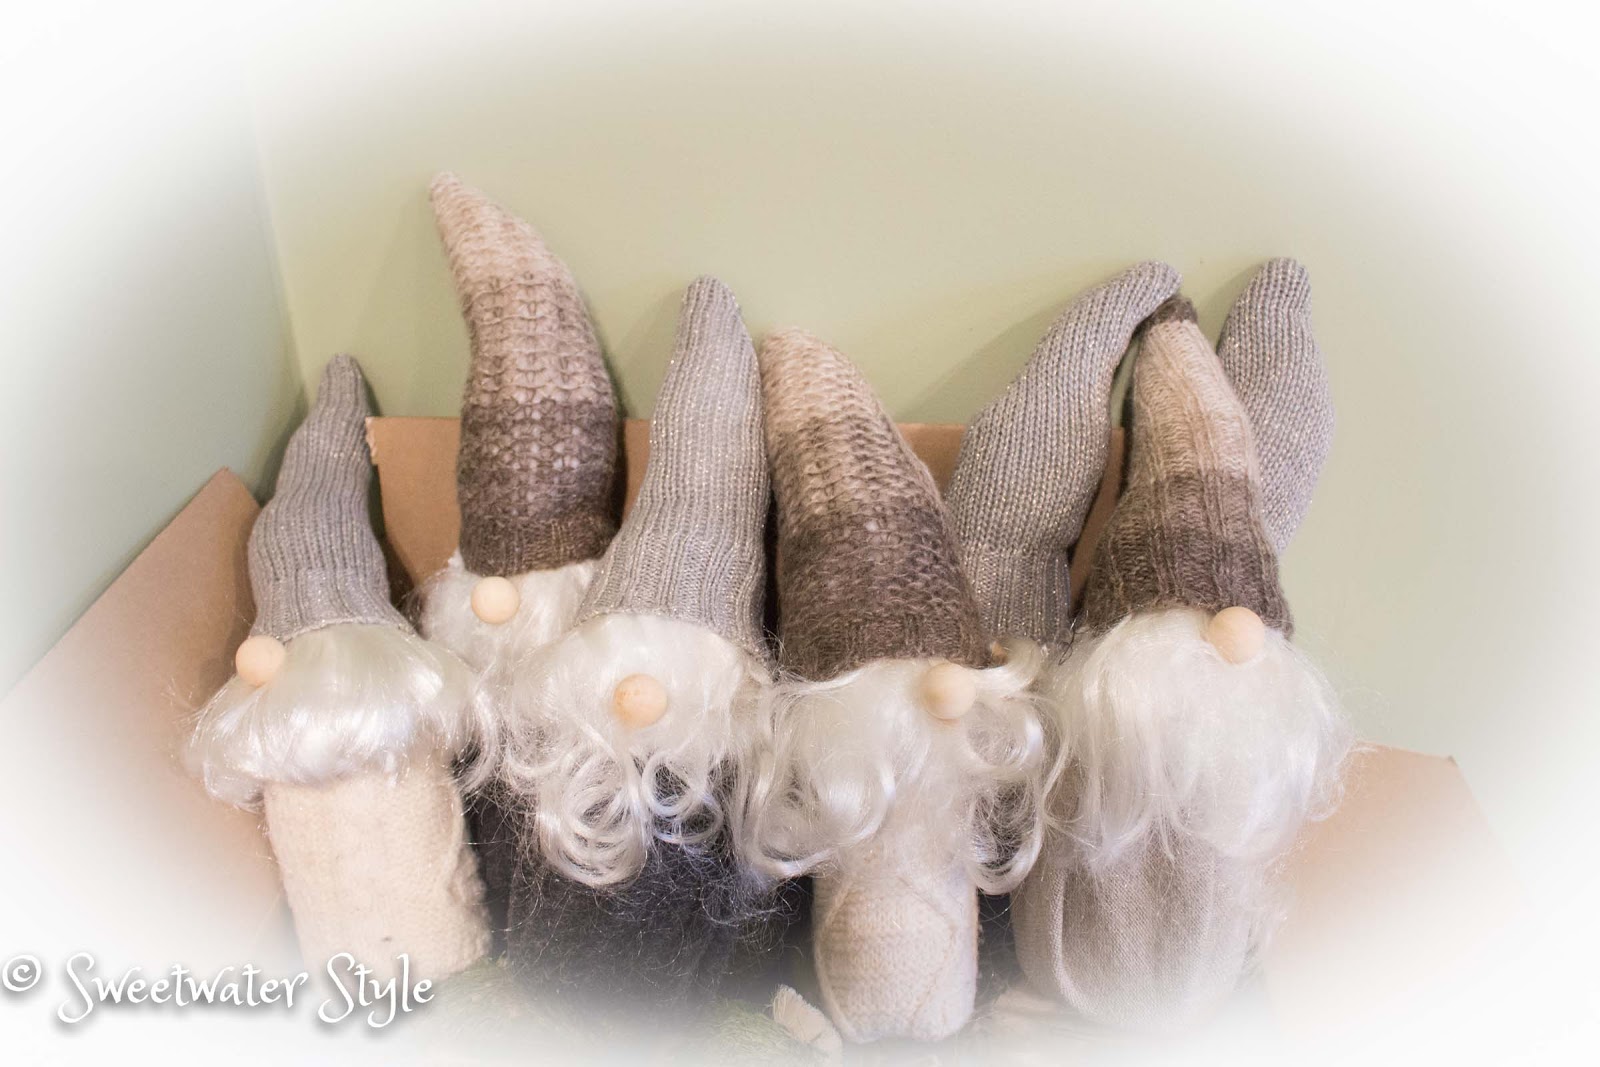
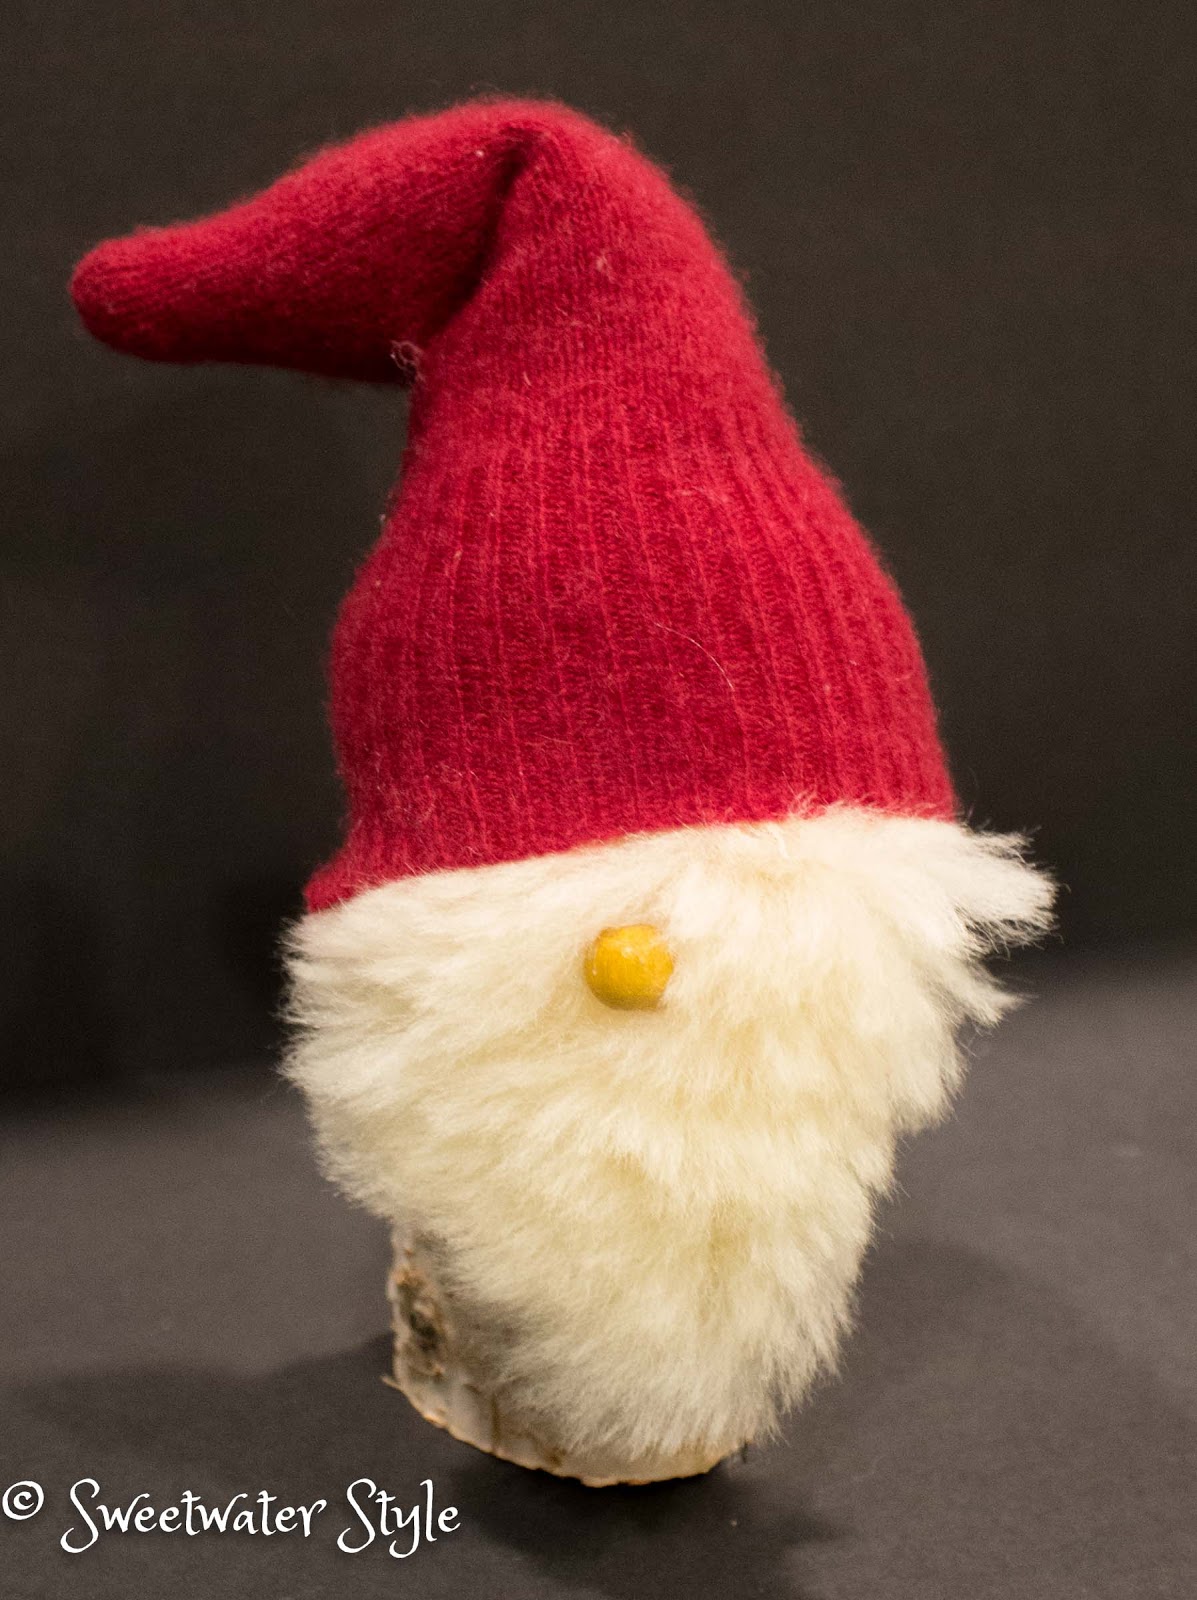
Instead of cardboard tubes and sweater sleeves, this version uses 3 to 4 inch chunks of birch logs.
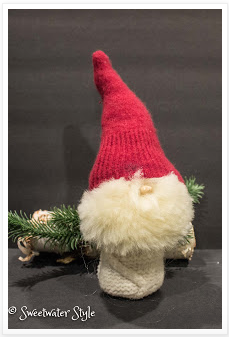
These Tomtens are pretty fancy with their “cashmere caps” made from a worn out sweater.
The beards are made from the costume wigs.
Ahh….then I remembered that our AxMan Surplus store always carries scraps of sheepskin that must be left from cutting rugs or something! I scored a great big piece for $3.50. I knew it would make a perfect Gnome beard!

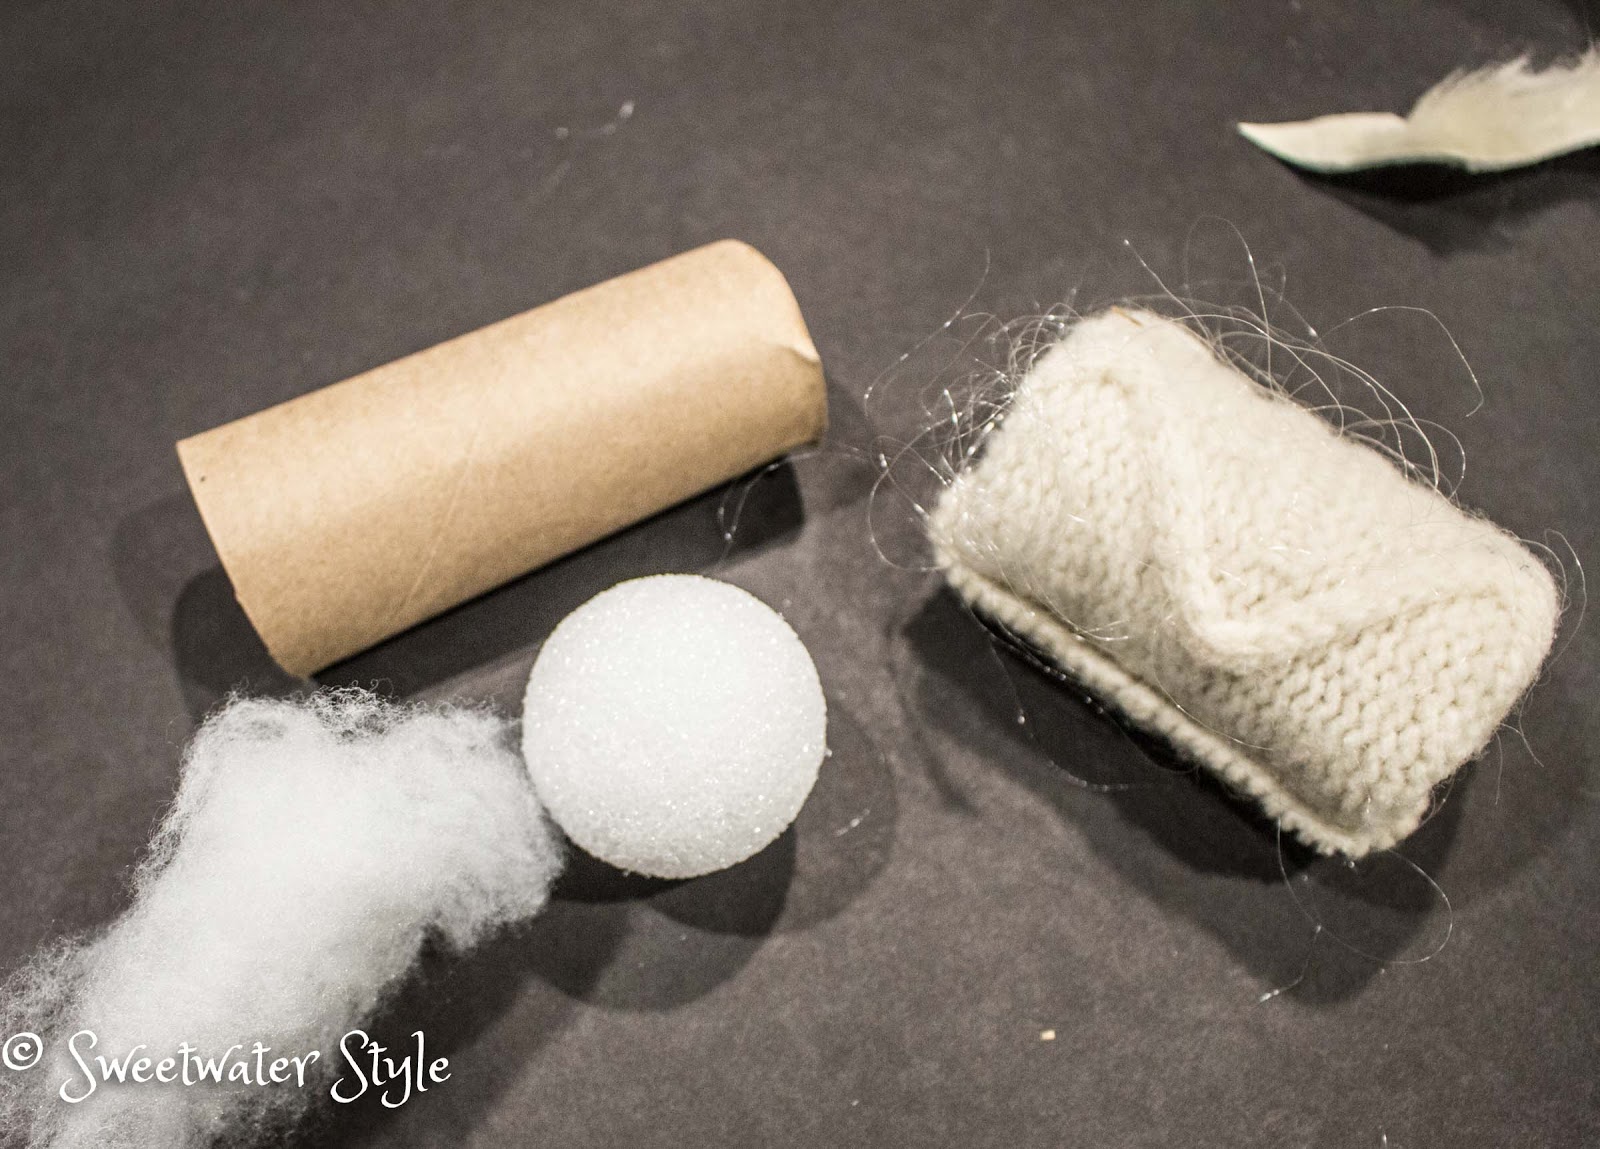
You can certainly use the cardboard tube and sweater technique if you don’t want to take the trouble to cut up a birch log.
The end result is every bit as cute!

I hope this has inspired you to create some elfin magic of your own!
Have a Wonderful Day!

Link Parties
Mila’s Little Things