Use What You Have Challenge

Simple Almost No Sew Custom Shower Curtain

A Long Long Time Ago…..
I posted about the no sew shower curtain in the guest bathroom.  The complete tutorial for how to do this can be found on the link.
This curtain really doesn’t look bad…..but heavens….it has been hanging around for over 7 years!  GASP!

 The dark brown walls will be staying for awhile.  We are redoing the master bath later on this month….and energy and budget for the guest bath just won’t happen.

My challenge:  Find some way to freshen up the room with out spending too much time and little or no money!

If you are a regular reader, you know that for me, many projects start with a fabric inspiration!
Fabric stores are my happy place!
Speaking of happy….don’t these little birds just make you smile?

I love the clean white background.
I love the multiple colors on the birds.
The green is bright and cheerful.
We can pretend the branches are brown…until we have time to paint!

 Here are the simple directions for an almost no sew shower curtain:

To make a shower curtain you will need 2 Lengths of fabric (typical drapery fabric is 54-60 inches wide).
1.  Four yards of fabric will give you enough fabric for a full looking curtain.

2. Cut the fabric in 2 pieces and seam them together (straight seam on the machine or fusible webbing will work…never tried to glue gun….but why not)

3. Cut a piece of fabric that is 8 inches wide from each of the pieces…..I cut this from the long sides of the fabric.  You will have 2 pieces that are 8 x 72.  Fold the strips to make tabs.  I don’t sew these…it has never seemed to be necessary.  Cut the folded strips into 8 inch pieces for use as the tabs.

4. Turn both of the sides of the big square in to make a smooth edge.  You can stitch or use fusible web for this.

5. Fold the top of the square down to make a 2 inch “hem”.

6. Fold the tab pieces over and pin them to the top.  Space them 5 inches apart with a 3 inch “loop”.

7.  Stitch across the top of the curtain at 1/2 inch down and 2 inches down.  This will secure the tabs.
I imagine you could do this with a glue gun too!

8.  Measure your curtain to make sure you know how long you want it….then turn up the bottom for a nice hem.

9. Hang the curtain by the tabs on a tension rod.  I have a regular shower rod with a liner behind the decorative one.

There you have it!

Then it was just a matter of “shopping the house” for some art and accents to fit the new decor.

I changed the mats on these little pictures to white for a brighter look.

This canvas has just the right color scheme for the new room.

The ceramic birds look right at home with their “friends”!

The new update was worth the couple of hours spent.
Even with new towels…I think the total cost was around $50!
My kind of decorating!

Have A Wonderful Day and Stay Warm!

Link Parties

Kate Spade Guest Bedroom Refresh

My latest project is one of those domino effect deals!
You know…..like the “If You Give A Mouse a Cookie” scenario! 
The Sweetwater version goes like this….

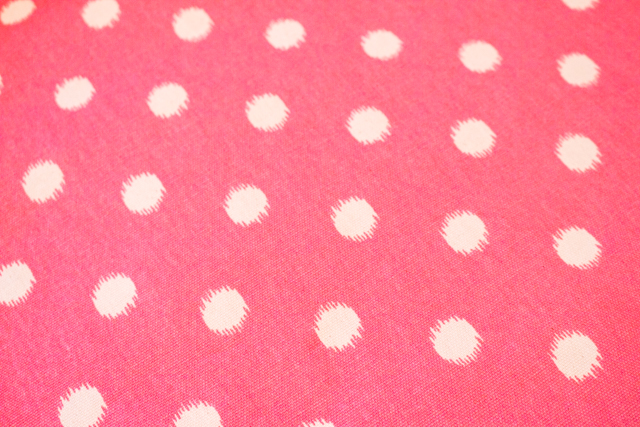
I bought this great looking pink polka dot fabric to make some fun place mats to go with the Desert Rose dishes we inherited from Mr. S’s mom.

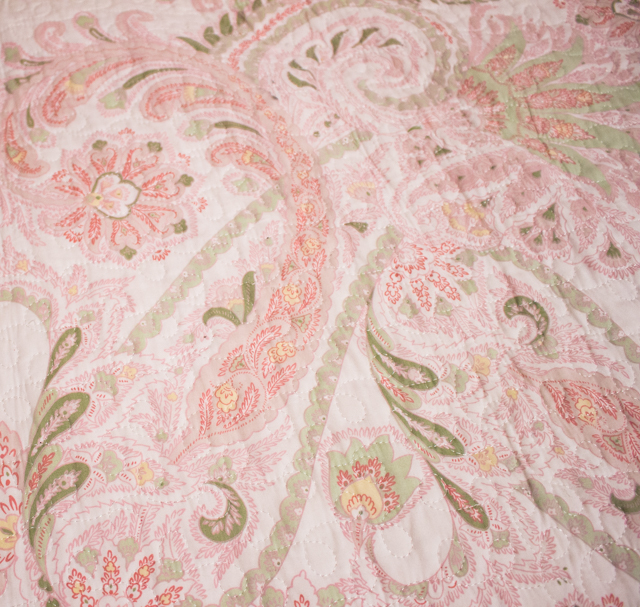
But then….I found this fabric in the stash….and these place mats at the thrift store for $.99!
So now I have eight plain pink mats and there will be eight more reversible ones as soon as I finish making them.

No need to make the polka dot placemats….

What to do??

Pinterest exploration of course!
Eureka!
My pink polka dots are so VERY Kate Spade!

The fabric was the perfect inspiration for a mini-makeover in the guest bedroom.

Well….really it is the Sweetwater Grandboy’s room for sleeping….and I hope he forgives me for the “pink” theme! Hopefully the navy blue pack and play is not a forever part of the room’s decor!
There is no need for BIG changes with the basic decor in the room.
The walls are a creamy white.
 The loveseat in the room is a covered in a pastel chintz with lots of greens, blues and pink.

The little white wrought iron bed is the one that I slept in when I was little….and it was handed down to me from my great aunt.  I believe it is over 100 years old!
This bed sits against the wall like a daybed.

Using a king sized coverlet is much less expensive than finding a custom daybed cover.
The coverlet also has pinks and greens.
Pardon the awful photo….the other king sized bolster pillow for the back of the daybed is the perfect size to prop up Mr. S’s new knee while he recuperates!
Trust me….soon this will get some Decor TLC!

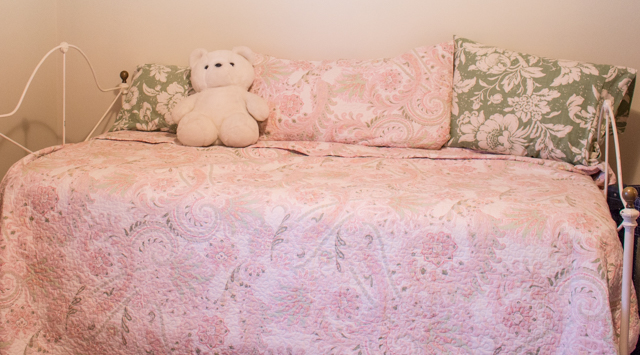
The first step for the mini makeover was to make a new valance!

 This is a almost no sew project.
The 1 x 4 mounting board was already there….I just had to staple on the new pleated fabric.
Camilla has a fabulous step by step tutorial for this project here on her Effortless Style Blog.

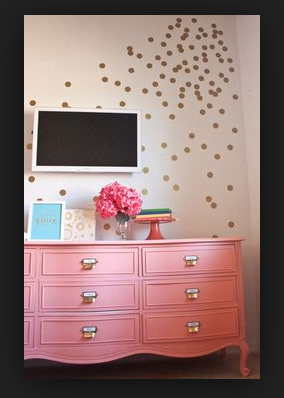
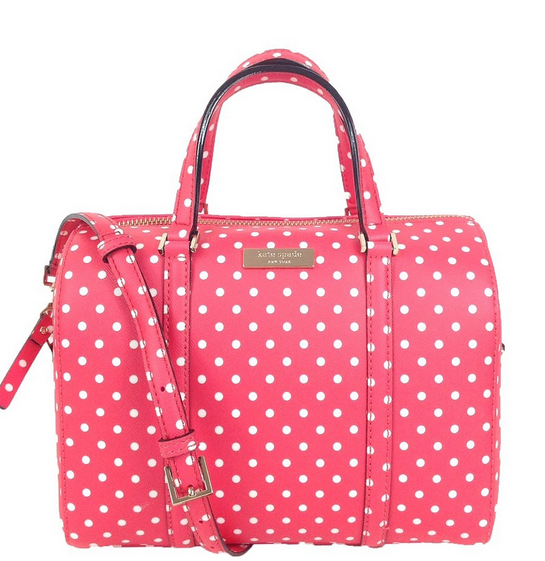
I found this little lovely in my search for Kate Spade style decor inspiration.
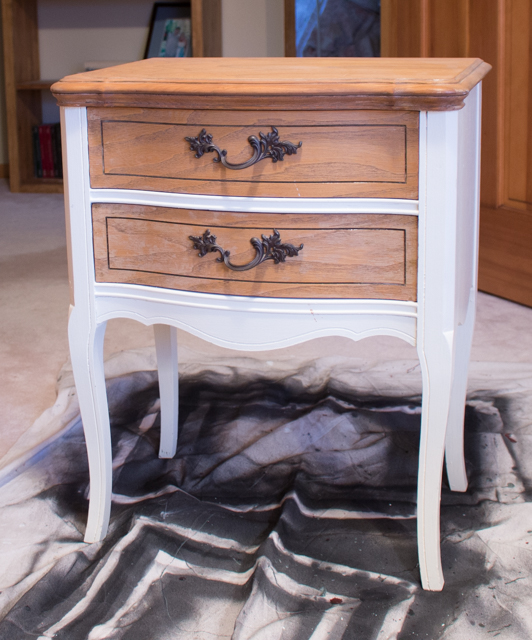
HMMMM……

Look at the little chest that has been in the guest room for years….

All it needed was a little pink paint!

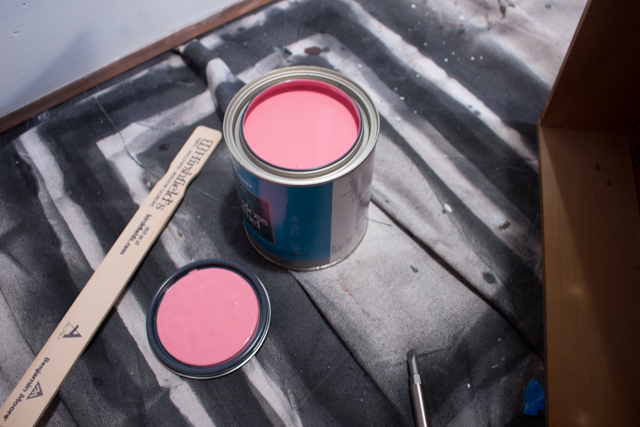
Some VERY pink paint!  In a high gloss finish!
Mr. S thought I was crazy….but what else is new?

After a couple of coats and some new shiny bright hardware….the little chest is so “very Kate Spade”!

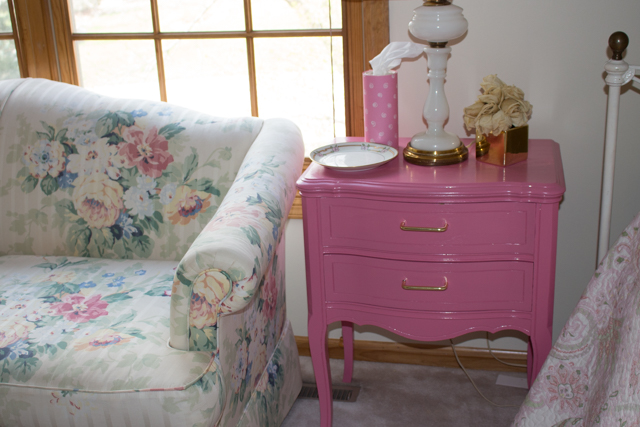
I absolutely love the way it turned out….
There is more to the little mini-makeover that I will share with you soon!
Some green stripes and some golden dots are part of that….

But for now….the beautiful Spring day is calling me to the garden!

Have a wonderful day!

Link to PART 2 of the mini-makeover

Link Parties

Use What You Have Winter Mantle

January is my “Use What You Have” month!
January is such a great month for organizing, making TO DO lists and generally getting life back in order after the holidays.  
It is time to take the challenge to stay out of stores and not buy “ANYMORE STUFF”!          Sweetwater is full of STUFF!   
The look on this little guy’s face pretty much says it all!  
When I look through closets, shelves and drawers, the refrigerator and freezer, it never fails that I find “STUFF” that is almost better than something new!  
The real challenge is to see the “STUFF” in a new and creative way that will be something to “RELISH”. (remember that relish is my one big word for 2016)
Here is the family room mantle decorated entirely with “STUFF” we already have. 
  • The birch branches are leftovers from the holiday decor workshops.  I made the “forest” by sticking them into a little galvanized planter that was out in the garage.  The planter still had the dirt inside.  I just poked the sticks and branches into the dirt and covered it with some of the left over moss laying around.
  • I always buy those cute little cedar trees to use as holiday accents.  I put them in two matching off-white Haeger pots from my collection.   Putting them in a prominent place will guarantee that I keep them watered so they don’t get all crispy and die!
  • The birch pillars candles were hand made by Mr. S.  They have a spot drilled in the top that is just the right size for one of the inexpensive votive candle inserts.
SIMPLE…..NO COST!
I am “relishing” the look and the thriftiness!
I challenge you to do the same kind of “recycling” of your own stuff at your house!
Have A Wonderful Day!

Fall Decorating Ideas-Use What You Have!

The first day of Autumn is less than a week away.
I absolutely love the song “Try to Remember”
If you aren’t already in the mood for Fall….this song will definitely help!
Click on play and let the Brother’s Four serenade you while you read the rest of the post.

I have decided to move slowly into full scale Autumn around here.
I also am committed to NOT spending ANY money to add those touches.

I started by gathering up all of the obvious Summer Decor.

It all went on the kitchen table…..forcing me to actually put it away before I started to change things out!  
Then down to the storage closet AKA the huge mess!  I dug out the storage bins of fall decor.  It is always interesting to see what is actually in those bins!
This sad little wreath was hanging in the closet! 
It looks pretty barren and was in obvious need of a “use what you have” update!
HMMMMM….
There was a whole bag of these lovely dried Magnolia leaves that was left over from last Christmas.
all it took was a little work with the trusty hot glue gun……
Click to see the results
 
The leaves filled out the wreath.
I didn’t even take the old stuff off…just filled in the bare places

The wreath leans on the wall of the Baker’s rack with a display of those realistic looking pears that I got at Goodwill last year.  You can’t really see the print in the frame….but it is a very “fall like” batik print of two Mallard Ducks in a pond!
The next thing was another “use what you have” project.
I have several enlarged photos that have been edited with an $2.99 APP called Waterlogue

 
 I use the app and play with an image until it has the look I want.
The mat is cut for a 16 x 20 enlargement.
This is a photo from a trip we took to the Gulf Coast a couple of years ago.
The beachy look is perfect for Summer….but not very autumnal!
I leave all the edited enlargements in layers behind one another….
So it was a simple task to just bring the Fall image to the front!
Instant FALL Decor!

This is the original “un”Waterlogued photo!

Quite an artistic change….with little or no effort!

 The last two last little projects in the kitchen were simply done by looking through the storage bins to find items to create little touches of Fall.

I found this great two tiered stand at a consignment shop a few years ago.
It is a great way to display a vignette with a few dried pomegranates some grapevine orbs, sprigs of Chinese Lantern and preserved leaves.

Did you know that you can dry a pomegranate just by setting them in a window and turning them every so often so they don’t spoil?

I think this area above the kitchen desk is supposed to be for cookbooks…..but since I never use cookbooks anymore….it becomes an area to decorate!

The faux tomatoes and autumn leaves are just “plunked” into the Goodwill Copper Collection!

Look closely at the little acorns….they were a 99 cent Goodwill  find.
I highly recommend that you always browse the artificial flower aisle at the thrift store.
You will often find high quality decorative sprays for very little money.

Well…..I am done with decorating for today….and since Autumn doesn’t officially start for awhile….there isn’t any rush!

HMMMM…I think the front entryway will be the next area I tackle!
Stay tuned and Have a Great Day!

Link Parties
Rooted in Thyme The Charm of Home    
DIY Vintage Chic  Bowdabra Showcase


Thrifty Patio Table Refresh!

The lovely April weather here in Minnesota this year is a bit deceptive!  Days in the 70’s make it a joy to get out and start clearing the gardens.  My solution to ease the  “gardening aches and pains” that are a result of way too much bending and pulling and digging is sitting on the deck with a cool beverage! 

Photo of the deck in 2012

The deck truly is a three season extra room in/out of our home!

We love the seating area with chairs around a round table with a copper inset for a planting.

Well….while I was sitting there relaxing…..
I noticed the surface of the top of the table!

YIKES!  Minnesota winters are hard on things!

In other years, I used Gel Stain and Polyurethane to refresh the surface! (Click to see how I did that)

But after doing that a couple of times, the situation called for something more drastic!

You may wonder…..why doesn’t this woman just buy herself a NEW table for heaven’s sake?
Well…..in all honesty it is a big pain to haul the old table out….figure out how to recycle or dispose of it…..then shop and assemble a new table!
Besides…..we love the shape of the round table and the insert that is perfect for flowers or other decor!  If we wanted a table like that….with a surface that would not deteriorate it would be a tad to spendy for this thrifty (CHEAP) person!
As you can see…..Lowes has JUST what we need!

A little sanding with a sanding block…..

Some Gloss Black Enamel paint…..
And a cheap throw away brush (because I decided to be lazy and not have to clean my brush)…..

Two coats later the table looked like this!
Not bad….but I felt like it looked a little like freshly tarred blacktop…..not exactly the look I was going for.

The easy fix was sort of a faux slate treatment achieved with a couple of passes with some bronze and black spray paint!
I sprayed and used a stiff brush to spread out the obvious spray spatters.

The final results!

This is a case of “Use what you have”because the paint was all leftover from past projects!

The cost for this was a total of $1 for the disposable brush!

Even better…..the time it took to do this was way less than replacing the table we love!

Have A Wonderful Day!
We are off to a baseball game this afternoon!
Link Parties