no sew

Simple No Fuss Outdoor Tablecloth

The table on our deck has a glass top.
The shape and size of the table is great.
The metal edge matches the other furniture.
BUT….
I obsess over all the water spots and other outdoor “schmutz” that gets on the glass!
I really do not want to have to wipe the table down every time we go out to use it…..
And just looking at it….is annoying!
I want some sort of “semi-permanent” covering on the table.
It needs to be weather resistant and sturdy.

I found some table cloth ideas out there:

I found a mitered fitted cover at Smashed Peas and Carrots, 

http://smashedpeasandcarrots.com/the-perfect-fit-tablecloth-tutorial/

 There is an elasticized tablecloth on Amazon….heck…I suppose I could even make one of these….

I made this one a few years ago.  It has weights sewn in the hem to keep it in place.
Read about it here:  http://sweetwaterstyle.blogspot.com/2016/07/almost-no-sew-outdoor-box-cushion-and.html

I still have this…but the decor on the deck has changed.
I headed to the fabric store to find an sunbrella fabric to make another just like it…

AND THEN…I came across something called Ballistic fabric.  It looks like the stuff that outdoor chairs have for seats.
I got mine at a fabric outlet store for 9.99 a yard.  Here are some specifics and a source if you are interested.

The plastic woven fabric is the perfect solution.  It just needed to be cut to size.  By cutting it exactly to fit into the metal frame,  the fabric almost looks like it has been “glued” down.

The raw edge doesn’t look too bad, but I decided to use the built in embroidery stitch on my sewing machine to add a little “fancy”.

This simple solution makes a nice alternative to constantly wiping away water spots.
The ballistic cloth can be scrubbed with a brush and hosed off when it does get dirty.

Soooo….Simple!
Have A Great Day!

Goodwill Clothes Alteration Hacks

I haven’t posted about thrift store shopping in awhile.
Never fear….that does not mean I haven’t done any thrift store shopping!

This week I was perusing the selection of pants in my closet.  Yikes…it is filled almost entirely with black pants and jeans leggings with some fancier pairs for dressier events.
I pretty much live in Yoga pants until it is time to go out.  Then casual is the rule. Ahh…the life of a retiree!

I headed to the thrift store this week with the goal of finding some summer pants that were not jeans or black!  It is usually a mistake to go to the thrift store with a specific item in mind.  Mostly that will be disappointing.

But the Good Will gods must have been watching over me this time.
I found not one, but three pair of summer pants.
AND…..a super cute summer sundress.

But here is the deal!
They were the perfect PRICE….but not the perfect fit.

Instead of passing these bargains up….I knew with very little time and effort I could cure what ailed them.

 I am pretty short so almost any pair of pants is going to need hemming up!
The red pants were the right length but were not tapered enough…..
The white pair and khaki pair needed hemming…..
The sundress hit the floor and then some on little me….and I wanted tea length because I know I will get more wear out of it.

Knowing how to do some basic alterations and/or tailoring is one secret for success at the thrift store.

If you think you have no sewing skills…..remember….the items you are working with cost less than a glass of wine in a restaurant!  You can take a risk and see what happens.

Here are my favorite alteration hacks:

Hemming: 

  • Sometimes the easiest thing to do is just turn the existing hem under and do a few tacks with a needle;
  • Fusible hem tape is a great time saver if you don’t feel like sewing.
  • Tightly woven knits like athletic leggings with lots of spandex can just be cut off with no stitching.  You will be amazed at how well the raw edge stands up to washing.
  • Alas…sometimes you need to do an actual hem….but don’t stress with finishing with hemtape and all that.  Just cut them off….turn it up and stitch. 

 Straps:

  • So many cute tops and dresses have spaghetti straps.  When you try on an item….pull those straps up to see if the top looks better. It is an easy fix to tack the shortened strap to the inside of the back.  This trick fixes a couple of fit problems….saggy bodice, loose underarms, and in some cases, pulling the straps up makes the waistline fit better too.

 
Under the arm:

  • When you see a top that looks just a little too big, sometimes it is a matter of just taking in the side seam.  This works especially well with sleeveless tanks.  The added benefit here is that you can fit the underarm area and taper it to the bottom.  This gives a little more room for your bottom too!

Baggy Legs:

  • I like the look of fitted skinny legs on most casual pants.  These cute red pants are a great example.  By tapering the inside leg seam just 1/2 and inch, they went from way to “preppy” and hard to find shoes for….to perfect casual with sandals or flats.

Every one of these alterations can be done with a straight stitch with the sewing machine or a few simple hand stitches.
It is definitely worth remembering when you find something wonderful at the thrift store that has “possibilities”!

OR….you can call a friend who sews 🙂
OR…you can find a tailor shop.

AND….all of the above also works for any bargain shopping you do.  If you find a good deal….but the fit isn’t good….think of the possibilities for a quick alteration.

Wishing you a wonderful day!

How to Upholster an Old Office Chair

 Yup…..we all have at least one office chair.
An office or task chair is one of those necessities that you really can’t do without.
Even new ones usually lack any kind of decor charm.
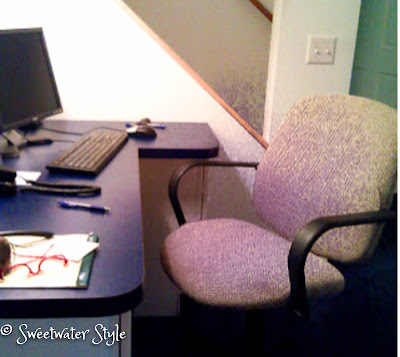
The one in my sewing room IS NOT new…..and it certainly has no charm!

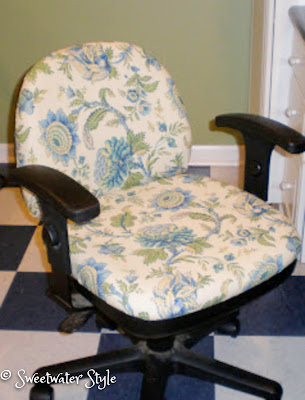
I learned to “upscale” an office chair a couple of years ago to make an eyesore part of the decor.

I could not believe how easy it is to do.
Well….it is easy to do if you have the right KIND of chair.
Notice that the cushions on this chair are inserted in a plastic frame.
All it takes for this project is:

Some really pretty fabric!

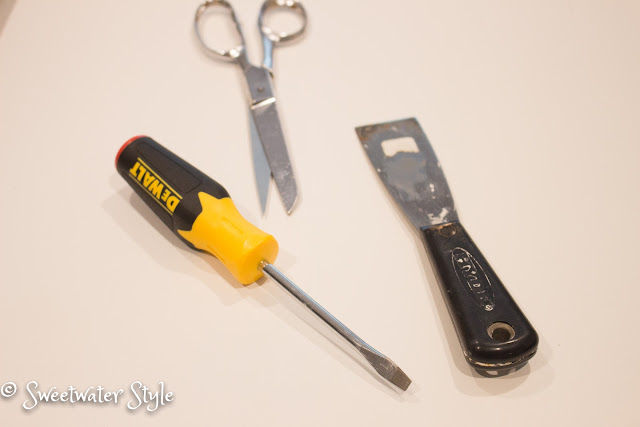
AND…..a couple of really basic tools.

It is just a matter of cutting two pieces of fabric the size of the cushion with about 2 inches of overlap.

Most decorator fabric is 54-60 inches wide.
You only need about a yard of fabric to do both the back and seat cushion.
But of course you will need to measure to be sure!

Cut the fabric to size.
Round the corners off to reduce the amount of fabric as you go around the frame.

It is a simple matter to just push the fabric in between the plastic frame and the cushion.


The putty knife usually works well.
Sometimes the screw driver helps to pull the frame out a bit to get the fabric started.

Make sure to pull and stretch the fabric tight.

One suggestion is to do part of the top, then part of the bottom, and part of each side.  This helps you get a tight fit.
Finish by going all the way around.

There is plenty of give in the plastic to get the fabric in there.

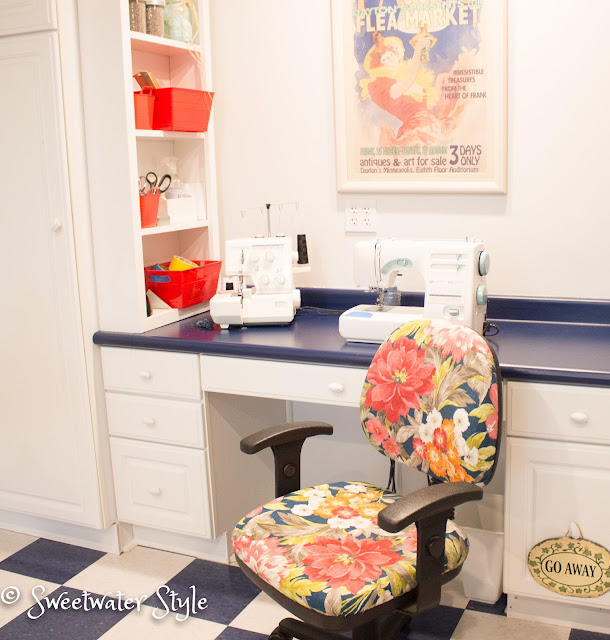
For about $10 and an hour of work time…the ugly utilitarian necessity….now looks like part of the decor!

When I walked by the framed poster that was hanging in a different room….I said “AHA!”
The colors couldn’t be a better match.

Here are a couple of posts I did a few years ago that give even more details.

The “manly” desk chair for Mr. S.

The “old version” of my sewing chair.

I hope this inspires you to upscale your own chair.

Have A Great Day!

Link Parties
Coastal Charm
Make It Pretty Monday 
I DIYed That 
Eclectic Red Barn

Summer Decorating on a Budget-Part 2

Part 2 of Summer Decorating on a Budget can really be summed up by the following:

I admit freely to being a “fabric”holic!
 
The summer look for the lower level family room has been the same for a long time.
The navy “monster” couch and navy carpet seemed to lend themselves to a red, white and blue theme.
I was quite simply “over it”.
The natural place to go to solve the problem was the fabric store.
I wasn’t sure what I was looking for……
I needed to “immerse” myself in all the pretties….
These are the fabrics that called to me and made sense with the blue carpet and white walls.
Best of all….I happened to be there on a day when all decorator fabric was $3.99 a yard.
Be still my heart!
Too funny….when I look at these 3 fabrics lined up in the photos….I have to say I was a bit of a risk taker.

You might be saying in true Minnesota nice language…..”well those are different”!
But look how the redo turned out using these unlikely pairings.

I have always loved chinoiserie fabric.

Vocabulary lesson: 
chinoiserie  chi·noi·se·rie
SHēnˌwäzəˈrē,ˌSHēnˈwäz(ə)rē/
noun
noun:  the imitation or evocation of Chinese motifs and techniques in Western art, furniture, and architecture, especially in the 18th century. 

Using just a bit for the seat cushions on the game table was a great way to have some that doesn’t over power the room.
Would you believe that I just used the glue gun to attach the fabric on these?
Why?  Because I want to be able to take the summery look away and use the red pattern underneath in the winter.  If I used the staple gun….removal would have been a huge pain!

The cushions on the cedar chest “window seat” got my famous almost no-sew box cushion treatment!
Here is a link to the original post….http://sweetwaterstyle.blogspot.com/2011/08/almost-no-sew-box-cushions.html
I got a big laugh when I looked at the statistics for this post and saw that it has gotten almost 10,000 since it was published 5 years ago.  I guess that means that this is something worth doing? 🙂

Big fabric envelopes made from the floral fabric were an easy way to switch out the couch cushions.

The ikat fabric is a fun look for the ottoman.  
Yes….you can easily cover an ottoman with just a couple of seams on the sewing machine. Here is the post that shows you the steps.                   EASY ALMOST NO SEW OTTOMAN                                                            I left the red and blue underneath so the new fabric can easily lift off.
I still need to do a bit of “red removal” and shop the house for things that will fit the new colors.
but even though the temps are back in the 50’s around here….I know that it soon will warm up and now…..

No Sew Tailored Bedskirt Tutorial

A couple of weeks ago, I bought a new comforter set for the guest bedroom. It isn’t fancy schmancy…just a “bed in a bag” deal from Target.

The price was right.
So  into the cart it went.

When I got home….
I took the bedding out of the bag.

It looks great

The print is nice.
It is an update that still works with the paint color in the room.

The texture of the fabric is really soft and smooth.

I was super happy with my purchase…..until….I unfolded the bedskirt.
That is….if you can call a sleazy, lightweight piece of gray fabric a skirt!
There was no pleating or gather to the thing.
It hardly covered the edge of the bed and gapped at the corners.
I knew I would have to upgrade this in short order.

I purchased of 3 yards of this great looking gray upholstery fabric at my favorite fabric outlet store.
It cost $10 a yard.
I wanted a heavy weighted fabric so that the bed skirt would look almost like the box spring was upholstered.

If you are a regular reader, you know how much this seamstress loves a “NO SEW” project. This is a perfect example.

I started by laying the fabric on the box spring and sort of playing around with how it would “turn the corner”.  I realized that if I mitered the corner, it would look like upholstery.
I measured the height of the box spring and added 6 inches.

2 inches for the hem
4 inches for the part at the top to attach to the box spring.

I cut two long pieces of fabric…..one from each side so that the finished selvage was along one side of each piece. That way it would have a clean look without having to finish it.

The two long pieces were sewn in the center with a simple seam.
*disclaimer…..somehow one seam still seems to rate as a no sew project.
If you don’t have a sewing machine….you could actually use stitch witchery to adhere the two pieces together or use a simple hand baste.

I used fusible web to hem the lower edge.  This is a case where “no sew” is better than stitching.  The fused hem will stay completely flat with no stitches to show.  The important tool here is the iron.

Once the long strip was hemmed, it was time to attach it to the box spring.

I used simple straight pins.
I pinned down into the box spring every 4 inches or so.

 Straight pins aren’t the best thing to use.
They tend to get pulled out over time.
I wanted to get this project done.
I didn’t want to wait until I had some upholstery screws.

BUT……

I have some of these nifty little guys coming from Amazon.

They were only $6

They screw into the surface and won’t come out….so I will replace the pins with them when they arrive.

Getting the skirt pinned to the bed was a 10 minute project.
Mitering the corners was also simple and makes the clean wrapped look I was after.

Once this was done….we put the mattress back on the bed and made it up with the new comforter.
I think the tailored look and quality fabric on the skirt elevates the look of this typical “bed in a bag”.

And the best part was….it was “ALMOST NO SEW”!

Have A Creative Day!

A Sunny Simple Life