use what you have

How to Make An Outdoor Light Swag

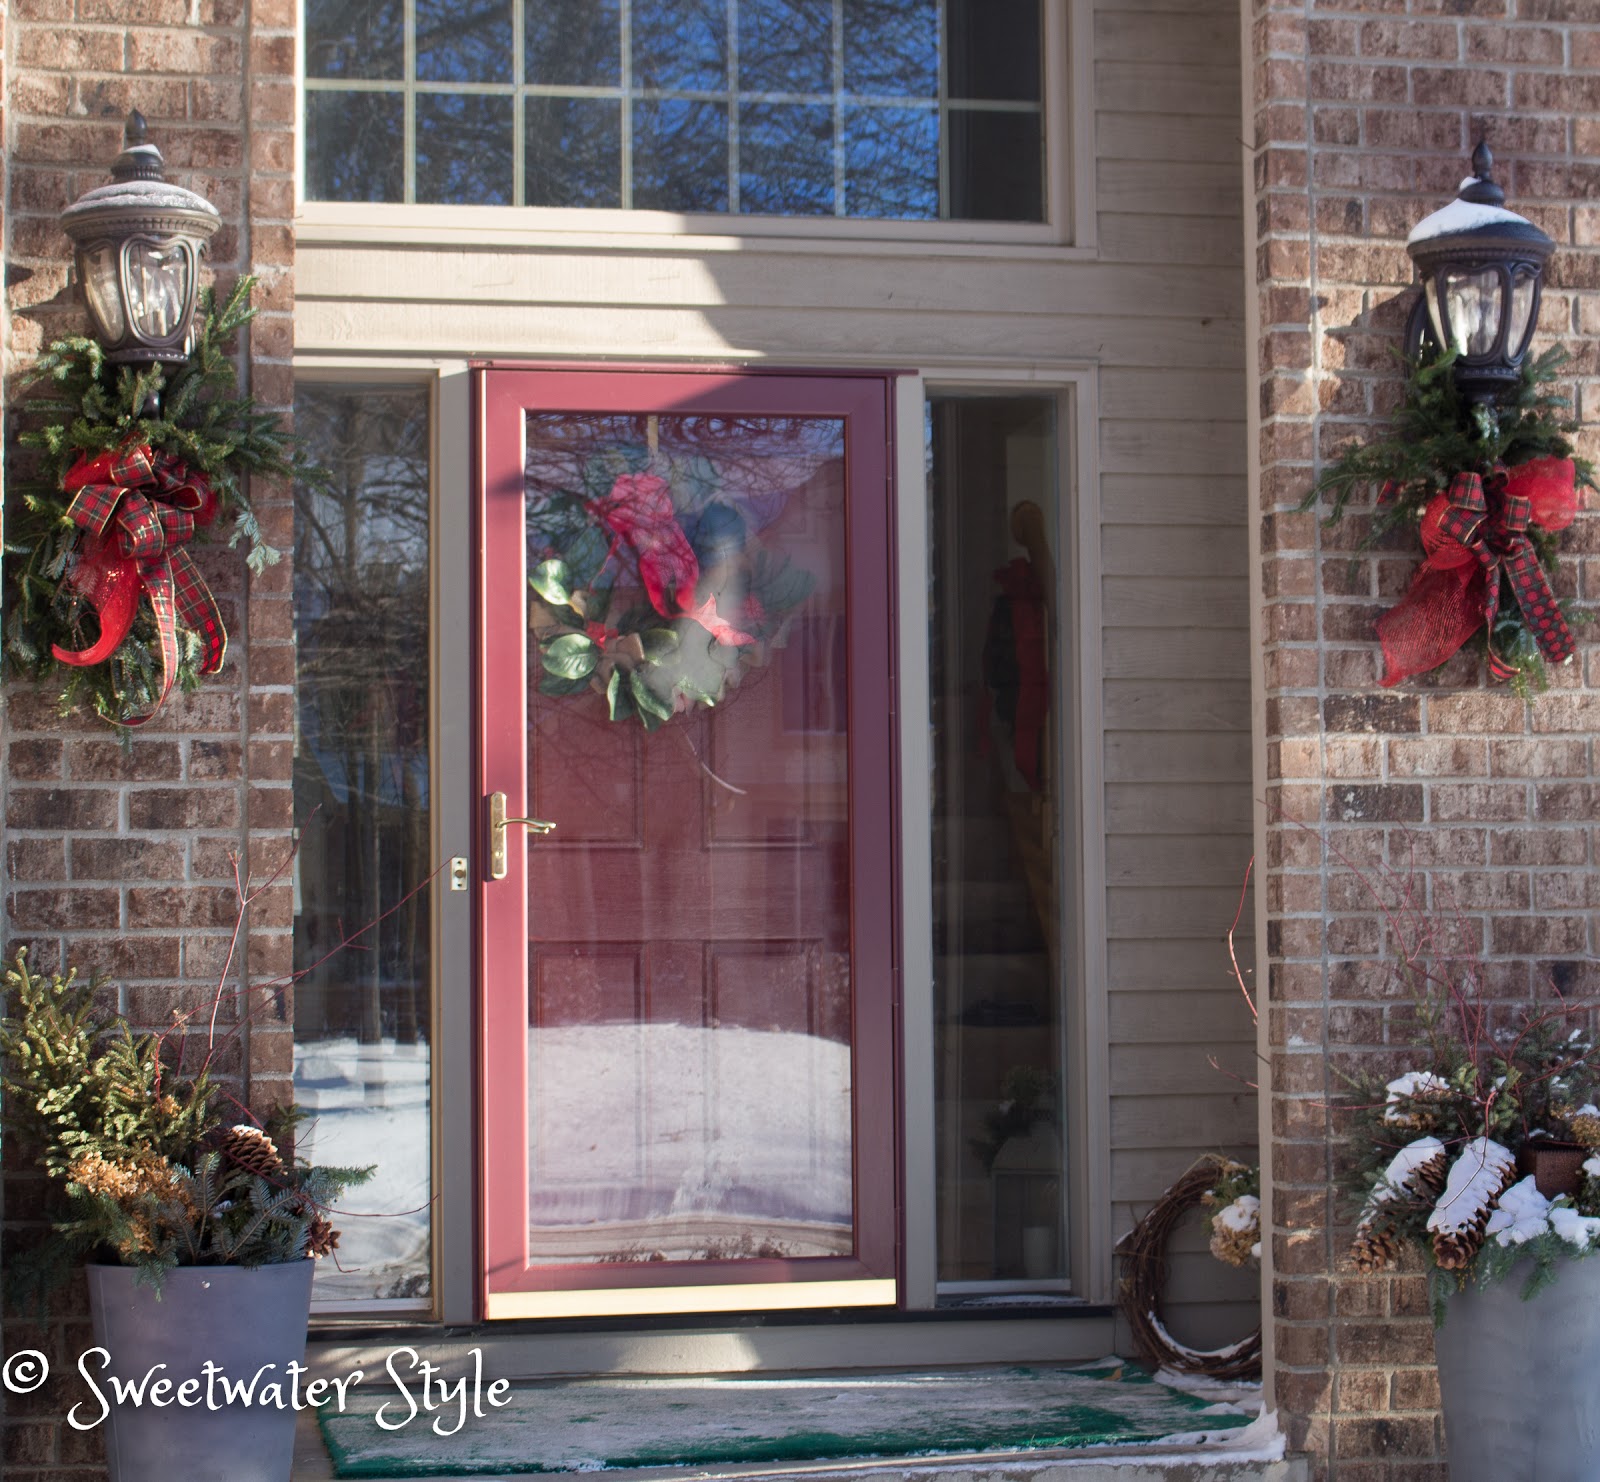
The front of the house here at Sweetwater has five light fixtures.
Two on the sides of the door and three across the front of the garage.
So nice to have all of that light.
Not so nice if I want to decorate those lights for the holidays.
Buying swags for FIVE lights is really not an option for someone as CHEAP thrifty as I am!
So over the years, I have learned to make my own using stuff that is almost free.
Read on to learn the trick behind this pretty swag.
 
Did you notice how this swag has a lot of dimension from front to back? 
I used to just gather up some greens….wire them together in the middle and tie it with a bow.
They looked okay but were sort of flat!
AND THEN….
I discovered a trick for making these fuller versions.
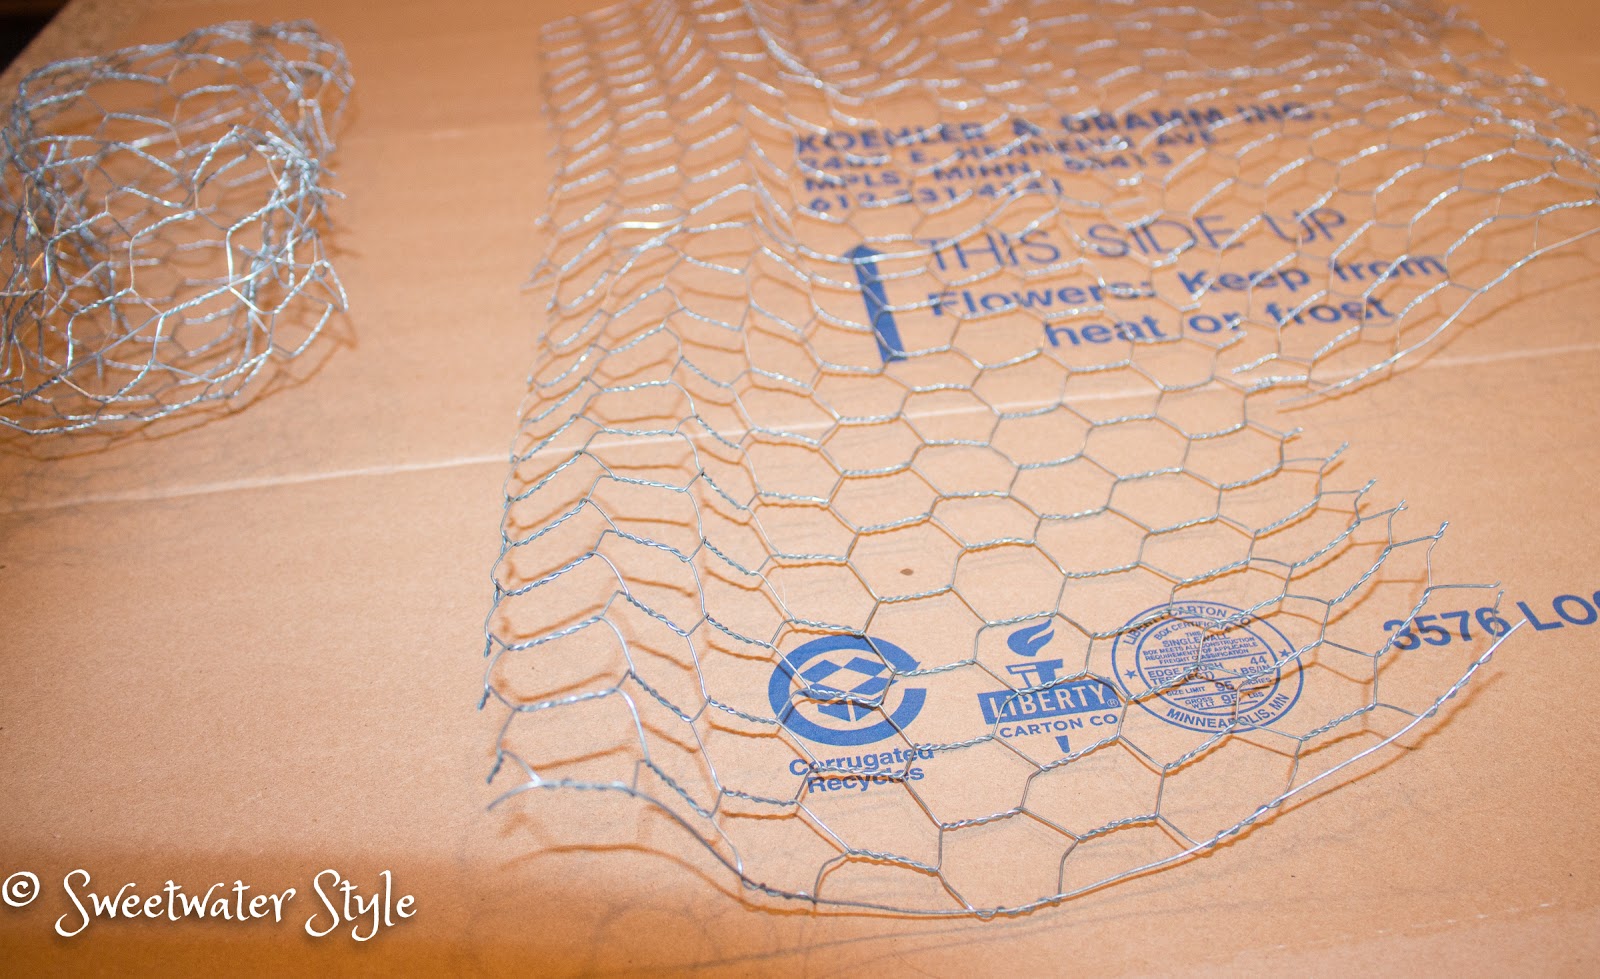
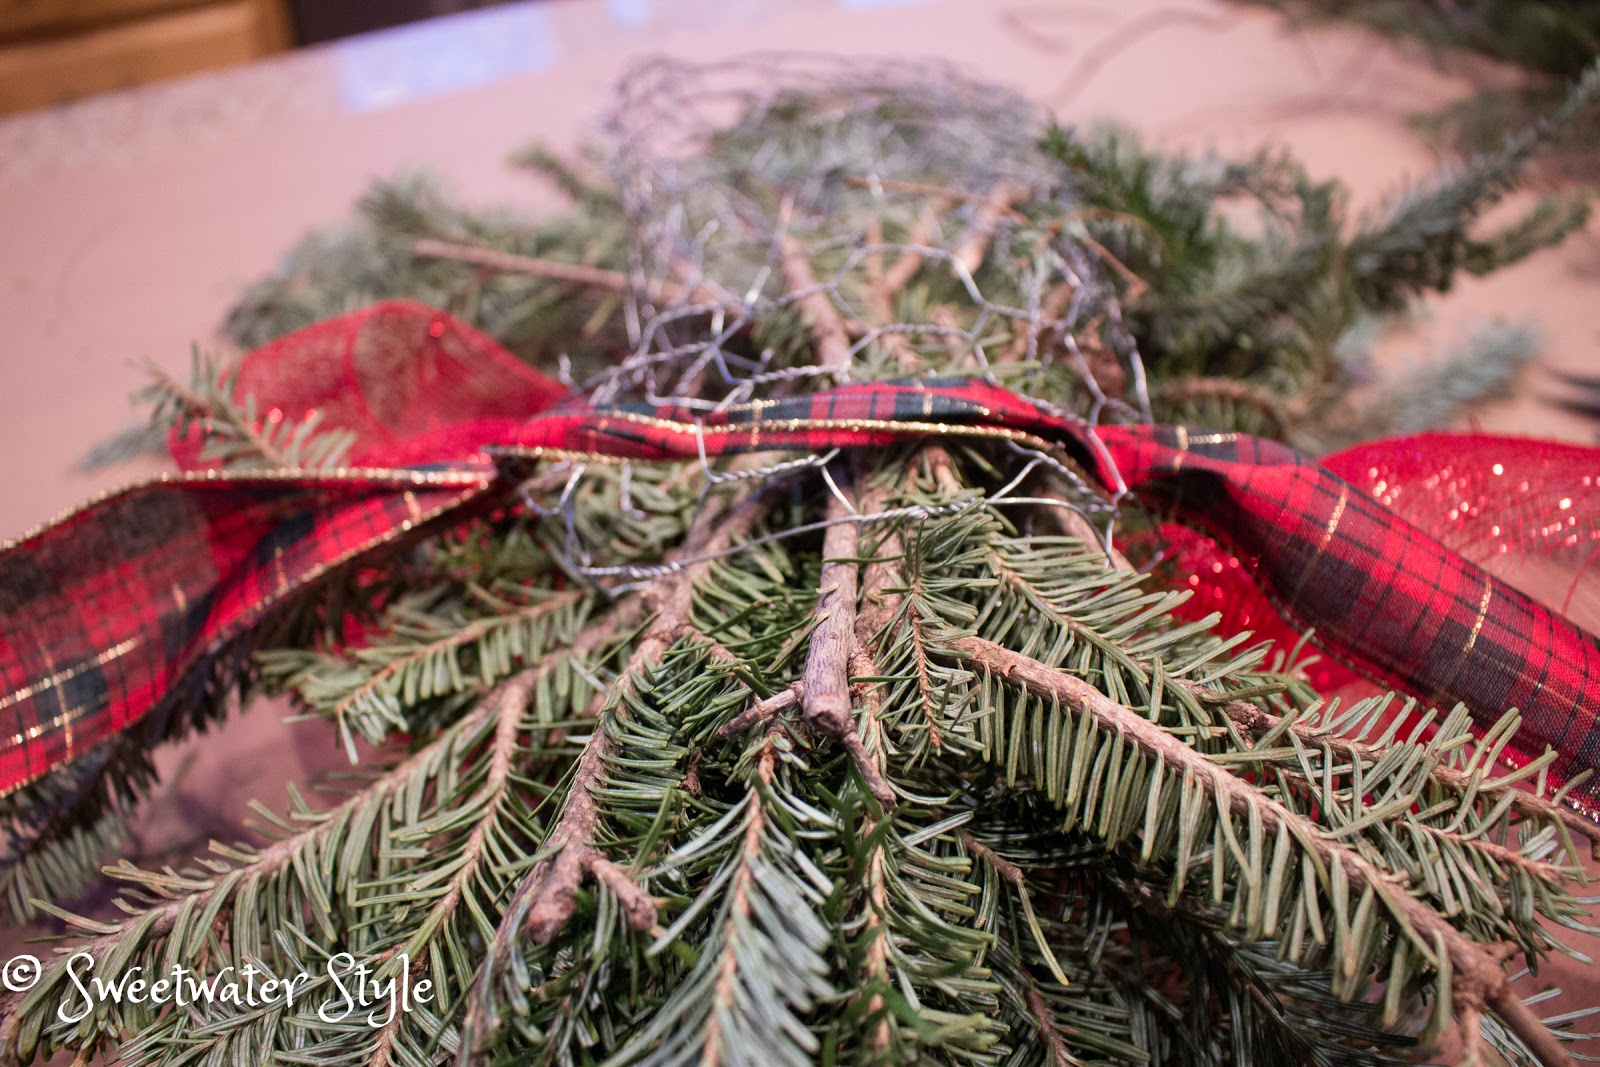
 
Chicken Wire! 
An eight inch strip of chicken wire can be cut using a sturdy snipper.  I am so lucky that Mr. S gifts me with these romantic type presents!  I guess he knows what I will actually use!
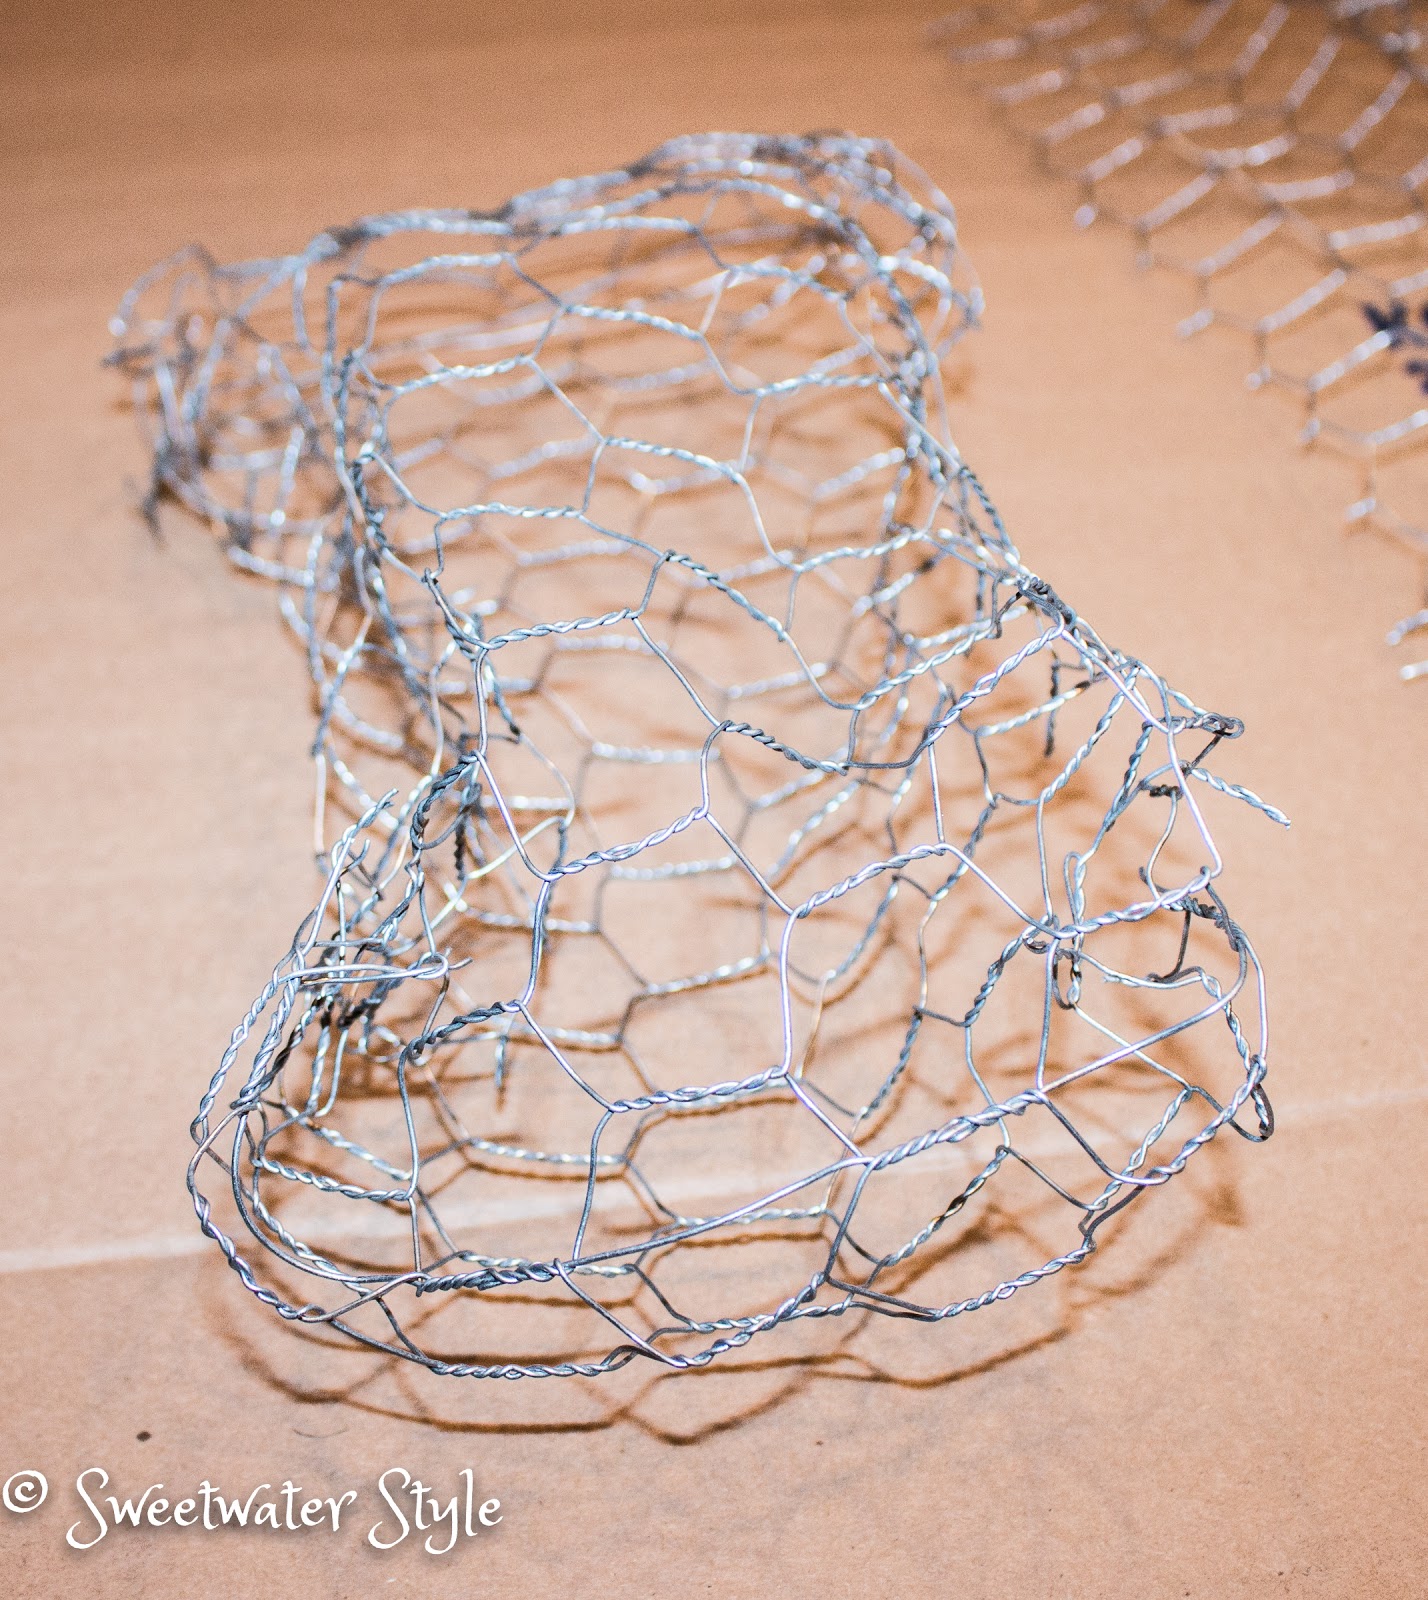
Form the eight inch strip into a cylinder by folding it over and pinching the sides in.  It is helpful to use work gloves when you do this…chicken wire is really hard on your hands.
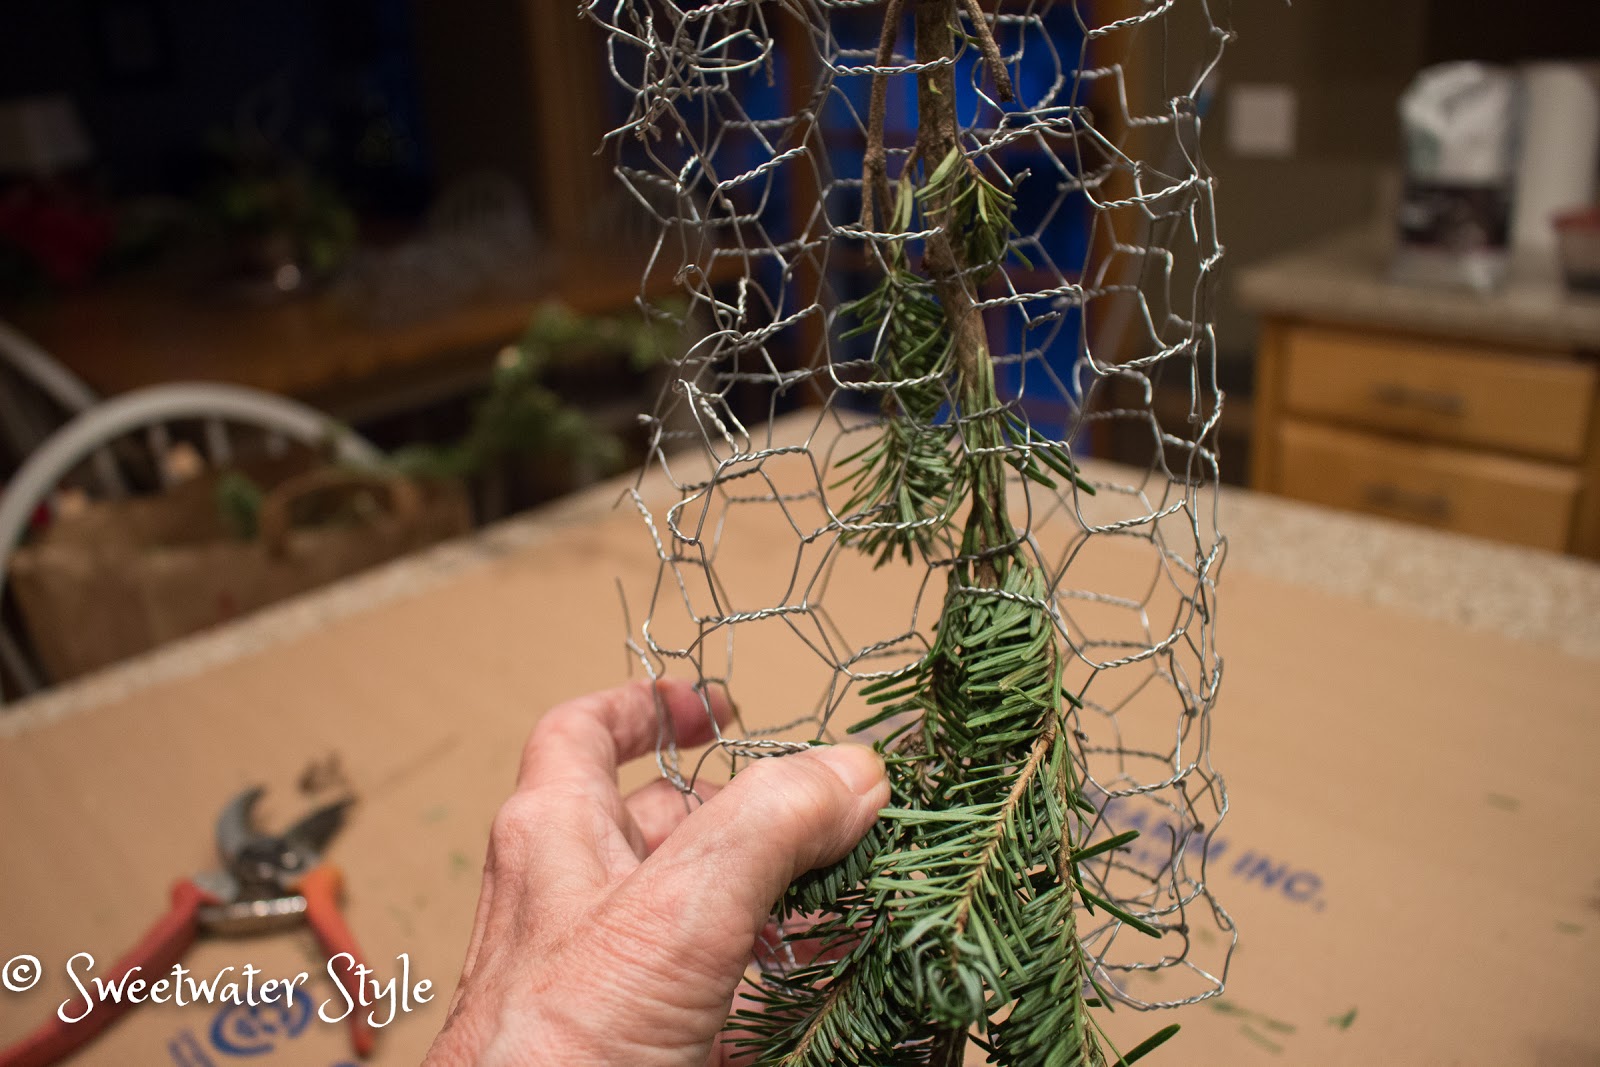
Now you have a form/base for your scraps of greenery.  I love the fact that you can use some pretty shabby greens in the back of your swag.   Just keep snipping greens and pushing them into the wire.  After you have the top and bottom of the swag the shape you like, start adding greens that stick out and make the swag look full from the front to the back.  You don’t need to put a lot of greens in the center because your bow will go there.
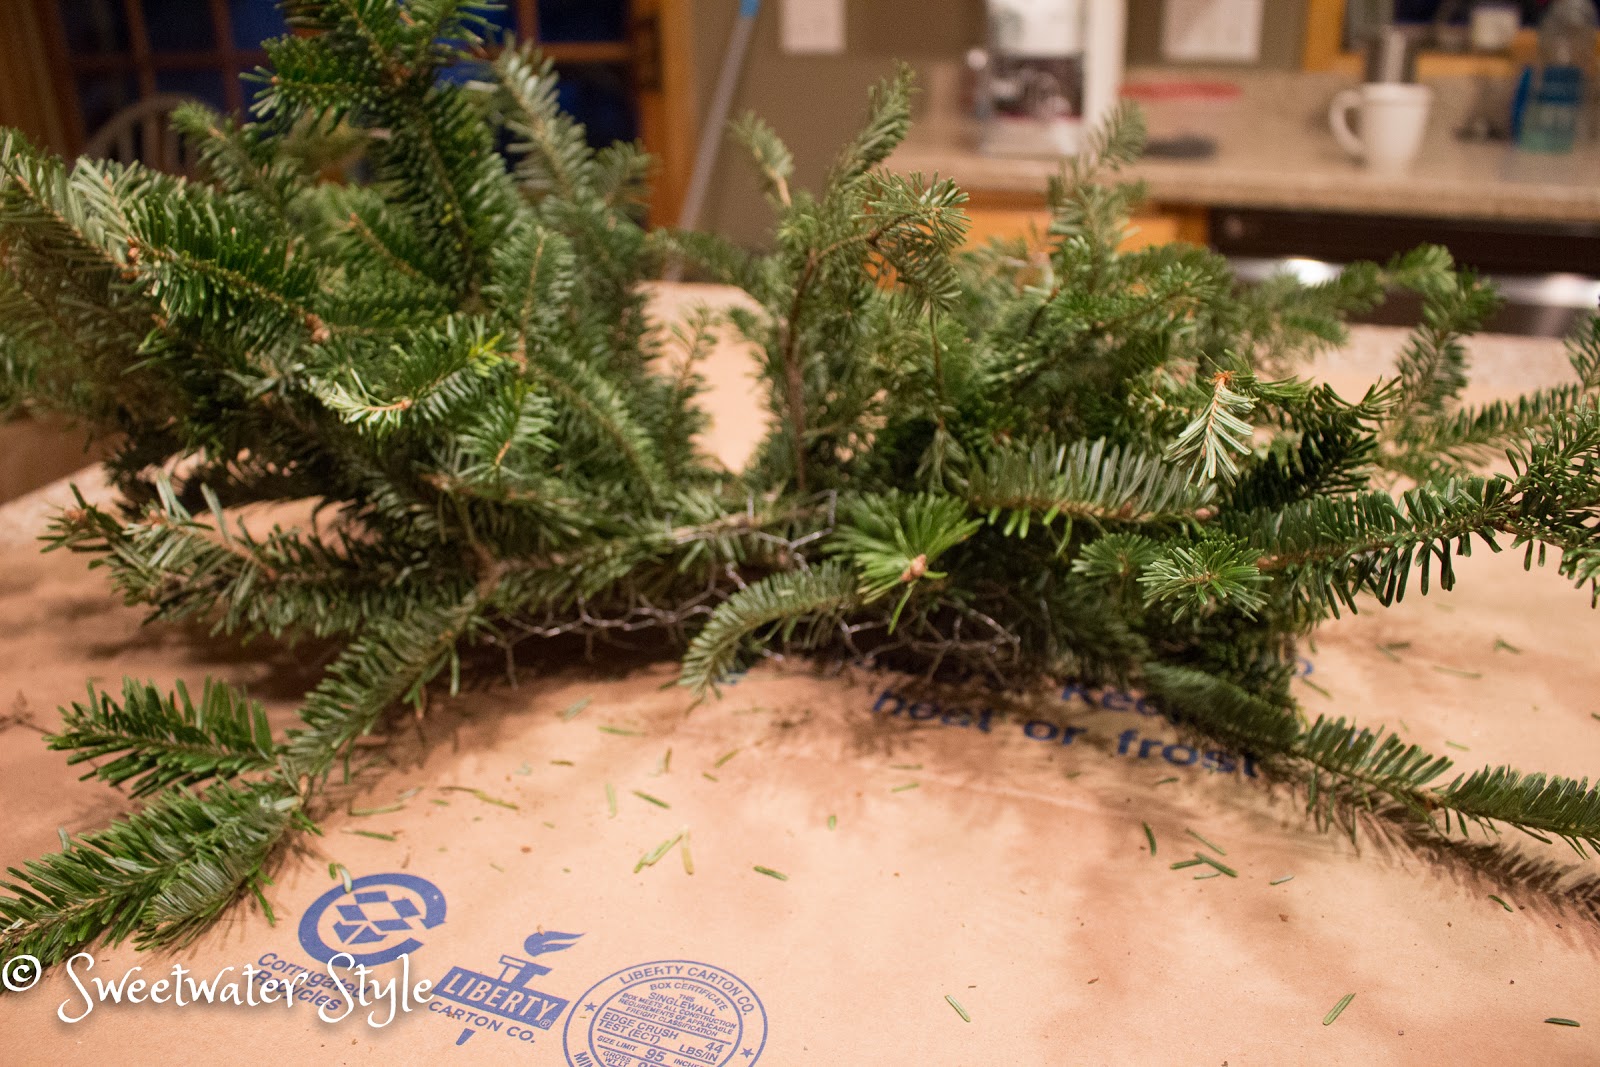
 When you are pleased with the greenery, you add a bow.
Bows seem to be intimidating to people.  Making a fancy bow is really pretty easy.  Check out this link to see a step by step of the process.
 I used some of that fun netting as the background for the bow on these swags.  That stuff is easy to find…I have seen it at the dollar store, Lowes and Micheals.  I like how it makes the plaid ribbon stand out.
These swags on the wire cages are especially nice because of how they can be attached to the lights.  Simply run a length of ribbon through the back of the cage.  This ribbon can be tied around the light.  No worries about wires that can scratch your fixture.
 I am always pleased that the swags look like something that I went out and purchased!
They frame the entry and add a lot of holiday oomph for little or no money!
Happy Decorating….
Before I go…..The Sweetwater entry is decked out for the holidays too!  I had an old grapevine wreath that was the perfect size.  A few scrap greens and some leftover ornaments from the Festival of trees event…..I am liking this a lot!
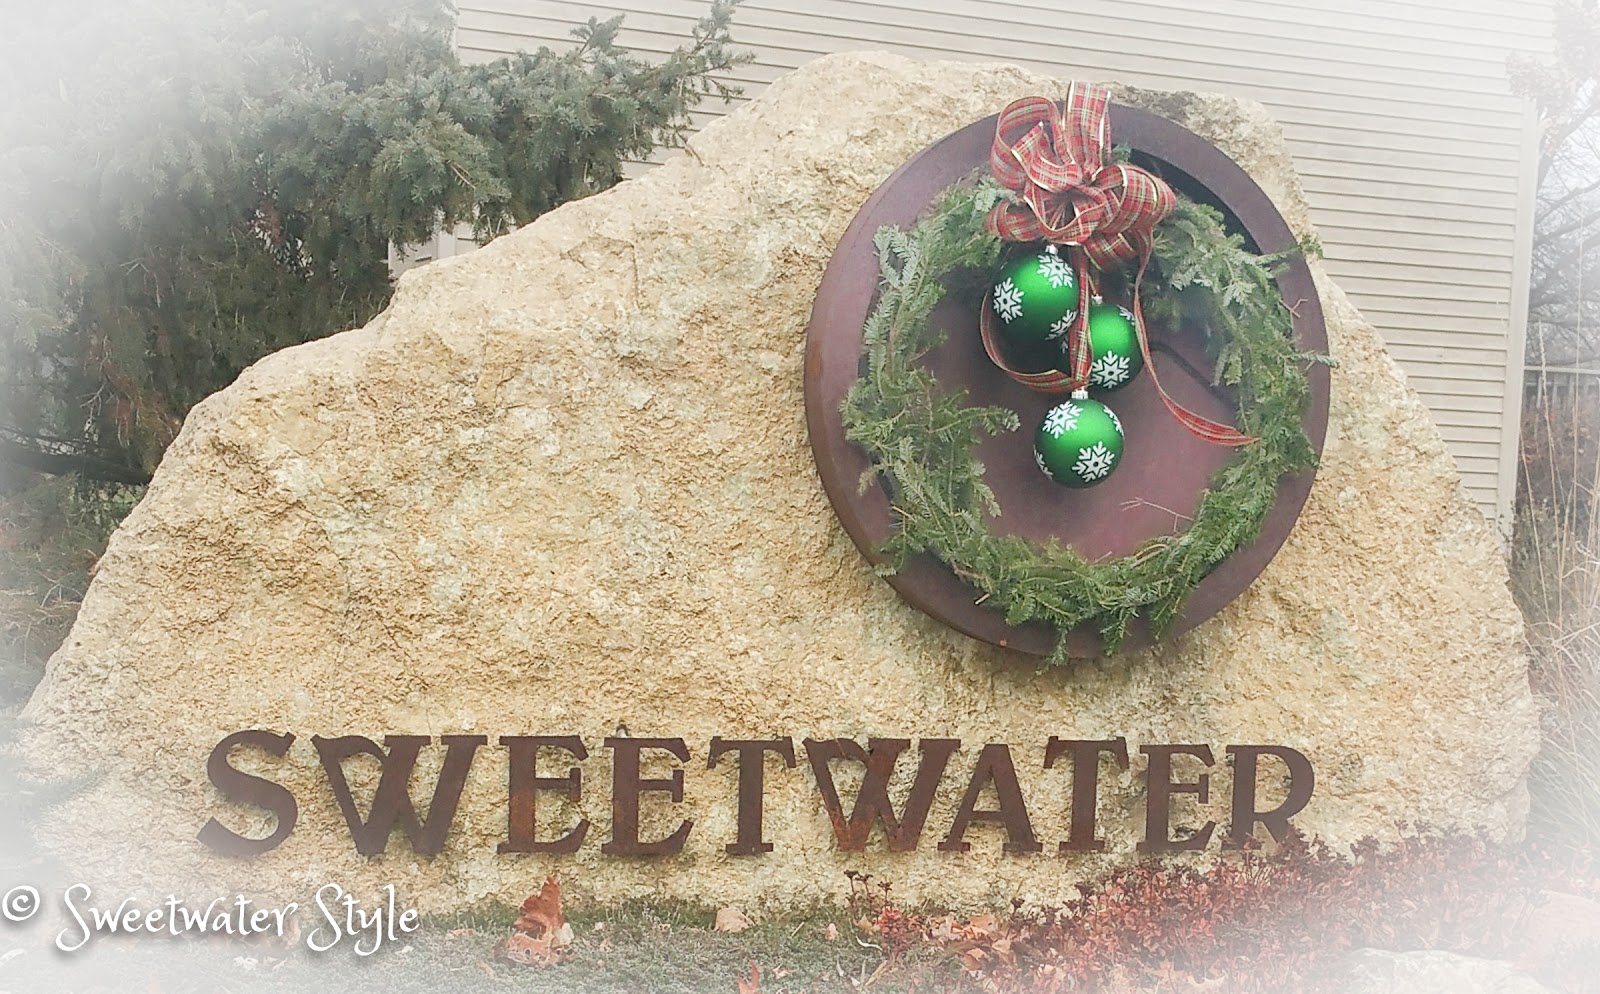
Have A Great Day!

Using Twinkle Lights for Fall Decor

Yesterday, the thermometer in the car said 100 degrees…..but the calendar says it is Autumn!  
Go figure!
I have been gradually switching the decor around Sweetwater to reflect the season….NOT…the temperature!
The family room was first….and honestly it took about 30 minutes to go from Summer to Fall!
The chair covers on the rattan chairs are now back to a muted color scheme. (I do love slipcovers for a quick change!)

  • These two purple pillows make sense when you look at the chair fabric.
  • A wine crate filled with interesting orbs and cotton bolls is fall like without going all “pumpkin” flavored! I often find these decorative balls at Good Will for a fraction of the cost they are at a decor store.  The same goes for the wine crate…keep an eye out for interesting containers.
  • The mantel got the “pumpkin” treatment complete with mood lighting!  I used my copper collection and a great pumpkin swag that has been around forever. 

I am totally obsessed with twinkle lights!
I love the battery powered strings that are on tiny copper wire.  The wire bends around to twist through the stuff and almost disappears.
A search on Amazon finds a really wide variety of these fun strings for a very low cost.  I have also seen them at Tuesday Morning and Dollar General.  You really want to have these in your decorating stash!!!

 I used a string to light up the Spooky Fairy Garden last season…..I will definitely do that again when October rolls around.

Look at some of the fun ways that other people have used twinkle lights:

Source

HMMMM….I could probably weave a string into my wine crate!

Source
Source

Hope this inspires you to do a bit of fall decorating and add some twinkle lighting to your projects…

 I love the quote from the movie “You’ve Got Mail” when Kathleen announces that all will be fine, but “in the meantime, I’m putting up more twinkle lights.”

Have A Wonderful Day!
Link Parties

A Cover Up at Sweetwater!

Don’t worry…..I am not going to go all political on you!
The cover up at Sweetwater is NOT scandalous!
It is simply the way that I “used what I had” to cover up some old plastic planters!
Mr. S is always trying to get me to throw away all the old pots around here.
They are stacked up behind the garage in an unsightly pile.
I just can’t bring myself to buy new ones…..because they still are “good enough” to use.
A couple of the old pots got used to plant some dark red geraniums and some zebra grass.  
(you know me….why spend money on an accent plant when you have way too many “accents” growing in the garden)
Well….you can see that the old plastic terra cotta colored planter was maybe….NOT good enough!
It was pretty faded and a little dirty….
I thought about using spray paint…..but it still would have that plastic look.
Then I remembered my fabric stash!
I have a lot of burlap…..remember when burlap was all the rage?
That burlap turned out to be just the cover up that was needed to pretty up the faded old pot.
How I did it:
I cut a large square of fabric.
I trim the corners to create a circle.
I gathered up the edges and tied it with a burlap ribbon.
I tucked the edges of the burlap up inside the planter and secured them with some picks.
Pretty darn simple.
I know that the burlap is porous enough to let the water drain….
If you do this with fabric that is not loosely woven, be sure to cut some drainage holes.
HMMMM….this might be a good trick to use to cover up a basic store pot when you give a plant as a gift.
HMMMM….what else could I use for my cover ups….off to the internets and look at the ideas I found!

I guess Mr. S had better resign himself to the unsightly pile of pots behind the garage!
I have projects in mind…..so watch out!

Summer Decorating on a Budget-Part 2

Part 2 of Summer Decorating on a Budget can really be summed up by the following:

I admit freely to being a “fabric”holic!
 
The summer look for the lower level family room has been the same for a long time.
The navy “monster” couch and navy carpet seemed to lend themselves to a red, white and blue theme.
I was quite simply “over it”.
The natural place to go to solve the problem was the fabric store.
I wasn’t sure what I was looking for……
I needed to “immerse” myself in all the pretties….
These are the fabrics that called to me and made sense with the blue carpet and white walls.
Best of all….I happened to be there on a day when all decorator fabric was $3.99 a yard.
Be still my heart!
Too funny….when I look at these 3 fabrics lined up in the photos….I have to say I was a bit of a risk taker.

You might be saying in true Minnesota nice language…..”well those are different”!
But look how the redo turned out using these unlikely pairings.

I have always loved chinoiserie fabric.

Vocabulary lesson: 
chinoiserie  chi·noi·se·rie
SHēnˌwäzəˈrē,ˌSHēnˈwäz(ə)rē/
noun
noun:  the imitation or evocation of Chinese motifs and techniques in Western art, furniture, and architecture, especially in the 18th century. 

Using just a bit for the seat cushions on the game table was a great way to have some that doesn’t over power the room.
Would you believe that I just used the glue gun to attach the fabric on these?
Why?  Because I want to be able to take the summery look away and use the red pattern underneath in the winter.  If I used the staple gun….removal would have been a huge pain!

The cushions on the cedar chest “window seat” got my famous almost no-sew box cushion treatment!
Here is a link to the original post….http://sweetwaterstyle.blogspot.com/2011/08/almost-no-sew-box-cushions.html
I got a big laugh when I looked at the statistics for this post and saw that it has gotten almost 10,000 since it was published 5 years ago.  I guess that means that this is something worth doing? 🙂

Big fabric envelopes made from the floral fabric were an easy way to switch out the couch cushions.

The ikat fabric is a fun look for the ottoman.  
Yes….you can easily cover an ottoman with just a couple of seams on the sewing machine. Here is the post that shows you the steps.                   EASY ALMOST NO SEW OTTOMAN                                                            I left the red and blue underneath so the new fabric can easily lift off.
I still need to do a bit of “red removal” and shop the house for things that will fit the new colors.
but even though the temps are back in the 50’s around here….I know that it soon will warm up and now…..

Summer Decorating on a Budget! Part One!

Source

Time for summer decorating….bright, fresh, and airy are words that come to mind.

Lightening up the look of the family room was the first step in the summer transformation here at Sweetwater.

When we got the new oatmeal colored couch, I no longer need to slipcover the cushions with summer weight fabric.

(Read about how I used to do this with the dark colored couch using stretch twill for cushion covers that are almost no sew)

The color scheme in the family room was pretty autumnal with all the browns and copper.

Pretty…. but definitely NOT bright, fresh and airy!

 What to do?
Obviously, I wasn’t gonna mess with the new couch!
So off to fabric.com to find some fabric to lighten up the cushions on the rattan chairs.

This is the fabric I picked.  It was less than $25 for the fabric and delivery.

Yes…I did have to sew for this project, but you could do a wrap and tack version that would be almost as good.

I can not believe the difference it made to switch out the dark for the bright!
Now I know why everyone says to buy a neutral colored couch!
It really was simple to change out a few things and get a new look.

Changing the color scheme of a room is always more than just changing the upholstery fabric.
Going with the teal and chartreuse meant that all the browns and rusts in the old accessories were just all wrong….
The room needed new stuff in the right colors.
It was so tempting to head over to Home Goods and buy everything summer in those appealing displays…..and I did find those great looking teal pillows for a bargain.  In fact…I would have spent way more $$ to make them.

I wanted to save my money for my other summer vice….PLANTS!

I decided I could go shopping…..but in my own house!
I walked the house….
I peeked into my over stuffed closets….
Looking for stuff that would go with the new colors.

I have always loved the summer themed pillow with the palm tree.  I was thrilled that it could take center stage(couch) with the perfect colors for the room.

The artificial pears have been around for awhile.  They have just the right green for the coffee table.

 Notice the pictures on the back wall…they were in other rooms and now have a new spot.

I kept the mantel simple.
The white candle sticks and lanterns have been around the house for a few years.
Looking at the photo makes me think that a bright beachy colored bow on the lanterns might make them pop. HMMM….maybe an artificial sunflower too!?

The image in the frame is an enlargement of a photo I took in Gulf Shores, Alabama.
I used Waterlogue…an iPad app to make it look like a watercolor. (You can read about how this works here)
It really is a perfect summery addition.
I imagine that I will find more things that will add summery touches…

A thrifty decorator’s work is never done!

Come back tomorrow for the second part of Summer Decorating on a Budget….the lower level family room has a new look too!

Have A Creative Day!

Link Parties
Eclectic Red Barn