If you are wondering why it has been more than 2 weeks since my last post….well….it is kind of a long story.
It has been an interesting couple of weeks around Sweetwater.
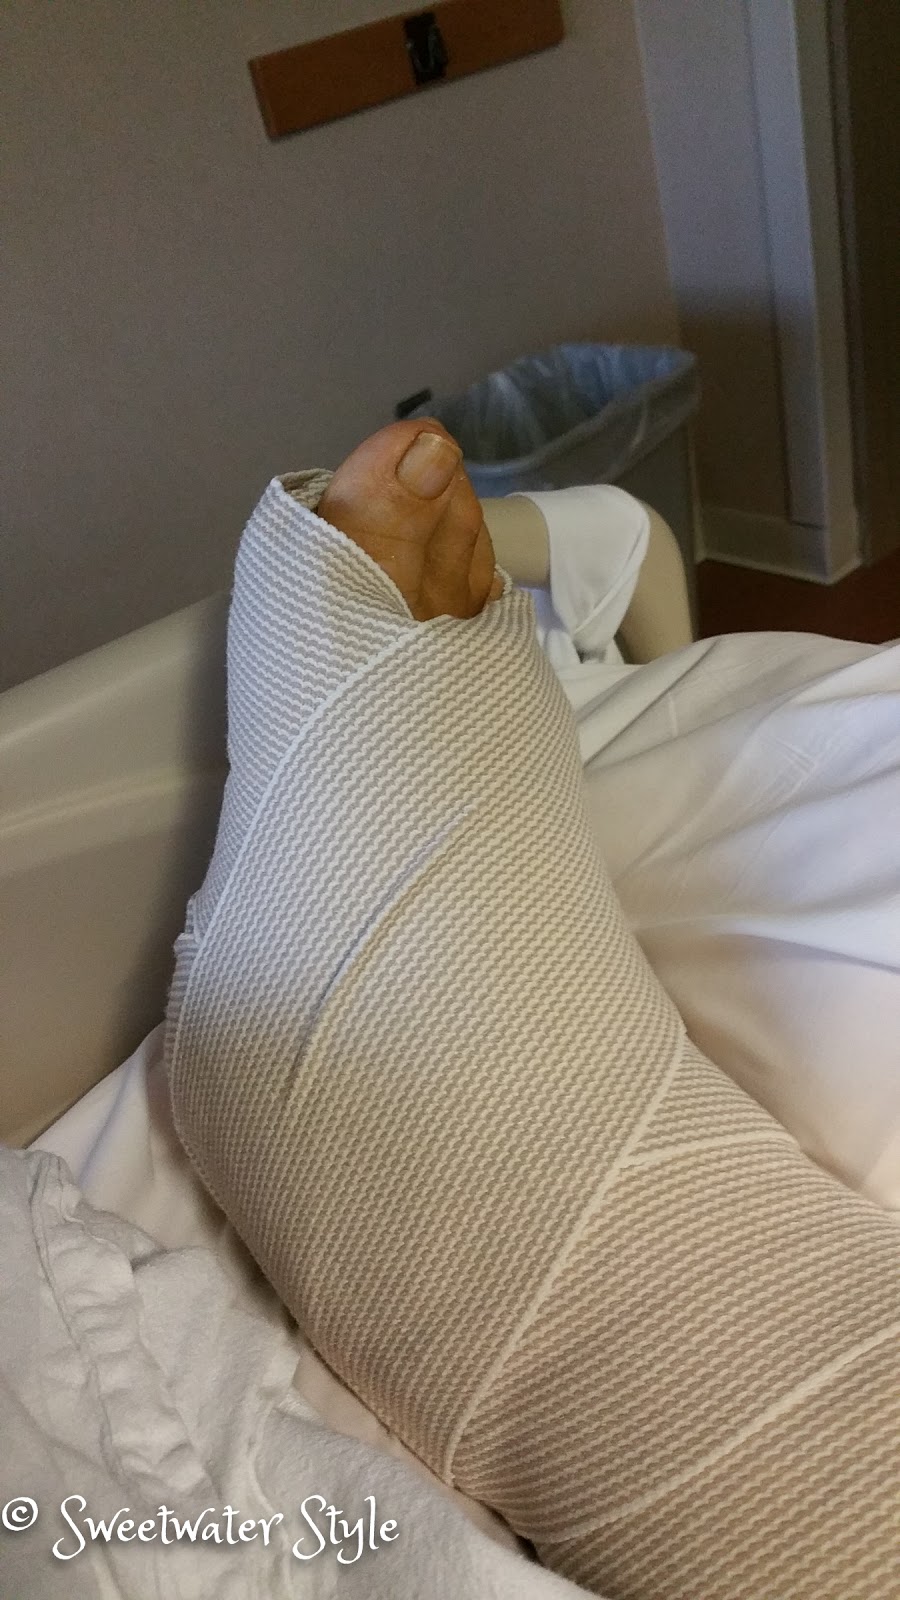
Mr. S had his right ankle totally replaced 3 weeks ago!
The surgery was very successful….but…the recovery time is LONG.
The guy who spends much of each day out and about is now unable to put weight on his foot for another 6 weeks and then slowly working to walk on it.
Poor guy…not being able to get out on his own is driving him crazy…..but the good news…his ankle doesn’t hurt anymore!
 And…the Sweetwater Grandboy thinks Grandpa’s Scooter is fabulous!
After a couple of weeks of “nursing” and “fetching and carrying”, things are getting back to normal for me at least.
So…you can imagine that I have been putting off doing any projects that might get in the way of the scooter!
But finally…we said…”enough is enough” and it was time to get busy!
This painting project is the result of one of those “If you a mouse a cookie” scenarios.
A few weeks ago…..our refrigerator gave up the ghost!
When we went to buy the new one….we chose a different finish….black stainless steel! Gorgeous!
BUT….
That meant we needed new dishwasher, oven and microwave too! And new cupboard hardware too!
Long story and installations later….the kitchen looks amazing!
So what am I painting?
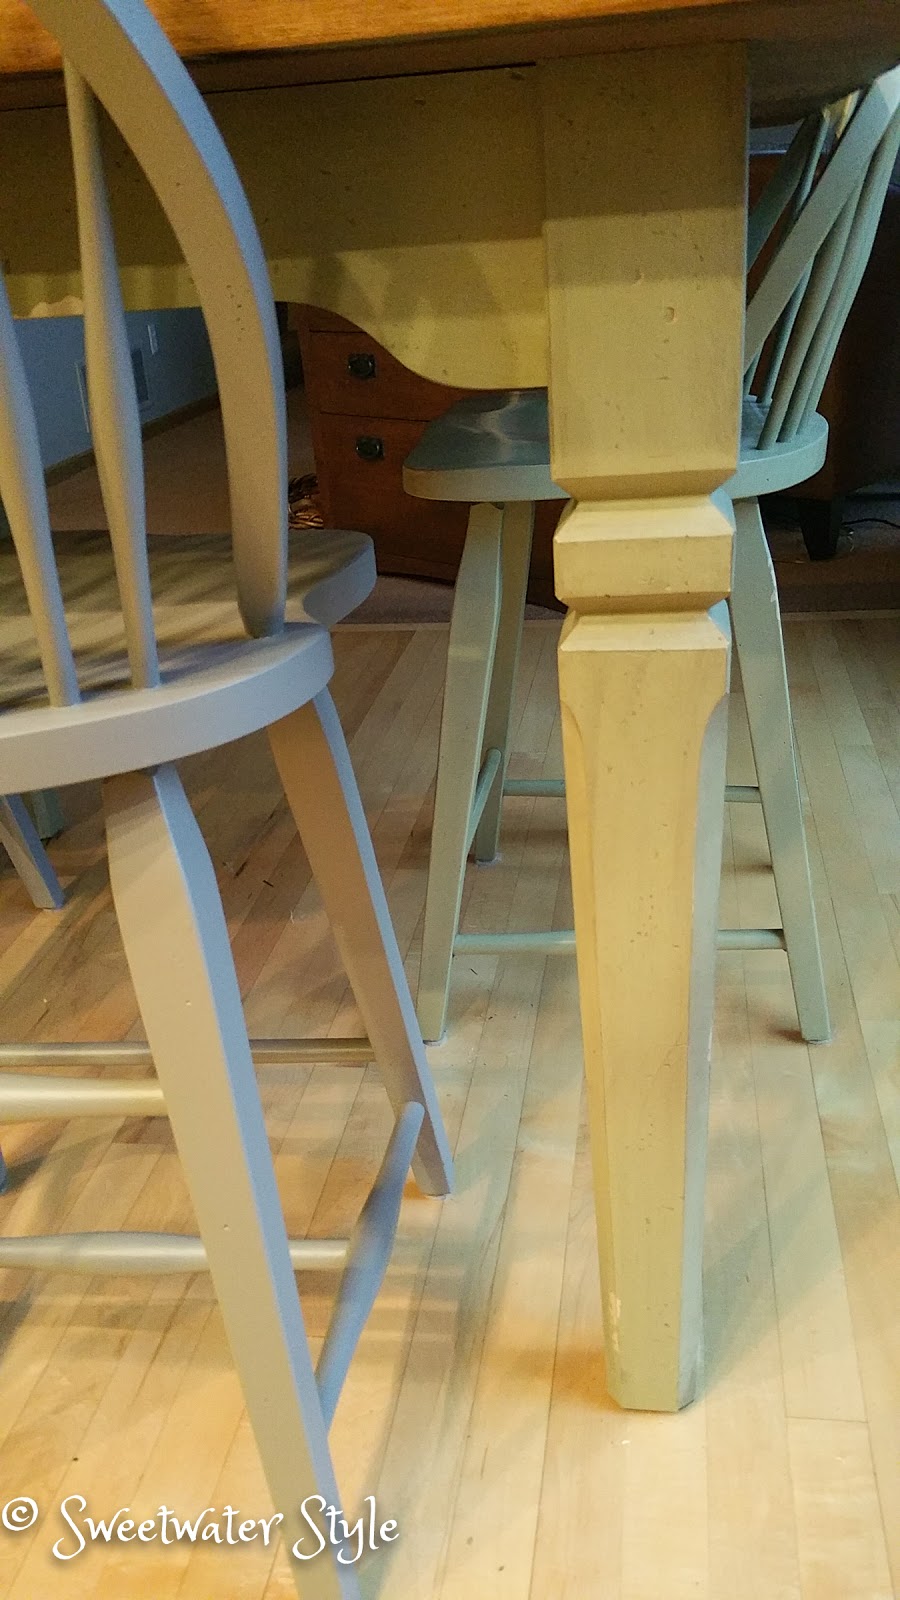
Note the green wood on the table and chairs that Mr. S and the Grandboy are standing next to.
They no longer looked “just right” with the new appliances.
It decided to paint them a soft griege color!
Finally….the point of the post!
THIS PAINT…..I am absolutely in LOVE with it.
It is amazing!
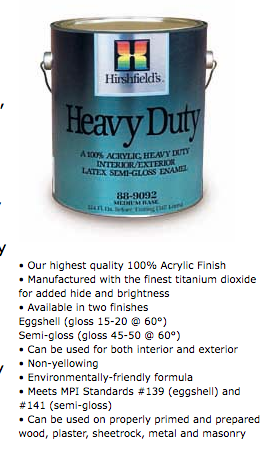
• Interior/Exterior
• Manufactured with the finest titanium dioxide
• Excellent Hide
• Good Burnish Resistance
• Very Good Washability
Yes…it is expensive…about $60 a gallon…but worth every penny. It is one of those spend to save deals.
Why?
The surface that you are painting only needs a good clean surface…
I suppose you could sand too, but I didn’t and the coverage is great.
It goes on so smoothly….
It dries in 30 minutes and ready for the second coat in an hour.
It cleans up with water!