refinishing

Paint You Will Love!

If you are wondering why it has been more than 2 weeks since my last post….well….it is kind of a long story.

It has been an interesting couple of weeks around Sweetwater.

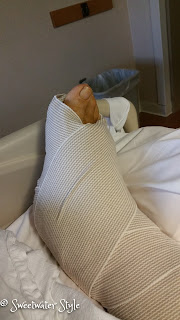
Mr. S had his right ankle totally replaced 3 weeks ago! 
The surgery was very successful….but…the recovery time is LONG. 

The guy who spends much of each day out and about is now unable to put weight on his foot for another 6 weeks and then slowly working to walk on it. 
Poor guy…not being able to get out on his own is driving him crazy…..but the good news…his ankle doesn’t hurt anymore!

And…the Sweetwater Grandboy thinks Grandpa’s Scooter is fabulous!

After a couple of weeks of “nursing” and “fetching and carrying”, things are getting back to normal for me at least.

So…you can imagine that I have been putting off doing any projects that might get in the way of the scooter!

But finally…we said…”enough is enough” and it was time to get busy!

This painting project is the result of one of those “If you a mouse a cookie” scenarios.

A few weeks ago…..our refrigerator gave up the ghost!
When we went to buy the new one….we chose a different finish….black stainless steel!  Gorgeous!
BUT….
That meant we needed new dishwasher, oven and microwave too! And new cupboard hardware too!
Long story and installations later….the kitchen looks amazing!

So what am I painting?
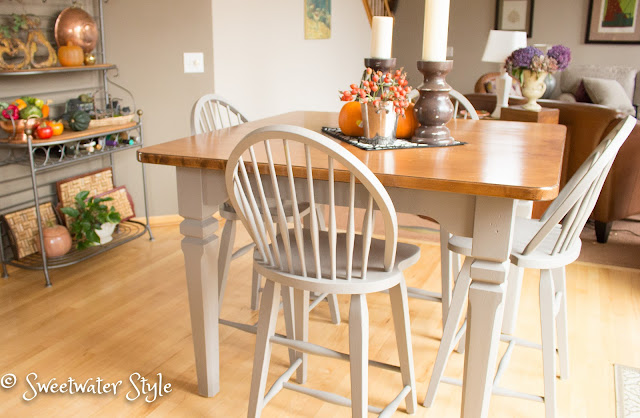
Note the green wood on the table and chairs that Mr. S and the Grandboy are standing next to.
They no longer looked “just right” with the new appliances. 

It decided to paint them a soft griege color!

Finally….the point of the post!
THIS PAINT…..I am absolutely in LOVE with it.
It is amazing!

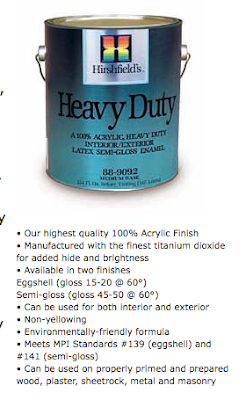
Heavy Duty– Premium 100% Acrylic Interior/Exterior Eggshell
Heavy Duty 100% Acrylic Enamels are an excellent choice for a multitude of applications including interior walls and woodwork as well as exterior trim applications. This finish is ideal for use in new home construction, existing homes, schools, nursing homes or anywhere that extreme durability is required
Features & Benefits
• Interior/Exterior
• Manufactured with the finest titanium dioxide
• Excellent Hide
• Good Burnish Resistance
• Very Good Washability

Yes…it is expensive…about $60 a gallon…but worth every penny. It is one of those spend to save deals.
Why?
The surface that you are painting only needs a good clean surface…
I suppose you could sand too, but I didn’t and the coverage is great. 
It goes on so smoothly….
It dries in 30 minutes and ready for the second coat in an hour.
It cleans up with water!

 If Mr. S was at full capacity….the chairs would have gone to the basement and I would have done them all at once….
Instead, I put a tarp down in the dining room and did them one at at time.
This is when the quick drying and second coat time was nice.
When one chair was done….I moved it back and then did the next one.
 
It took me 6 days to get it all done.
I cannot tell you how wonderfully the paint covered in 2 quick coats.
I love the quality of the finish.  It feels almost like the original factory paint.
I love that the new color isn’t all that different than the old….just the RIGHT color.

If you have a painting project that you are putting off because you don’t want to do a lot of sanding and priming.  This is the paint for you.
I think it would even be a good paint for kitchen cabinets ….but I am not quite that crazy a DIYer.
Have A Great Day!

Thrifty Patio Table Refresh!

The lovely April weather here in Minnesota this year is a bit deceptive!  Days in the 70’s make it a joy to get out and start clearing the gardens.  My solution to ease the  “gardening aches and pains” that are a result of way too much bending and pulling and digging is sitting on the deck with a cool beverage! 

Photo of the deck in 2012

The deck truly is a three season extra room in/out of our home!

We love the seating area with chairs around a round table with a copper inset for a planting.

Well….while I was sitting there relaxing…..
I noticed the surface of the top of the table!

YIKES!  Minnesota winters are hard on things!

In other years, I used Gel Stain and Polyurethane to refresh the surface! (Click to see how I did that)

But after doing that a couple of times, the situation called for something more drastic!

You may wonder…..why doesn’t this woman just buy herself a NEW table for heaven’s sake?
Well…..in all honesty it is a big pain to haul the old table out….figure out how to recycle or dispose of it…..then shop and assemble a new table!
Besides…..we love the shape of the round table and the insert that is perfect for flowers or other decor!  If we wanted a table like that….with a surface that would not deteriorate it would be a tad to spendy for this thrifty (CHEAP) person!
As you can see…..Lowes has JUST what we need!

A little sanding with a sanding block…..

Some Gloss Black Enamel paint…..
And a cheap throw away brush (because I decided to be lazy and not have to clean my brush)…..

Two coats later the table looked like this!
Not bad….but I felt like it looked a little like freshly tarred blacktop…..not exactly the look I was going for.

The easy fix was sort of a faux slate treatment achieved with a couple of passes with some bronze and black spray paint!
I sprayed and used a stiff brush to spread out the obvious spray spatters.

The final results!

This is a case of “Use what you have”because the paint was all leftover from past projects!

The cost for this was a total of $1 for the disposable brush!

Even better…..the time it took to do this was way less than replacing the table we love!

Have A Wonderful Day!
We are off to a baseball game this afternoon!
Link Parties

My First Chalk Paint Project-Resources for the Beginner!

On the TO DO list here at Sweetwater are a couple o furniture painting projects.
These projects involve furniture that has been oiled or waxed.
That means that in order for MOST paint to adhere properly…..there needs to be a lot of prep work involved.
If you know me….I HATE prep work!
 This little end table started it’s life in Mr. S’s childhood home…..
It has seen several different coats of paint…..and I would have to say that the latest coat is probably my LEAST favorite…
Bad color….and the (my) paint job was less than stellar!
This is also a nice small project!
Perfect for my first foray into the world of Chalk Paint!
Seriously….as ugly as this is….what could I lose!
Many of my favorite bloggers are always “waxing” eloquent about Chalk Paint….and the projects they showcase are pretty wonderful!  But to be honest, I never much paid attention to the products or the process these clever DYIers were using.
It was time for ME to do my research….which of course I am  sharing with you!
If you want the very basics about Chalk Paint….check out this post from Chic Mouldings!   It has basic information about using Chalk Paint….specifically the expensive Annie Sloan product….but the information is generic.
What I learned:
When you paint with Chalk Paint you do not need:
X Prep
X Sanding
X Sealing
X Cleaning
X Priming
X Solvents
If you use Chalk Paint you can paint over just about every surface, wood, plastic, tile, metal, or glass. The paint will even  cover a piece of furniture that has previously been sealed with wax. 
Wow….I knew this stuff was popular….now I see why!
But “Sweetwater,,,,we have a problem!”
Annie Sloan paint is super expensive (in my humble opinion)..
….more problematic…it doesn’t seem there are a lot of places around here that sell it! 
….even more problematic….I wanted to do this project NOW…..not wait until I could go to the store….if I could find a store! And remember….we are in a Polar Vortex…so no way was I going out!
More research…..and guess what….there are recipes out there to MAKE YOUR OWN Chalk Paint….
Hmmmmm….now that is way more “Sweetwater Style”!
 This is a great post with several DYI Chalk Paint Recipes from Salvaged Inspirations!
Diane over at In My Own Style does a comparison of DYI Chalk Paint Recipes HERE!
Source
Since I am all about “Using What I HAVE”, I opted for the Plaster of Paris recipe….because I HAVE some!
I mixed it up…..poured it into the paint I had….with a little help from Marvin of course….
Hmmmm…..I wonder if you can Chalk Paint a cat?
I won’t bore you with all kinds of pictures of the process…..I figure you all know how to paint!  Or if you don’t…..just GOOGLE it!
I only did one coat of the Chalk Paint on this…..then a little sanding and distressing….and a lot of elbow grease with the coat of Johnson’s Paste Wax….which I had to thaw out because it was stored in the garage!!!!

I am pretty pleased with this simple transformation…..and I learned a bunch about Chalk Paint! Mainly that it is simple….inexpensive….no fuss….and very forgiving!
I can’t wait to decide on colors for my other painting projects and get them done soon!
Have A Great Day!

Refinishing Adirondack Outdoor Furniture

 
Sometimes I sits and thinks, and sometimes I just sits.
Satchel Paige (1906 – 1982)
The Adirondack chairs and bench that encircle the Fire Pit at Sweetwater are the perfect spot to “sits and thinks” or to “just sits”!

This photo was taken early this summer.  I don’t know if you can see how BAD the wood finish is on the furniture….we like to leave them out all year….so the wood really takes a beating in the harsh Minnesota weather!

I spent the last month refinishing the chairs….and I am thrilled with the result!
I WAS NOT thrilled with how long the project took….
But now I can show you the results….and tell you how I did it!
“Librarian Alert”….I just had to show you what I found when I researched 
“Adirondack Chairs”

 This is a drawing from the Patent issued to H.C. Bunnel in 1905!  Cool Huh!
Then in 1938 Irving Wolpin refined the design and took out this patent:

 I guess that explains why these chairs are such iconic images of outdoor relaxation.

Enough with the history lesson….on to the project!

SEE…I wasn’t kidding when I told you the wood on the chairs was in HORRIBLE shape!

We have had them for 4 years…
We tried Tung Oil at first….
We tried Spar Varnish a couple of years ago…
It was time to get EXPERT advice!
We went to the SOURCE…..and asked the little old man who built the chairs what to use!
He told us about SIKKENS….
It “ain’t” cheap….but when you see the results you will see it was worth the cost!
The first task was sanding the furniture down to the bare wood!
HOURS AND HOURS AND HOURS of sanding!
(my apologies to the neighbors who had to listen to the sander)
I have to admit that I did the sanding in stages…..my hands kept getting NUMB!
(Hopefully all that sanding was good for my triceps!!!) 
I actually did two chairs at a time!
Once the sanding was done…..it was time to put the finish on!
SIKKENS is oil based….so I had to listen to the admonitions of Mr. S 
“Make sure you use a good brush so there won’t be any bristles on the chairs!”

“Make sure you dust them off and use a “tac cloth”!

“Make sure you don’t spill any SIKKENS on the patio blocks”

“Make sure you do a good job cleaning my good brush when you are done!”

Once I started putting the finish on…..I was sooooo excited to see how they were turning out!
It almost made me want to start sanding the other chairs right away….OR NOT!
 Isn’t that an amazing transformation?
When I got all 4 chairs done….the bench that Mr. S made was totally the wrong color!
This bench is one that is made from a pattern he took from a bench that sat outdoors at lake cabin we spent time at many years ago…it is the most comfortable bench!

We had never put anything on this bench to seal it or finish it….and after 3 years it was pretty rough….but I decided to give it a try!

SUCCESS!

I am pretty darn proud of the way they turned out!
Hopefully the finish will last….but at least I know that if they need a refresh next year…
I WON’T have to do all of that sanding…just a new coat.
I really cannot sing the praises of the SIKKENS product enough….
Maybe they could sponsor my blog someday !!!!
The FirePit area is just waiting for us to come “sits and thinks” or “just sits”!
I will leave you with this gorgeous art print of Adirondack Chairs in Maine!
It is by Debra-bretton-robinson Art and depending on the size 
you could get it for as little as $25

Source

Wouldn’t this be beautiful hanging on the wall?

this one seems to fit the theme of this post!!!
Source
Gotta Love IT!

Maybe Mr. S and I should invite Eric and Myrna over to sit in our refinished Adirondack chairs! They look like they need a nice glass of wine….or at least some “fashion advice”!
Have A Great Day….Hope you find time to “Just Sits”!