

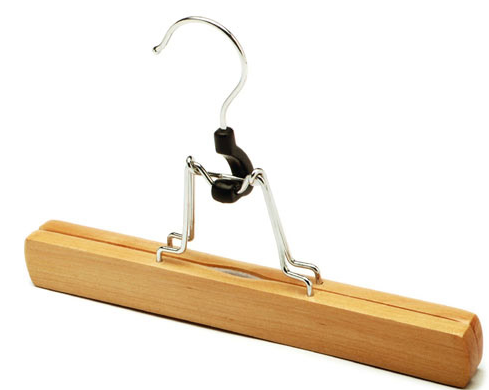
Even wooden pants hangers don’t seem to solve the problem for me.
The wood bar still leaves creases….and I don’t like to hang my pants from the cuffs!
I have looked all over for padded hangers for pants and have been unsuccessful! And chances are…if I ever do find some….I will be too “cheap” to shell out the $$$ for them!
Read More to see what I did instead!
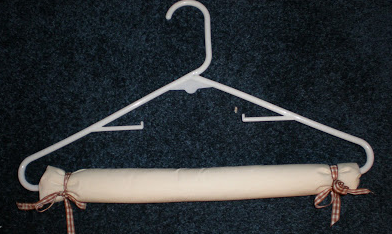 A couple years ago, I made these padded hangers…..
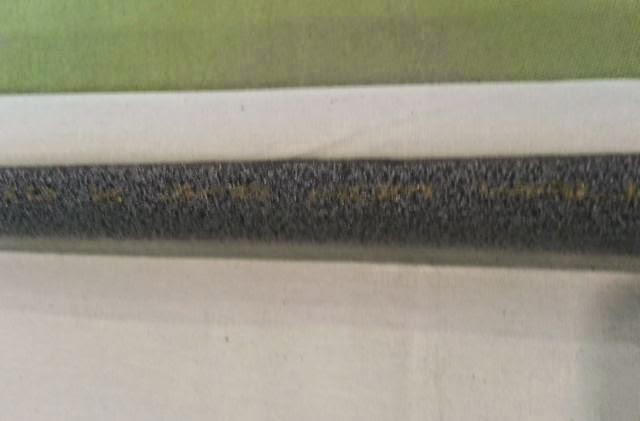
In effect, they are batting filled tubes wrapped around the hanger and hand stictched closed.
I tied some ribbon around the ends to stabilize them.
You can hop over to read the tutorial by CLICKING HERE.
I made about 10 of these pants hangers….but since I do go to the thrift store a lot…..I have (gasp) more than 10 pairs of pants!!!!
It was time to make more padded hangers….and to be honest…..I am not all that much in love with these (another gasp)!

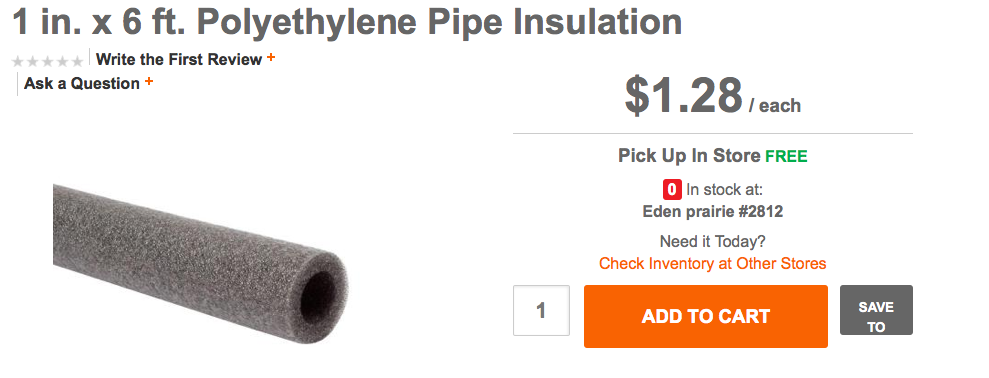 Home Depot sells it for a buck twenty five for six feet!
I have used this stuff to hide electrical cords…..a post for another day!

I even used it for the trunks of the Truffala Trees ala The Lorax (click to see how)
What a versatile product! I probably should ask Mr. S if we actually use it to insulate the pipes!
Anyway….I had an AHA moment and figured that this stuff would be perfect for streamlining the padded hanger project!
I was right….It was super simple….It was fast…..It was CHEAP!

The process is almost too simple!
Cut the tube the width of the bottom of the hanger (in my case 15 inches)
The foam already has a scored line to separate it (you know….to get it to go around the pipe)….so it is easy to cut the slit in the foam.
Cut a piece of fabric 2 inches wider than the tube by 5 inches.
Then it is just a simple matter of tucking the fabric into one side of the tube…

Then smoothly roll the fabric around the tube and tuck it into the other side.
The extra fabric helps to fill the space around the plastic hanger bar.

Tuck the extra end fabric into the tube on both ends.
Then you slide the fabric covered tube on to the bottom of the hanger!

Seriously….could it be simpler?
I secured the plastic hanger to the tube by squirting a little glue from the glue gun into the space.
You would not have to do the gluing….but the tubing did shift a little.
I also added a squirt of glue to each end to secure that fabric.
These four hangers took about 15 minutes to make….and I have supplies to make 6 more!
So in an hour I can have 10 pretty snazzy pants hangers for less than 5 dollars!

Since I used such a crisp canvas….I think they almost look “manly” enough to get some use on the other side of the closet!
Have any of you found “AHA” uses for pipe insulation? I would love to hear about them!
Have A Great Day!

Link Parties
Practically Functional
The Diary of a Real Housewife
Adorned From Above Glitter Glue and Paint