picture matting

How To Cut Your Own Custom Picture Mats

Custom framing is soooo expensive!
Even when you take advantage of deals at the frame shop, a typical framing job will cost you a bundle.

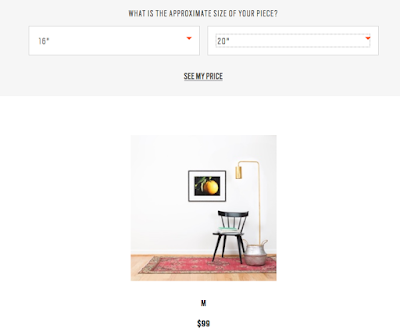
I found this great website that has a princing estimator built in: https://www.framebridge.com/pricing
I ran the numbers for a 16 x 20 print….

YUP….$99!  Now that might seem reasonable to you….but NOT to me.  Especially because I am someone who wants to change out the stuff on my walls a LOT!

Here at Sweetwater, I have found a way to mat and frame things without spending this kind of money.

Sometimes you have to spend some money to save some money.

This post is all about that!

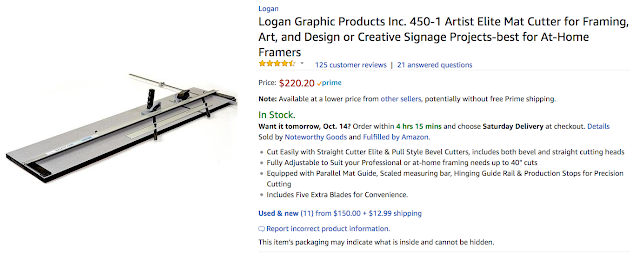
A few (or maybe many) year ago, I invested in a professional mat cutter like this one.

Okay…..$220 seems like a lot of money…..but remember how much ONE 16 x 20 picture cost?

You also need to buy matboard and frames.
I buy matboard at Dick Blick.  A 32 x 40 inch piece costs between $8 and $10 depending on how fancy it is…..
I buy my frames at the thrift store.  The array is pretty amazing.  You look at the FRAME not the ugly art that is in there.

Any new tool can seem intimidating…..but once you learn the basics….you can mat and frame your piece in less than 30 minutes.

So let’s get started on the tutorial!

I was “just gonna” go down to the craft room and do a step by step photo shoot for you….
And then I realized that….hmmm…..somebody probably already did that on YouTube!
Watch this and see how it is done!
(this is the link if the video doesn’t load)  https://youtu.be/PT1n0r_87tQ


It really isn’t that difficult after you have practiced a bit.

Now the fun begins!
With a few pieces of mat board and some thrift store frames….the sky is the limit!

Framed Projects Around Sweetwater

A spooky photo of a graveyard in a thrift store frame.  Instant seasonal decor.
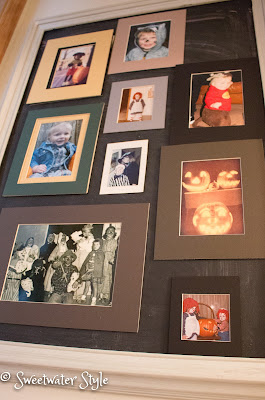
  Favorite photos from Halloween past.  Mats only….displayed on the big chalkboard in the stairwell.
 

 Gallery style display of photos taken by the Sweetwater Son.

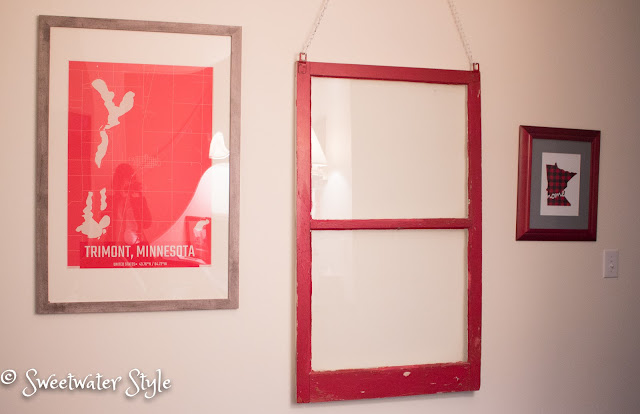
 This old window is from the childhood home of Mr. S.  The poster was a gift from the Sweetwater Daughter and SIL.  The Minnesota Home print from the Sweetwater Son and DIL.
My family always gives me fun things to frame because they know it can be done inexpensively.

Nobody wants to see ALL of our vacation photos….but making a quick collage is a fun way to display just a few.  This is an unframed mat with a foam core backing.  The back has magnets that let it hang on the refrigerator.  A quick way share without “oversharing”.  BTW….Ireland was amazing! 
This is a tea towel that I picked up in a fun boutique on a trip to Florida.  It can easily be switched out when I want a new look….or find a new tea towel!

More Minneapolis themed art….would you believe that I actually took the top photo….good for me!

A cluster of framed posters and photographs lean against the wall on Mr. S’s desk in the office.
I love the look of the vintage posters….The blue and green one was purchased on a trip to Voyageur National Park.

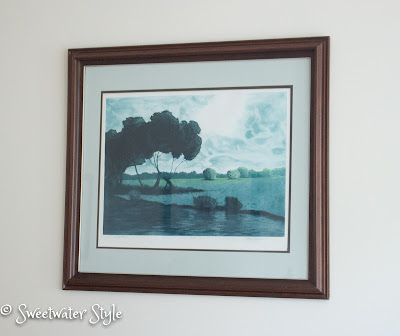
We have had this chalk pastel for many years.  I love being able to change the mat color to coordinate with what ever decor scheme we have.  No need for new art…..just $10 for new mat board.  I am always amazed that you can find a color in your favorite image that goes with any scheme.
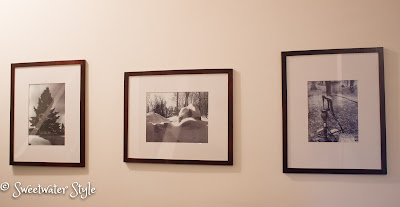
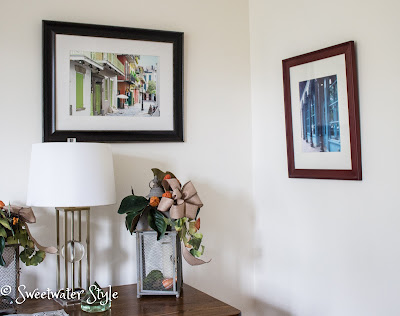
These white mats look nice with the off white walls.  This is another photo by me and the New Orleans scene is another we purchased at an art fair in Memphis….go figure. 

These are just a few of the ways I have used the ability cut custom mats….
Even better….
Now that people know that I have the mat cutting system…they come over and either mat their own things or let me do it for them.

I always tell folks….”I MAT FOR WINE”….

Hope this inspires you to spend some of your crafting or decorating budget on a mat cutter….you will be glad you did.

Have a Wonderful Day!

Fall Decorating Ideas-Use What You Have!

The first day of Autumn is less than a week away.
I absolutely love the song “Try to Remember”
If you aren’t already in the mood for Fall….this song will definitely help!
Click on play and let the Brother’s Four serenade you while you read the rest of the post.

I have decided to move slowly into full scale Autumn around here.
I also am committed to NOT spending ANY money to add those touches.

I started by gathering up all of the obvious Summer Decor.

It all went on the kitchen table…..forcing me to actually put it away before I started to change things out!  
Then down to the storage closet AKA the huge mess!  I dug out the storage bins of fall decor.  It is always interesting to see what is actually in those bins!
This sad little wreath was hanging in the closet! 
It looks pretty barren and was in obvious need of a “use what you have” update!
HMMMMM….
There was a whole bag of these lovely dried Magnolia leaves that was left over from last Christmas.
all it took was a little work with the trusty hot glue gun……
Click to see the results
 
The leaves filled out the wreath.
I didn’t even take the old stuff off…just filled in the bare places

The wreath leans on the wall of the Baker’s rack with a display of those realistic looking pears that I got at Goodwill last year.  You can’t really see the print in the frame….but it is a very “fall like” batik print of two Mallard Ducks in a pond!
The next thing was another “use what you have” project.
I have several enlarged photos that have been edited with an $2.99 APP called Waterlogue

 
 I use the app and play with an image until it has the look I want.
The mat is cut for a 16 x 20 enlargement.
This is a photo from a trip we took to the Gulf Coast a couple of years ago.
The beachy look is perfect for Summer….but not very autumnal!
I leave all the edited enlargements in layers behind one another….
So it was a simple task to just bring the Fall image to the front!
Instant FALL Decor!

This is the original “un”Waterlogued photo!

Quite an artistic change….with little or no effort!

 The last two last little projects in the kitchen were simply done by looking through the storage bins to find items to create little touches of Fall.

I found this great two tiered stand at a consignment shop a few years ago.
It is a great way to display a vignette with a few dried pomegranates some grapevine orbs, sprigs of Chinese Lantern and preserved leaves.

Did you know that you can dry a pomegranate just by setting them in a window and turning them every so often so they don’t spoil?

I think this area above the kitchen desk is supposed to be for cookbooks…..but since I never use cookbooks anymore….it becomes an area to decorate!

The faux tomatoes and autumn leaves are just “plunked” into the Goodwill Copper Collection!

Look closely at the little acorns….they were a 99 cent Goodwill  find.
I highly recommend that you always browse the artificial flower aisle at the thrift store.
You will often find high quality decorative sprays for very little money.

Well…..I am done with decorating for today….and since Autumn doesn’t officially start for awhile….there isn’t any rush!

HMMMM…I think the front entryway will be the next area I tackle!
Stay tuned and Have a Great Day!

Link Parties
Rooted in Thyme The Charm of Home    
DIY Vintage Chic  Bowdabra Showcase


Add A Frame to a Canvas Print

This is a photo that the Sweetwater Son took when he was in Singapore.

We really enjoyed this spot when we were there last October.

The “ship” is actually a Casino!

The two glass structures are the Gardens By the Bay.  These huge “terrarium” like buildings house the Flower Dome and the Cloud Dome.

He and the soon to be Sweetwater daughter in law had the photo printed on canvas as my birthday gift.  You can imagine that I was anxious to find a good place to hang it.

HMMMM…..

 This is a picture that was hanging in the family room.

A few weeks ago I rematted it and when I did….. the glass cracked.

It cracked when after I put it in the frame.
I kept putting off replacing the glass because that would mean that I had to touch the broken glass!!!!

I have such a phobia about broken glass.  I don’t know why.  I don’t have any history of an accident involving glass breaking.
BUT….just the thought of touching a broken edge of glass makes me almost sick to my stomach!
I did some research and found out that there is actually a name for this fear. 

Nelophobia (also known as hyelophobia or hyalophobia) is the fear of glass. The fear is caused by the fragile nature and possibility that the glass will break and cause injury. 
WHATEVER it is called….I have it!
Back to the topic at hand….Adding a Frame to a Canvas Print….
I decided that this frame would be a great way to showcase the canvas print!

I was very brave and took the cracked glass out of the frame….gritting my teeth the whole time.

I taped the jagged edge so that when it went in the trash it wasn’t a safety hazard for the trash men.

Too funny…..the frame was a long ago Goodwill purchase and the foam core board backing the artwork is a promotional image for some kind of real estate group!

Not to worry….the foam core was the perfect solution for this project.

I had some nice plain natural colored canvas in the fabric stash!

The canvas got wrapped around the foam core and secured with painters tape.  Not pretty or elegant….but it is never going to be seen by anyone!

The bone folder helped to smooth the bumps out.

It took some time to pull and stretch the canvas tight.

The canvas print has stretchers that are about 1/2 inch deep.

This makes it easy to hang on these 3 push pins.

That is also the beauty of using foam core for the inset….the pins just stick right in!

The Canvas print “hangs” in the center of the canvas wrap foam core.

It was necessary to add some double sided mounting tape to each corner to further secure the canvas to the backing.

I love the way this makes the lovely print the right size to be a focal point on this large wall.

Have A Wonderful Day!

Link Parties
My Turn For Us  

Simple St. Patrick’s Day Art

I like to add a bit of seasonal decor to the Baker’s Rack in the kitchen.
I gathered some GREEN!
A green depression glass measuring cup and lemon/orange squeezer…
A fun 1930’s Rum Rill Pottery Candle holder….
A Fiestaware Pitcher…
A green placemat….
AND
The framed Shamrock leaning on the shelf that was super simple to make!
I looked through all of my decorative paper stash….and found all of this “greenery”….
 
I used my Cricut and Sure Cuts a Lot software to cut an intricate Shamrock.
If you have a die cut machine I am sure there are Shamrock designs to buy….
OR
You could cut your own simpler design and the effect would be nice too!
A quick rummage through the stack of frames….and I found a nice square white one!
I spray mounted the cut-out to a black mat….
Cut a white mat….
and in about 15 minutes…..ART!
By the way….I am trying to find out if that little Rum Rill candlestick holder that I bought for $5.00 at Goodwill is worth anything!  Are there any experts out there who could help me find out?
There is still a week left before St. Patrick’s Day…..you too could make yourself some art!
Have a Great Day!
Link Parties