products. cleaning

How To Cut Your Own Custom Picture Mats

Custom framing is soooo expensive!
Even when you take advantage of deals at the frame shop, a typical framing job will cost you a bundle.

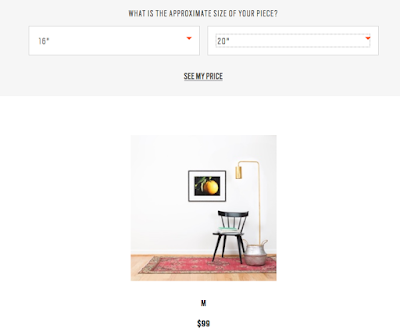
I found this great website that has a princing estimator built in: https://www.framebridge.com/pricing
I ran the numbers for a 16 x 20 print….

YUP….$99!  Now that might seem reasonable to you….but NOT to me.  Especially because I am someone who wants to change out the stuff on my walls a LOT!

Here at Sweetwater, I have found a way to mat and frame things without spending this kind of money.

Sometimes you have to spend some money to save some money.

This post is all about that!

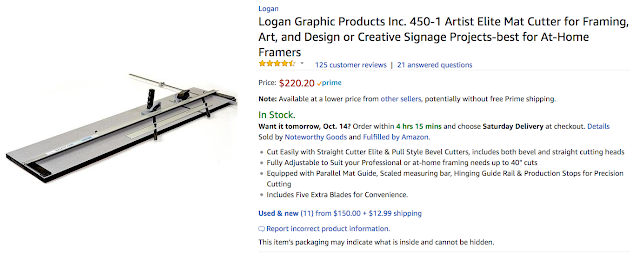
A few (or maybe many) year ago, I invested in a professional mat cutter like this one.

Okay…..$220 seems like a lot of money…..but remember how much ONE 16 x 20 picture cost?

You also need to buy matboard and frames.
I buy matboard at Dick Blick.  A 32 x 40 inch piece costs between $8 and $10 depending on how fancy it is…..
I buy my frames at the thrift store.  The array is pretty amazing.  You look at the FRAME not the ugly art that is in there.

Any new tool can seem intimidating…..but once you learn the basics….you can mat and frame your piece in less than 30 minutes.

So let’s get started on the tutorial!

I was “just gonna” go down to the craft room and do a step by step photo shoot for you….
And then I realized that….hmmm…..somebody probably already did that on YouTube!
Watch this and see how it is done!
(this is the link if the video doesn’t load)  https://youtu.be/PT1n0r_87tQ


It really isn’t that difficult after you have practiced a bit.

Now the fun begins!
With a few pieces of mat board and some thrift store frames….the sky is the limit!

Framed Projects Around Sweetwater

A spooky photo of a graveyard in a thrift store frame.  Instant seasonal decor.
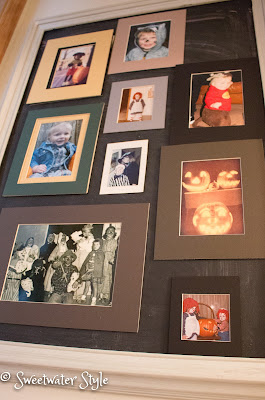
  Favorite photos from Halloween past.  Mats only….displayed on the big chalkboard in the stairwell.
 

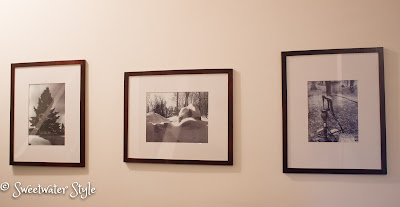
 Gallery style display of photos taken by the Sweetwater Son.

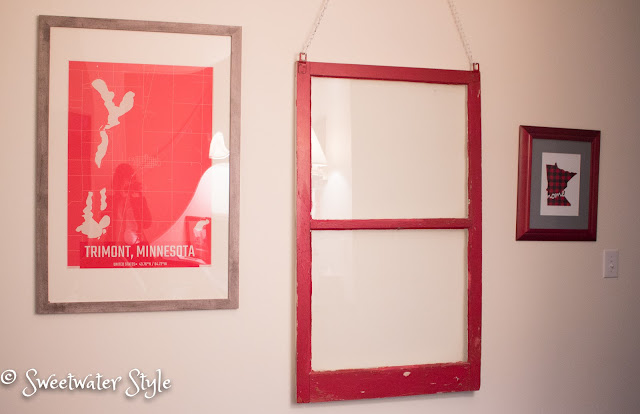
 This old window is from the childhood home of Mr. S.  The poster was a gift from the Sweetwater Daughter and SIL.  The Minnesota Home print from the Sweetwater Son and DIL.
My family always gives me fun things to frame because they know it can be done inexpensively.

Nobody wants to see ALL of our vacation photos….but making a quick collage is a fun way to display just a few.  This is an unframed mat with a foam core backing.  The back has magnets that let it hang on the refrigerator.  A quick way share without “oversharing”.  BTW….Ireland was amazing! 
This is a tea towel that I picked up in a fun boutique on a trip to Florida.  It can easily be switched out when I want a new look….or find a new tea towel!

More Minneapolis themed art….would you believe that I actually took the top photo….good for me!

A cluster of framed posters and photographs lean against the wall on Mr. S’s desk in the office.
I love the look of the vintage posters….The blue and green one was purchased on a trip to Voyageur National Park.

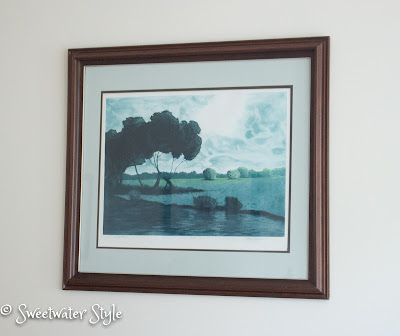
We have had this chalk pastel for many years.  I love being able to change the mat color to coordinate with what ever decor scheme we have.  No need for new art…..just $10 for new mat board.  I am always amazed that you can find a color in your favorite image that goes with any scheme.
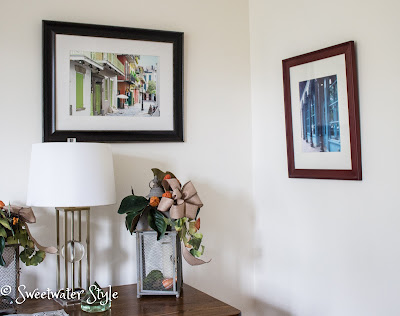
These white mats look nice with the off white walls.  This is another photo by me and the New Orleans scene is another we purchased at an art fair in Memphis….go figure. 

These are just a few of the ways I have used the ability cut custom mats….
Even better….
Now that people know that I have the mat cutting system…they come over and either mat their own things or let me do it for them.

I always tell folks….”I MAT FOR WINE”….

Hope this inspires you to spend some of your crafting or decorating budget on a mat cutter….you will be glad you did.

Have a Wonderful Day!

DIY Cleaners Using Dawn Detergent

If you don’t have a bottle of this in your house….
You need to put it on your list of must buys!

I know I could use this for it’s primary purpose….washing dishes….

BUT…honestly…I use the bulk stuff from Costco on a regular basis….

Using a decorative bottle with a pouring top is something I learned from Martha Stewart’s Good Things!

I posted about that 5 or 6 years ago…..

So….what DO I use Dawn Detergent for?

You will not believe how well this works!
Spray it on…..walk away for awhile…..scrub a little…..DONE!

This formula also does a great job on crusty water stained glass and plastic.

These two acrylic beverage tubs are favorites of mine.  They get used for lots of things besides beverages…..like conditioning flowers for events.  I was almost ready to give up on being able to put them out for entertaining…..you can see how crusty the build up was.  A little of the “miracle” sauce and they were back to sparkly and shiny.

On to Part TWO

Seriously folks….this truly is almost magic.

I have tried it on a bunch of things with pretty darn good results.

One of Marvin the cat’s least favorite “issues” is his BULIMIA!  Yup…he overeats and purges all over the carpet!  Since the cat food has orange dye in it….the stains are GROSS!
Of course, he always chooses to leave his treasures on the beige carpet!

 It takes a little time and some elbow grease with the solution of Dawn and Hydrogen Peroxide.

Because it is pretty soapy….it takes a good bit of rinsing and blotting to get all the soap residue up.

 Can you believe the way this works!?
Now…I just need to troll through the house and find the old stains….and get them erased!
I don’t have photos of all the successful stain removal, but here are a couple of examples that have worked:
Wine stain on a shirt that had been washed and dried several times……gone in 10 minutes!
Grease stain on my favorite gray sweatshirt…..gone!
Dirty white tennis shoes….scrubbed….and bright white again!
This concoction will be my go to for pesky stains from now on!
I guess you could say:
Have A Great Day!

Chalkboard Art Tips and Tricks


I did a lot of chalkboard writing ” back in the day” before Smartboards replaced them.                                    I was pretty proud of my “teacher penmanship” skills!
It is humorous that chalkboards are ” historical artifacts” in the classroom, and yet, those same chalkboards have become popular home decor accents!

I have a big chalkboard in the stairwell to the lower level

I recently found a cute little easel chalkboard at a consignment shop that fits perfectly on the kitchen counter.

I usually write something seasonal on the chalkboards…..but in all honesty…I have been feeling that my efforts would not get very good grades for creativity and penmanship!

 I decided it is time for me to spend some time perfecting….or at least improving…. my chalkboard art skills.
I guess that might be an irony goal for a retired teacher….but heck…I have nothing but time now!

Here is a round-up of all the great tips and techniques that are sure to turn my chalkboard art from novice to pro!

In My Own Style

Diane Henkler at In My Own Style has done  wonderful post with lots of tips.
This post has a link to some great fonts to download!
One of the tips that I found most helpful was how to season a new chalkboard to eliminate “ghosting”.

Here is a post from Kelly at the Lily Pad Cottage.  Her 10 tips are worth taking a look at.

My favorite on this post was to use Q-Tips…..well why did I have to read this to figure it out????

Sara D at Sincerely SaraD has really nailed it with this tutorial for Perfect Chalkboard lettering.

I think I am going to stick with regular chalk…..somehow using markers seems like “cheating”.

She does a chalk transfer technique that makes it simple to do “fancy” script with perfect spacing.

There is also a link to some font downloads here!

Tausha at Sassy Style Redesign has a list of great tips. 

My favorites:
Use the cheapest chalk….it is the best!
Use a make-up sharpener to sharpen your chalk!

I can’t wait to start practicing my “art”!
I will share when I have something I am proud of!
Now….off to spend a few minutes (hours???) searching Pinterest for just the right words!

Have  A Wonderful Day!

Copper Cleaning Magic!

 I always keep an eye out for interesting copper items at the thrift store!
Over the years, I have collected quite a few pieces.
The earth tone of these pieces make them a natural choice for Fall Décor!
Now..some people might like the look of the aged patina of old copper…..
but sometimes a good polishing is in order.
Just like polishing silver…..polishing copper can be a real pain!
Enter my secret weapon!
Seriously…..this easy to find cleaner….works like magic on copper!
I got to work the other day scrubbing the “patina” off of some of my favorite copper items.
Yeah….they really were pretty awful looking!

This little colander or berry bow is one of my favorites.

Can you believe how grungy this looks?

I spent a chunk of time with the scrub brush and it came pretty clean.

Now…all that scrubbing wasn’t really my thing….and I had a few more pieces to clean!.

Then….I had an aha moment!
Remember the “lazy woman’s”  way to polish silver?
That method relied on the chemistry of baking soda and aluminum foil in boiling water.
Well… I got the idea that maybe hot or boiling water might work with the bar keeper’s friend to magically clean the copper!
So…I mixed some up in a pan and brought it a boil!
I used 1/4 cup in about 2 cups of water….but there really isn’t a “recipe”!

Look what happened after 30 seconds!

And…after only  2 minutes!

Needless to say….
this is my new method of choice for copper cleaning!

The collection is all bright and shiny now!
In fact…the pieces  might be a little to too shiny!
Not to worry…the patina will come back gradually….
Now…..
I just need some inspiration to figure out how to display them!

Hope you have a “bright shiny” day!

Silver Polishing For Lazy People!

Alas….there are no butlers or footmen at Sweetwater who can polish the silver!

I imagine the Silver at Downton Abbey the silver is all real Sterling too!

The Sweetwater silver is all SILVERPLATE…..
And…. it almost all came from the thrift store!

I do love the silver pieces I have….
I do love using the stuff…..
I do love sharing it with friends…

In fact…a girlfriend is coming over this week to take inventory of the collection and see what pieces she might use for her wedding reception.

FUN!

What I do not love is polishing this stuff!  But it needs to happen every once in a while!  Especially if it is going “on a field trip” to a wedding reception!

Typically, I get out the polish and just do it….
Then I remembered reading somewhere that you could use tinfoil and baking soda to remove tarnish without polishing!
So of course…..I did some research and found a bunch of tutorials about doing this!
And it WORKS!
This is what you need!
This is what you do!
Line a big pan with aluminum foil.
SHINY SIDE OUT
Pour in some baking soda.
3 or 4 Tablespoons per quart of water
Get the water boiling!
Dump in the silver pieces….
Let the magic happen….
It takes a little while….like five minutes!
Look at the dark color the foil turned!
According to Mr. S (he is not a chemist….but pretty darn smart about stuff like this)…what is really happening is a chemical reaction that results in sort of electroplating the foil with a tiny bit of the silver.
Mr. S. told me I needed to find the scientific reason this works….here is a link from some guy at John’s Hopkins if you feel the need to study up on this….but here is a quote from the article:
“The reason that this process works so well is that it acts electrochemically. There is a flow of electrons between the silver object and the aluminum foil, and that’s what removes the tarnish.”
Sounds just like what  Mr. S told me….don’t you think?
I decided to try this with the silverplate flatware for the first try with the process.
I hate polishing this the most….as you can plainly see!
The results were truly amazing!
Not perfect…..but with no polishing!
I decided to try using the kitchen sink for some of the bigger pieces!
I wasn’t quite as happy with the results…..probably because I couldn’t keep the water hot enough!
I will figure some way to put a bigger pot on the stove next time.
I was really pleased with the way the tarnish came out of the grooves in the edges of the trays.
 It would have been a real pain to get this result with silver polish!
Disclaimer:  
Remember that all my silver pieces are thrift store bargains and NOT heirlooms!
In the process…..a tiny bit of the silver is coming off and going to the aluminum foil!
Mr. S thinks it would take a WHOLE bunch of treatments to actually damage the pieces….but I thought you should be forewarned if you have precious pieces!
I don’t think I will completely give up my Downton Abbey moments….but this process is one that I will use more often!
I would love to hear from anyone who has a solution for doing this on the larger trays and bowls.  
I am thinking that my roaster might work…..what do you think?
Have a Great Day!